A ball head tripod offers flexibility and stability for photographers. It allows for smooth camera movement and precise framing.
Understanding its use can enhance your photography skills significantly. Using a ball head tripod might seem challenging at first. But with the right guidance, it becomes an invaluable tool. This tripod head allows for quick adjustments and stable shots. It’s perfect for landscapes, portraits, and action photography.
With a few simple steps, you can master its use. Start by learning how to attach your camera securely. Then, explore how to adjust the angles with ease. The ball head’s versatility makes it ideal for various shooting scenarios. Whether you’re a beginner or seasoned photographer, knowing how to use a ball head tripod can elevate your work. Let’s explore the steps to make the most of this essential tool.
Credit: improvephotography.com
Table of Contents
Choosing The Right Ball Head Tripod
Ball head tripods come in different materials. Some are aluminum, others are carbon fiber. Aluminum tripods are strong and affordable. Carbon fiber ones are light and durable. Choose the one that fits your needs. Consider the environment you’ll use it in. Wet or dry? Hot or cold? Think about the long-term use and comfort.
A tripod must hold your camera safely. Check the weight capacity. It should be more than your camera’s weight. Heavier cameras need stronger tripods. Always check the tripod’s specifications. This ensures safety for your equipment. Never ignore this important factor. It helps avoid accidents.
Setting Up Your Tripod
Start with the tripod legs closed. Open each leg slowly. Extend one leg at a time. Balance the tripod on all three legs. Make sure the tripod is stable. Adjust the leg height as needed. Lock the legs in place. This keeps the tripod from moving.
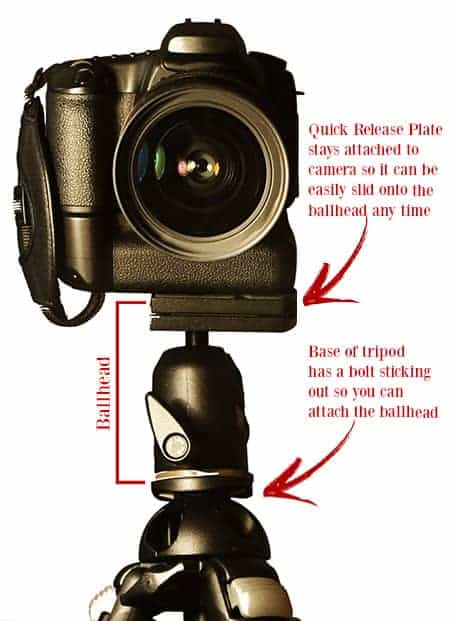
The ball head is important. Attach it to the tripod firmly. Tighten the knob for safety. Ensure the camera stays in place. Adjust the ball head for angles. Loosen the knob for movement. Tighten the knob to fix the position. This helps in getting the right shots.
Adjusting The Ball Head
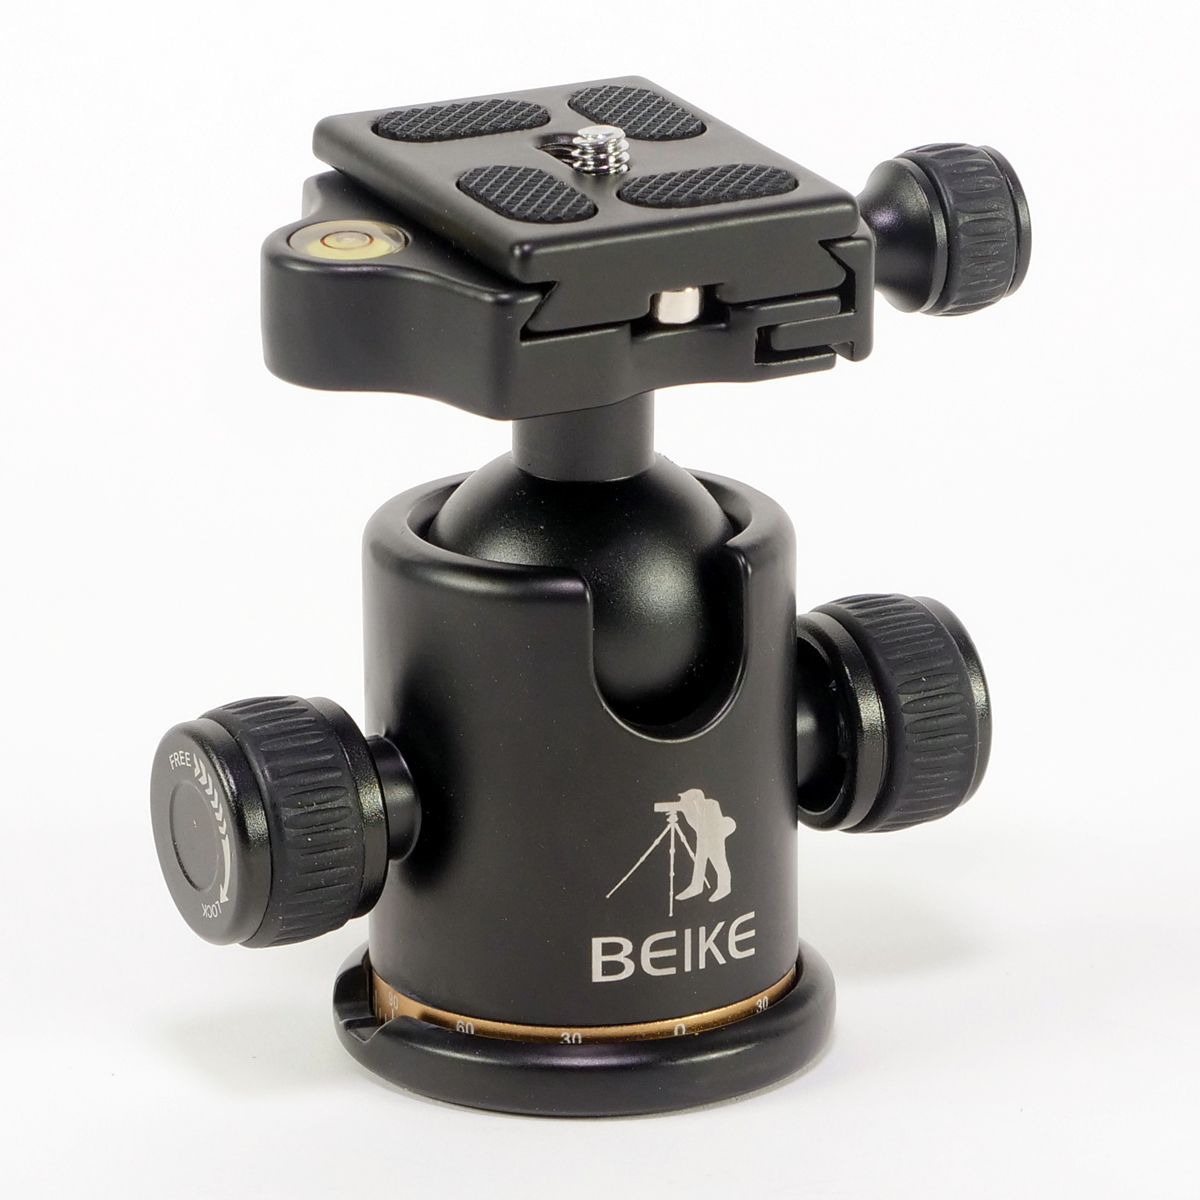
The ball head tripod allows smooth pan and tilt movements. Turn the knob to pan the camera left or right. This helps capture wide views. Tilt the camera by loosening another knob. Point the camera up or down. Always tighten knobs after adjusting. This keeps your camera steady. Practice these movements for better shots.
Locking mechanisms keep the camera still. Turn the main knob to lock the ball head. This prevents unwanted movements. Use a smaller knob for fine adjustments. Check the locks before shooting. Ensure the camera does not move. This is crucial for clear images. Secure locks avoid camera shake. Remember to check them often.
Achieving Stability
Using a Spirit Level helps keep your camera straight. It shows if your camera tilts. Place the spirit level on the tripod. Check the bubble. If the bubble is in the middle, your tripod is level. Move the tripod legs until the bubble is centered. Always check the spirit level before shooting. This ensures stable pictures.
Wind Resistance Tips are helpful. Wind can shake your camera. Use tripod hooks to hang a bag. This adds weight. Heavier tripods are stable in wind. Set up the tripod with legs wide apart. This makes the tripod sturdy. Always check the tripod’s stability in windy places.
Optimizing For Different Terrains
Setting up a tripod on sand or gravel can be tricky. The ground is soft. Legs might sink or slip. Use wide tripod feet. These help spread weight. They prevent sinking. Always check stability. Adjust the legs. Make sure they are firm. Do not let the tripod wobble. Wind can be a problem. Weigh down the tripod. Use a bag or some rocks. This adds stability. Protects the camera.
Uneven surfaces need careful tripod adjustment. Each leg should be a different length. This helps balance the tripod. Keep the camera level. Use the bubble level. It shows if the camera is straight. Adjust the ball head. Point it where you want. Check the legs. Make sure they are secure. The tripod must not tip. Safety first.
Credit: filmdevices.com
Enhancing Composition
Use the Rule of Thirds to improve your photos. This rule helps in placing the subject off-center. Imagine a grid on your photo. Two vertical and two horizontal lines. Place the subject where lines cross. This makes the photo more interesting. A ball head tripod helps with this. It moves smoothly in all directions. You can tilt the camera easily. Adjust and lock it in place. This way, the subject stays in the right spot. Try different angles too. This gives new perspectives. Photos look more lively and fun.
Capturing Long Exposures
A ball head tripod helps capture clear night photos. It keeps the camera steady. Stars and city lights look sharp. Always use a remote shutter or timer. This stops camera shake. Keep ISO low for less noise. Set a long shutter speed. This lets in more light. Adjust the ball head to find the best angle. A sturdy tripod is very important. It holds the camera still.
Blurred water looks magical in photos. A ball head tripod makes this easy. Use a slow shutter speed for smooth effects. Secure the tripod near the water. Keep the camera safe and dry. Frame the shot with the ball head. Make sure the camera is stable. Use a neutral density (ND) filter. It helps control light. Experiment with different angles. This adds drama to the photo.
Maintaining Your Equipment
Using a ball head tripod enhances photography stability and flexibility. Adjust the knobs to achieve smooth motion and precise angles. Regular maintenance ensures optimal performance and longevity, keeping your equipment ready for action.
Cleaning Tips
Always keep your tripod clean for better performance. Use a soft cloth to wipe it. Make sure to reach every corner. Dirt can harm the joints. A small brush is good for tight spots. Avoid using water near metal parts. Water can cause rust. Clean your tripod often. This keeps it working well.
Storage Solutions
Store your tripod in a dry place. Humidity can damage it. Use a tripod bag if you have one. This keeps dust away. Keep it away from direct sunlight. Heat can weaken the materials. Store it upright to avoid bending. Make sure the locks are tight. Loose locks can cause damage.
Credit: www.mapir.camera
Frequently Asked Questions
How Does A Tripod Ball Head Work?
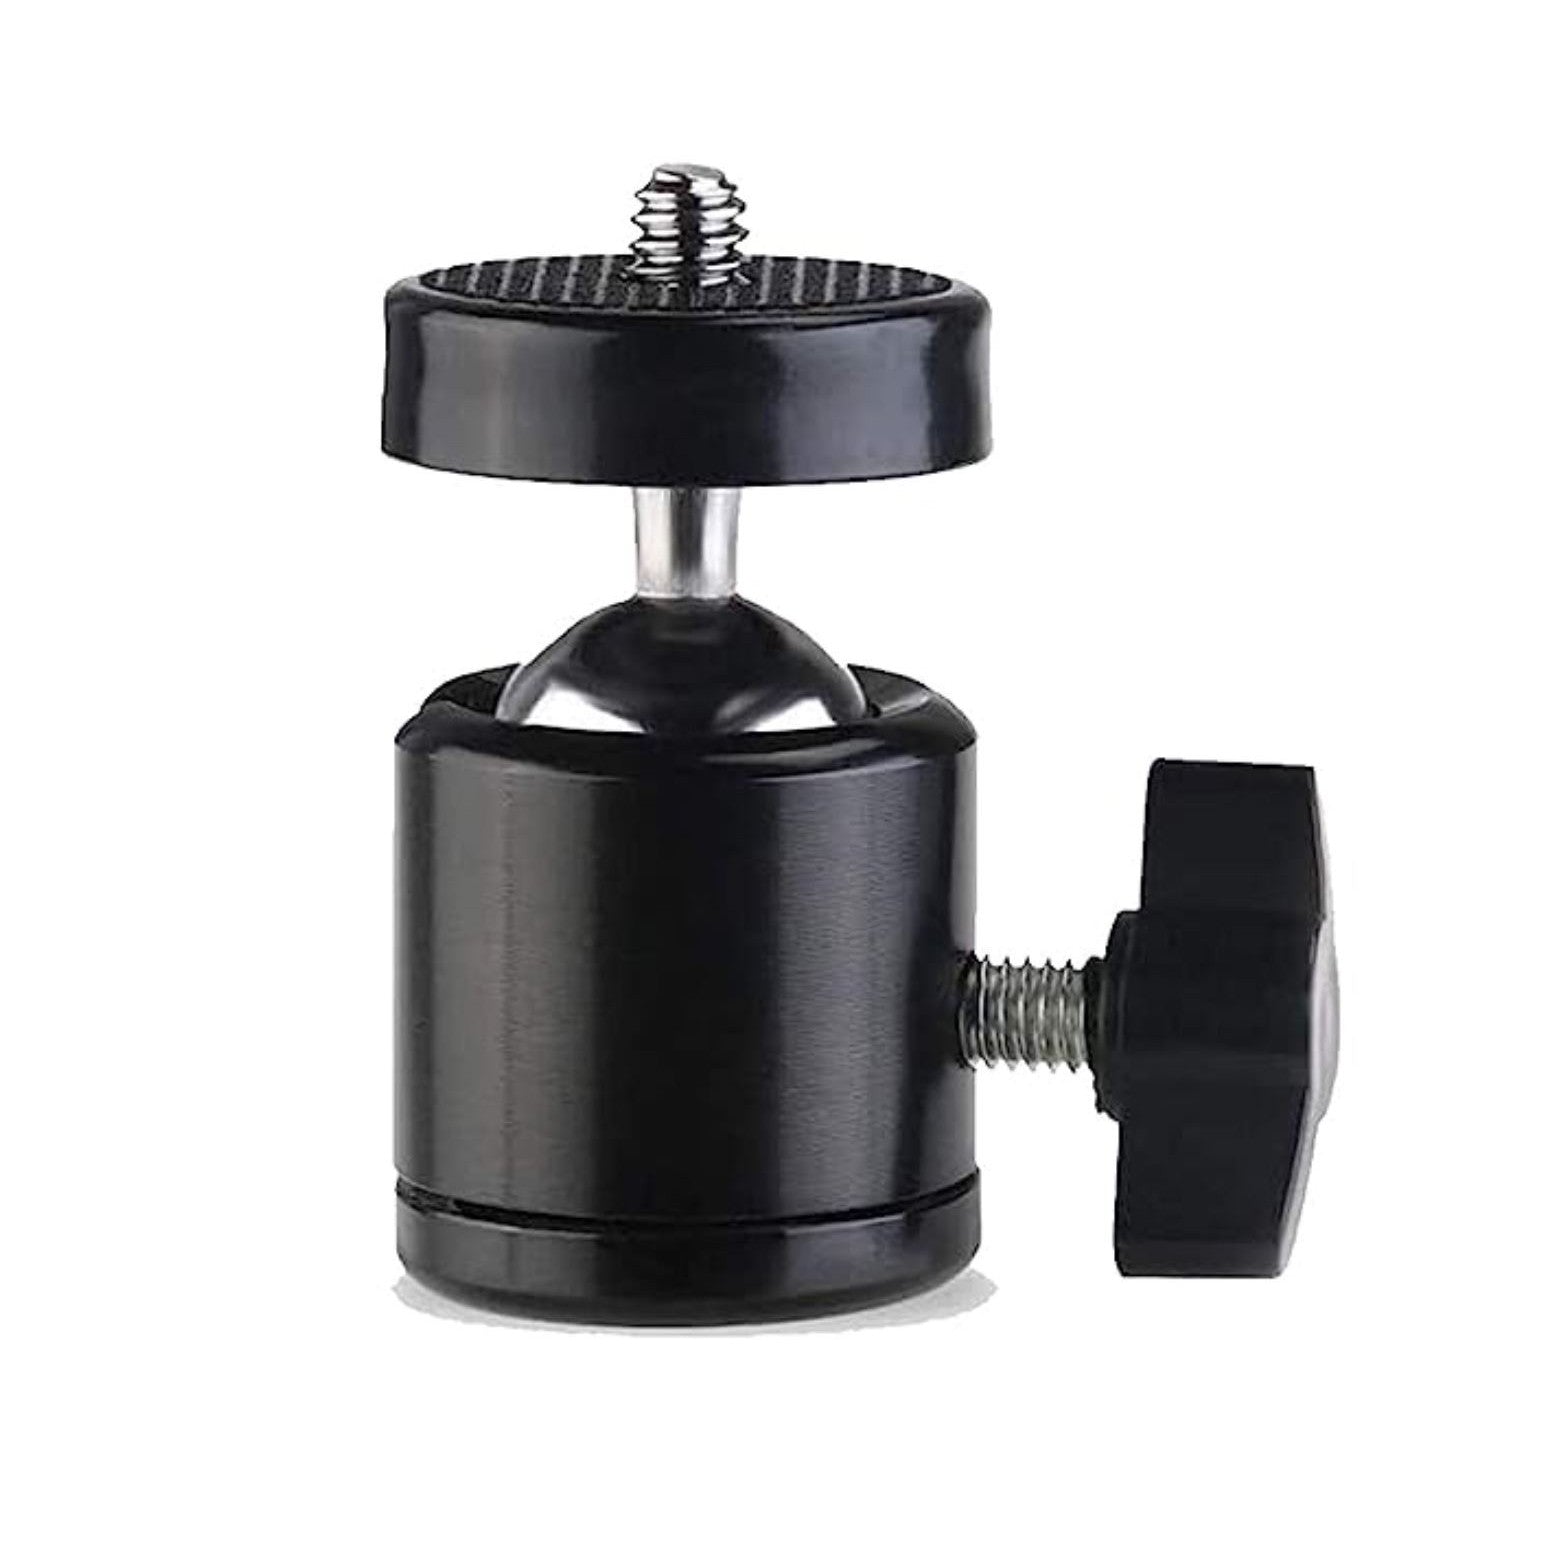
A tripod ball head allows smooth camera movement. It uses a spherical mechanism for 360-degree rotation and tilt. Locking knobs secure the position. Quick adjustments are possible, enhancing flexibility for photographers. Ideal for capturing dynamic shots and precise framing. Compact design ensures easy transportation and setup.
How To Use A Tripod For Beginners?
Set up the tripod on stable ground. Extend the legs evenly. Adjust the height and angle. Secure your camera using the mounting plate. Use the tripod head for smooth movement.
Is A Ball Head Tripod Better?
A ball head tripod offers flexibility and smooth movement for photographers. It allows quick adjustments and precise framing. Its compact design is ideal for travel, making it a popular choice. Some users may prefer pan-tilt heads for specific tasks, but ball heads generally provide versatility for various photography styles.
What Is The Difference Between 3 Way And Ball Head Tripods?
3-way tripods offer precise control with separate handles for pan, tilt, and roll. Ball head tripods provide quicker adjustments with a single control. Choose 3-way for accuracy and ball head for flexibility.
Conclusion
Mastering a ball head tripod can boost your photography skills. It offers flexibility and smooth movement for various shots. Practice adjusting angles and locking positions for stability. Try different settings to find what works best. Always ensure your camera is secure before taking pictures.
Experiment with tilt and pan for creative perspectives. This tool is great for landscapes, portraits, and action shots. Remember, patience and practice lead to improvement. Embrace the learning process. Your photos will thank you! Keep exploring new techniques and enjoy capturing moments with ease.