Attaching a webcam to a tripod is simple. Start by finding the right tripod mount.
Then, securely attach the webcam to the tripod. Webcams have become essential tools for video calls and streaming. A tripod can enhance your webcam setup by offering stability and flexibility. It allows you to adjust angles and heights easily. This setup ensures your video is clear and steady, making your virtual presence more professional.
Tripods come in various sizes and designs, accommodating different needs. Whether you’re working from home or creating content, a tripod can elevate your video quality. This guide will walk you through the steps to securely attach your webcam to a tripod, ensuring you get the best possible video experience. Get ready to enhance your setup with ease!
Table of Contents
Choosing The Right Webcam
Resolution is important for clear videos. Higher resolution shows more details. HD or 4K webcams are best. Look for webcams with auto-focus. This keeps the video sharp. Built-in microphones can help in online meetings. Some webcams have special features. Low-light correction helps in dark places. Privacy shutters can cover the lens when not in use.
Check the webcam’s base for a screw hole. The tripod mount needs this hole. Some webcams have different sizes. Adapters can help in these cases. Choose a tripod with a stable base. Adjustable tripods can change height. This helps get the best angle. Lightweight tripods are easy to carry. Look for universal mounts for most webcams.
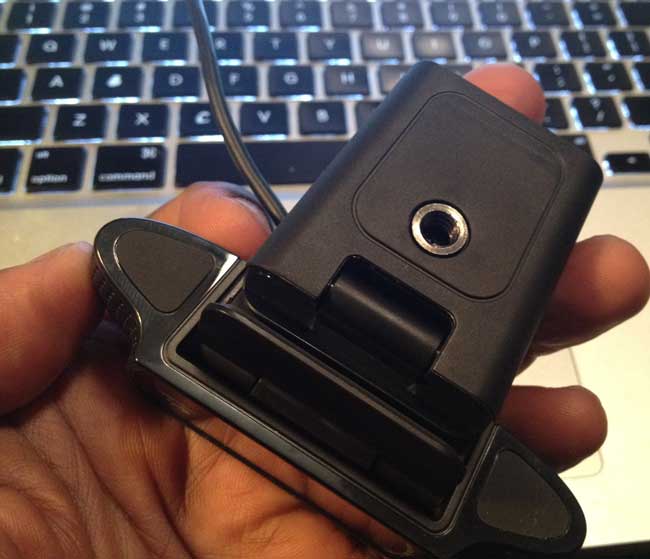
Credit: terrywhite.com
Selecting A Suitable Tripod
Height matters for a tripod. Make sure it is tall enough. It should reach your eye level. This helps in getting a better view. Stability is key. A shaky tripod makes videos blurry. Look for rubber feet. They keep it steady. Consider the material too. Aluminum is light. But carbon fiber is stronger. Choose wisely for best results.
Different head types exist. Ball heads are popular. They move smoothly. Easy to adjust. Pan-tilt heads are precise. They let you control movements. Good for detailed shots. Fluid heads are for video. They provide steady motion. Each type has benefits. Pick one based on your needs. Compatibility is important. Check if your webcam fits. This ensures it stays secure.
Preparing The Webcam
Every webcam has different ports. Look carefully at your webcam. You need to know which ports are there. Some webcams have USB ports. Others have HDMI ports. Choose the right cable for your port. You must have a compatible cable for the connection. Make sure the cable is not damaged. A damaged cable won’t work well. This simple check saves time later.
Webcams often come with protective covers. These covers keep the lens safe. Before attaching, remove these covers. Check for any other wrapping too. The lens must be clean. Clean lenses give clear pictures. A dirty lens affects image quality. Use a soft cloth to clean the lens. Be gentle to avoid scratches. Now, your webcam is ready.
Setting Up The Tripod
Tripod legs are folded when packed. Extend each leg slowly. Pull the legs out until you hear a click. This click means the legs are locked. Locked legs keep the tripod stable. Stable tripod means clear webcam view. Ensure all legs are evenly extended. Even legs prevent tipping over. Check for any wobble or shake. Adjust if necessary. Stability is key.
Height is important for webcam angle. Find knobs on the tripod. Twist the knobs to adjust the height. Raise or lower the tripod to your preference. Ensure the webcam sits at eye level. Eye level gives a natural view. Tighten knobs to lock height in place. Secure height avoids sudden drops. Test the stability after adjusting. A stable tripod keeps the webcam steady.
Attaching Webcam To Tripod
Most webcams have a mounting screw hole at the bottom. This hole fits onto the tripod screw. First, find the hole on your webcam. Next, align this hole with the tripod screw. Then, gently turn the webcam clockwise. Keep turning until it’s tight and secure. Don’t force it too hard.
After attaching, make sure the webcam is stable. Check if the webcam can move. If it moves too much, it might fall. Adjust the tripod legs for better balance. Ensure the webcam faces the right direction. Double-check its position before using. This helps in capturing clear videos or pictures.
Adjusting Webcam Position
Adjusting the webcam is simple. Loosen the screw on your tripod head. Tilt the webcam up or down. Find the perfect view for your needs. For panning, turn the webcam left or right. Make sure the image is clear. Secure the screw back tightly. This keeps the webcam steady. Avoid shaky videos or images.
To get the best angle, place the webcam at eye level. Test different angles to see what looks best. Adjust the tripod height if needed. A good angle helps in clear communication. It also makes you look more engaging. Remember, a stable webcam gives a better experience. Avoid placing it too high or low.
Testing Webcam Setup
Start by opening the webcam software. Look for the video feed. Make sure the image is clear. Adjust the lighting if needed. Check for any blur or distortions. Ensure the camera is focused on the right spot. Try moving the webcam slightly. See if it improves the video. Test the sound if the webcam has a microphone. Listen for any strange noises. Fix them quickly.
Adjust the tripod height carefully. Make sure the camera is steady. Tighten all screws. This prevents wobbling. Recheck the camera angle. Ensure it is pointing correctly. Use a level if needed. This helps in keeping the camera straight. Adjust the zoom for better focus. Keep testing until you get the best result. Always check your settings before starting a video call.

Credit: www.youtube.com
Troubleshooting Common Issues
Attaching a webcam to a tripod often resolves positioning issues. Use the screw mount to secure the webcam firmly. Ensure the tripod’s stability by adjusting its legs for balanced support.
Fixing Loose Connections
Loose connections can cause many problems. Check all screws on the webcam and tripod. Tighten them with a small screwdriver if needed. Inspect cables for any visible damage. Replace damaged cables to ensure a good connection. Use tape to secure loose wires temporarily. It can help until you find a permanent solution. Always handle equipment with care to avoid damage.
Resolving Image Quality Problems
Blurry images can be a common issue. Clean the webcam lens gently with a soft cloth. Dust or fingerprints can affect clarity. Adjust lighting in the room for better visibility. Sometimes, poor light makes images look grainy. Check webcam settings on your computer. Adjust brightness and contrast for a clearer picture. Make sure the webcam is set to the right resolution. Lower resolutions can make images look bad.
Tips For Best Results
Maintaining Equipment is important for clear video quality. Keep the webcam clean. Wipe the lens gently with a soft cloth. Check the tripod regularly. Tighten loose screws. Ensure everything is stable. This prevents shaking during use. Proper care extends equipment life.
Enhancing Lighting Conditions makes videos better. Use natural light if possible. Place the webcam near a window. Avoid direct sunlight. It can cause harsh shadows. Use lamps for extra lighting. Position them at different angles. This reduces shadows and creates a balanced look. Good lighting improves video clarity.

Credit: www.amazon.com
Frequently Asked Questions
How To Connect A Webcam To A Tripod?
Attach the webcam to the tripod using a compatible mount or adapter. Secure it tightly to avoid movement. Adjust the tripod height and angle for optimal positioning. Ensure all connections are secure before use. Check the webcam’s view on your computer to confirm alignment.
How To Mount A Camera To A Tripod?
Attach the camera to the tripod’s quick-release plate. Secure it by tightening the mounting screw. Ensure it’s firmly locked. Adjust the tripod legs for stability. Confirm the camera’s position and angle. Always check the connection before use to avoid accidents.
How To Attach Camera Slider To Tripod?
Secure the slider to the tripod using the slider’s mounting plate. Align and tighten it with the tripod’s quick-release plate. Ensure the connection is stable. Adjust the tripod legs and slider position for balance. Confirm the setup is firm before use to prevent camera shake.
How To Attach Camera To Tripod Without Screws?
Use a quick release plate or a tripod mount adapter to secure the camera without screws. Ensure compatibility with your camera model. Adjust the adapter or plate to fit snugly. This setup offers stability and ease of use for photography.
Conclusion
Attaching a webcam to a tripod is simple. Follow the steps we’ve shared. Start by checking your webcam and tripod. Make sure they are compatible. Secure the webcam on the tripod tightly. Adjust the angle for better video quality. This setup enhances your video calls and recordings.
Now you can enjoy clear and stable visuals. No more shaky videos. Feel free to experiment with different angles. Capture the best shots effortlessly. With a tripod, your webcam becomes more versatile. This guide makes the process easy. Anyone can follow it.
Have fun with your new setup!