Building a tripod is simpler than you think. You only need basic materials.
With a few steps, you can create one at home. Tripods are essential for steady photography and video recording. They hold cameras still, preventing blurry shots. Making your own tripod can be a fun and rewarding project. Plus, it saves money and offers customization.
You can adjust the height and angles based on your needs. This guide will help you understand the process. Whether you are a hobbyist or a professional, creating a tripod is useful. It is a practical skill that enhances your equipment arsenal. Let’s explore how you can craft a tripod with ease. By the end, you will have a reliable support for your camera.
Table of Contents
Materials And Tools
Building a tripod needs some basic supplies. You need three wooden sticks. Each should be the same length. You will also require strong string or rope. It ties the sticks together. A small platform or base is needed. This holds the camera or object.
You will also need some glue or nails. These secure the parts. Make sure all materials are sturdy and safe. This ensures the tripod stands firm. Use high-quality items for the best results.
Use the right tools to make your tripod. First, you need a saw. It cuts the sticks to the right size. A hammer helps with the nails. You will also need a drill. This makes holes for the screws. A measuring tape ensures precise lengths.
Don’t forget the screwdriver. It tightens any screws in place. Having these tools makes the task easy. Ensure they are in good condition. This avoids accidents and mistakes.

Credit: www.youtube.com
Choosing The Right Design
Tripods come in many styles. Some are tall and strong. Others are light and easy to carry. Pick a style that fits your needs. A heavy tripod is great for big cameras. A light tripod is good for travel. Think about what you will use it for. This helps you choose the best style.
Decide on the height you need. Taller tripods help with high shots. Shorter ones are easier to pack. Check the weight limit. It must hold your camera safely. Measure the spread of the legs. Wide spread gives more stability. Narrow spread is for tight spaces. Choose wisely for your perfect tripod.
Building The Base
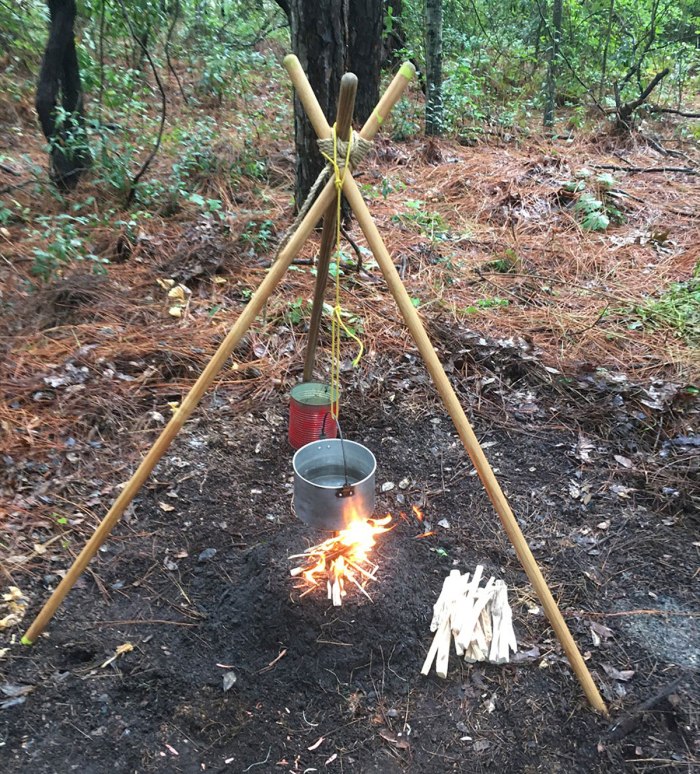
Start with three strong sticks. Each stick should be the same length. Use a sharp tool to cut them. Make sure the ends are flat. Flat ends help them stand well. Smooth the edges. This makes them safe to touch. Safety is important. Check the sticks. They should not bend easily. Strong sticks make the tripod stable.
Lay the sticks on the ground. Form a triangle shape. Tie the top ends tightly with rope. Use a strong rope for this. The rope keeps them together. Stand the tripod up. Spread the bottom ends. Make sure it stands firmly. Adjust if needed. The tripod should not wobble. Test the stability. It should hold a camera or phone well.
Credit: scoutlife.org
Crafting The Legs
Choosing the right leg length is important. Short legs make the tripod stable. Long legs help reach high places. Measure the height you need. Think about where you will use it. Inside or outside. For a table, use shorter legs. For a camera, longer legs might be better. Adjustable legs are useful. You can change their length. This makes the tripod versatile.
Make sure the legs are attached well. Use screws or bolts. Tighten them securely. Loose legs can make the tripod fall. The base should be strong. It holds everything together. Check that it is level. This keeps your tripod straight. Test by shaking it gently. It should not wobble. If it does, tighten the screws more.
Creating The Head
Tripod heads come in different types. Ball heads are easy to use. They move in many directions. Pan heads are for smooth moves. They are good for video. Tilt heads are for up and down moves. Choose a head for your needs. Each type has its own use.
The mounting mechanism is important. It holds your camera. Quick-release plates help. They make it easy to mount. Screw mounts are strong. They hold the camera well. Choose a mechanism that is safe for your camera. Safety is key.
Stability And Balance
The tripod’s weight must be spread equally. This helps keep it stable. Use strong materials for the legs. They should not bend or shake. Heavier bases add more support. Keep the center of gravity low. This stops the tripod from tipping. Distribute weight evenly on all three legs. It avoids wobbling. Each leg should be the same length.
Tripods need parts that can be changed. Adjustable legs help on uneven ground. They allow you to set the right height. Locks keep the legs secure. Rotating heads let you move the camera smoothly. This helps in capturing different angles. Some tripods have extendable arms. These can be helpful for tricky shots. Easy adjustments make the tripod user-friendly.
Finishing Touches
Crafting a homemade tripod involves a few simple steps. Start by gathering sturdy materials like wood or metal pipes. Attach a stable base, secure the legs, and add adjustable hinges for easy positioning. Finishing touches can include rubber feet for grip and a camera mount on top for stability.
Sanding And Polishing
Sanding gives the tripod a smooth surface. Use sandpaper to remove rough spots. Start with coarse sandpaper. Gradually move to finer sandpaper. This process makes the wood even. Polishing adds shine to the tripod. Use a soft cloth for polishing. Rub gently in circular motions. This enhances the tripod’s look and feel.
Adding Protective Coating
A protective coating helps keep the tripod safe from damage. Use varnish or paint for coating. Apply it evenly over the surface. Let it dry completely. Repeat this step if needed. This keeps the tripod strong and durable. Coating also adds a nice finish. It protects the wood from scratches. Makes the tripod last longer.

Credit: www.cloudynights.com
Testing And Adjustments
Start by placing your tripod on a flat surface. Ensure that each leg is firmly placed. Check the stability of the tripod by gently pushing it. Adjust the legs if it wobbles. Make sure the camera mount is securely attached. The mount should not move when you touch it. Adjust the height of the tripod to your liking. Use the knobs to make it taller or shorter. Keep all adjustments tight. This prevents any accidental falls.
If one leg is loose, tighten its screw. Check the base for any dirt or debris. Clean it if needed. If the tripod is still wobbly, ensure each leg is the same length. Adjust the locks on each leg if required. If the camera mount is not fitting, check its size. You may need a different adapter. Always check for any missing parts. Replace them to ensure stability.
Frequently Asked Questions
How To Make A Homemade Tripod?
Use three sturdy sticks of equal length. Tie them together at one end with strong string or rubber bands. Spread the sticks apart to form a stable tripod. Attach a small platform or phone holder at the top for your device.
Adjust the height by spreading or closing the legs.
What To Do If You Don’t Have A Tripod?
Use stable surfaces like tables or walls for support. Employ a bean bag or pillow for stabilization. Utilize your body by leaning against a solid object. Explore creative angles by placing your camera on the ground or a ledge. These alternatives help achieve steady shots without a tripod.
What Household Items Can You Use As A Tripod?
Use books, a chair, or a stack of boxes as a tripod. Secure your device with rubber bands. Ensure stability by adjusting items carefully. Create a DIY tripod with a broomstick, tape, and a cup. These household items can effectively support your camera or phone for steady shots.
What Is A Substitute For A Tripod?
Use a sturdy table, wall, or stack of books as a tripod substitute. A monopod or selfie stick can also provide stability. Consider using a bean bag or sandbag to stabilize your camera. Handheld gimbals offer mobility and support for video recording.
Conclusion
Creating your own tripod can be a rewarding experience. You save money and learn valuable skills. The process is simple and requires basic materials. Follow the steps carefully for best results. Personalize your tripod to fit your needs. Enjoy capturing steady shots with your homemade tool.
Share your creation with friends and inspire others to try. Remember, practice makes perfect. Use your new tripod with pride. Now you’re ready to explore photography with confidence. Happy shooting and keep experimenting with different angles. Your creativity is the limit!