Using camera filters in OBS Studio can instantly boost your video quality, add creative effects, and solve common camera issues. Whether you stream on Twitch, record YouTube videos, or join online meetings, mastering camera filters is a smart move. But many people miss out because the process looks complex at first. Here’s a simple, step-by-step guide to help you use camera filters in OBS like a pro.
Table of Contents
Getting Started With Obs Filters
First, make sure you have OBS Studio installed. Filters in OBS are tools that change how your video looks in real time. You can add them to your webcam, capture card, or any video source.
To access filters:
- In OBS, right-click your video source (like your webcam) in the Sources box.
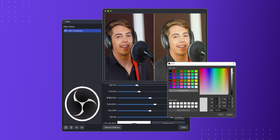
- Choose Filters from the menu. A new window appears with two columns: Audio/Video Filters and Effect Filters.
Popular Obs Camera Filters Explained
Each filter has a unique use. Here’s a quick comparison of the most-used camera filters:
| Filter Name | Main Use | Typical Setting |
|---|---|---|
| Color Correction | Adjust brightness, contrast, and color | Gamma: 0.10–0.20 |
| Chroma Key | Green screen effect | Similarity: 400–500 |
| LUT | Apply a color profile | Amount: 0.50–1.00 |
Basic Steps To Add A Filter
- Click the + button under the Effect Filters column.
- Pick a filter (like Color Correction or Chroma Key).
- Adjust the settings using the sliders.
- Preview the changes before closing the window.

Credit: www.youtube.com
Advanced Tips For Better Results
A common mistake is adding too many filters at once. Too many effects can slow your computer or make your video look unnatural. Stick to two or three filters per source.
Another tip: order matters. For example, place the Chroma Key filter before Color Correction for a cleaner green screen effect. Here’s how filter order can affect results:
| Order | Result |
|---|---|
| Chroma Key → Color Correction | Smoother background removal |
| Color Correction → Chroma Key | Possible color spill issues |
Real-life Example
Imagine you have poor lighting. Use Color Correction to brighten your image, then add a Sharpen filter to make your video clearer. Many professional streamers use this combination for a polished look.
For more detailed filter settings, the official OBS Guide offers extra information.
Credit: www.streamingvideoprovider.com
Frequently Asked Questions
What Are Obs Filters Used For?
OBS filters change your video’s appearance in real time. They fix issues, add effects, and improve image quality.
Can I Use Multiple Filters At The Same Time?
Yes, you can add several filters to a single video source. Just don’t overdo it—too many filters can cause lag.
What’s The Difference Between Effect Filters And Audio/video Filters?
Effect Filters change how the image looks. Audio/Video Filters include things like noise suppression for microphones.
Do Filters Slow Down My Computer?
A few filters are fine, but too many high-intensity filters can affect performance, especially on older systems.
Can I Save My Filter Settings For Later?
Yes. Right-click your source, choose Copy Filters, and paste them onto another source to reuse your setup.
Adding filters in OBS is a simple way to make your camera feed stand out. With a little practice, you’ll create videos that look and feel professional.