Table of Contents
Mastering Your Blink Camera Placement With The Right Mounts
Blink cameras offer a simple and affordable way to keep an eye on your home or property. But even the best camera is only as good as its placement. This is where Blink camera mounts become essential. They ensure your camera is positioned correctly for the best possible view, providing optimal security and peace of mind.
Choosing the right mount can seem straightforward, but there are several factors to consider. From the type of surface you’re mounting to the camera’s field of view, the mount plays a crucial role in your camera’s effectiveness. This guide will walk you through understanding and using Blink camera mounts to get the most out of your security system.
Understanding Blink Camera Mount Types
Blink offers a variety of mounts designed for different installation needs. Each type serves a specific purpose, ensuring flexibility in how and where you can position your cameras.
Standard Indoor Mounts
Most Blink indoor cameras, like the Blink Mini, come with a small, adjustable stand that allows them to sit on a flat surface. This stand often has a pivot point, letting you tilt the camera up or down. It’s perfect for placing on shelves, tables, or countertops.
Outdoor Wall Mounts
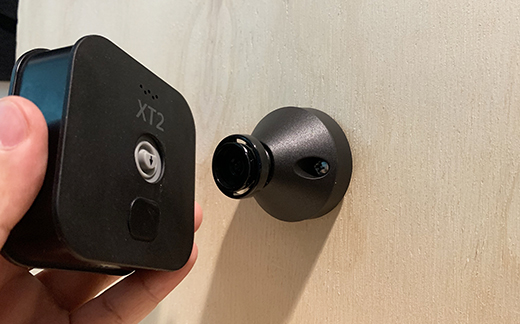
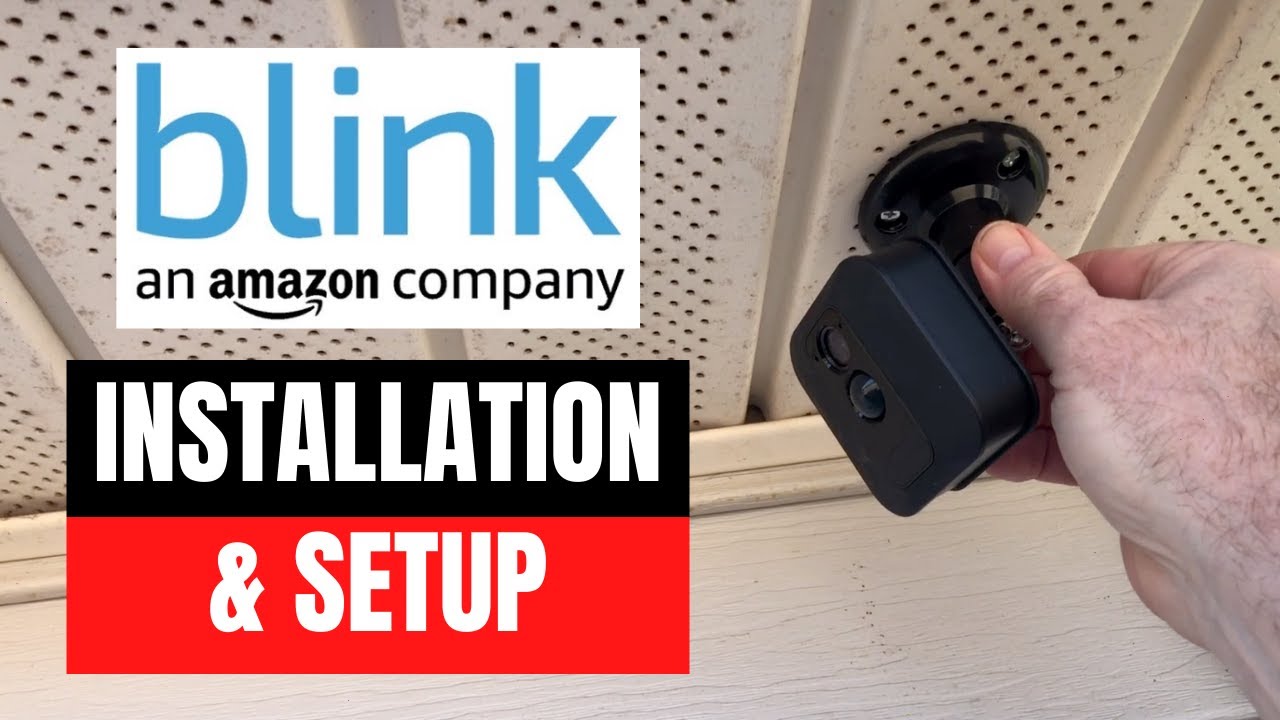
For outdoor cameras, Blink typically includes a weather-resistant wall mount. These are usually designed to attach securely to exterior walls, fences, or eaves. They often feature a swivel and tilt mechanism, giving you a wide range of motion to direct the camera.
Specialized Mounts
Beyond the standard options, Blink offers or supports various specialized mounts. These can include:
- Suction cup mounts: Ideal for mounting cameras on smooth, non-porous surfaces like windows.
- Pole mounts: Useful for attaching cameras to outdoor posts or railings.
- Magnetic mounts: Some Blink cameras have magnetic bases or can be used with magnetic mounts for quick, temporary placement on metal surfaces.
- Gooseneck mounts: These flexible mounts allow for very precise positioning, especially useful for indoor cameras where you need to snake the camera into tight spots.
The right mount depends entirely on your specific needs and the location where you plan to install the camera.
Credit: support.blinkforhome.com
Choosing The Best Location For Your Blink Camera
Before you even pick up a mount, strategic placement is key. Think about what you want to monitor and what potential blind spots exist.
Indoor Placement Considerations
For indoor cameras like the Blink Mini, consider:
- Entry points: Hallways, doorways, and main living areas are prime spots to catch activity.
- High-traffic areas: Places where family members or pets spend a lot of time.
- Avoid direct light: Pointing a camera directly at a bright window can make the rest of the image dark.
- Privacy: Be mindful of where you point your camera to respect the privacy of others.
Outdoor Placement Considerations
Outdoor cameras require more thought regarding protection and coverage:
- Main entry doors: Monitor who approaches your front and back doors.
- Driveways and garages: Keep an eye on vehicles and any activity around them.
- Ground floor windows: These are common entry points for burglars.
- Height: Mount cameras high enough to be out of easy reach (around 8-10 feet is often recommended), but not so high that they lose detail.
- Weather protection: While mounts are often weather-resistant, try to position cameras under eaves or overhangs for extra protection from direct rain and sun.
- Wi-Fi signal: Ensure the chosen spot has a strong Wi-Fi connection for reliable streaming and recording.
Installing Your Blink Camera Mounts: Step-by-step
The installation process varies slightly depending on the mount type, but the general steps are similar.
Mounting An Outdoor Wall Mount
- Choose your spot: Based on the considerations above, select the ideal location.
- Mark screw holes: Hold the mount against the wall and mark where the screws will go. Use a pencil for accuracy.
- Drill pilot holes: If mounting into wood, you might not need pilot holes. For brick, stucco, or concrete, use a drill bit appropriate for masonry and insert wall anchors.
- Secure the mount: Screw the mount firmly into the wall or anchors. Ensure it feels stable and does not wiggle.
- Attach the camera: Most Blink outdoor mounts have a screw thread or a clip system to attach the camera securely.
- Adjust the angle: Position the camera for the best view and tighten any adjustment screws to keep it in place.
Using A Standard Indoor Stand
This is the simplest method:
- Place the camera: Position the Blink camera on a stable, flat surface like a shelf or desk.
- Adjust the angle: Use the built-in pivot to tilt the camera up or down.
- Connect power: Plug in the camera’s USB power cable.
Installing Specialized Mounts
- Suction Cup Mounts: Clean the surface thoroughly. Press the suction cup firmly onto the clean surface, ensuring a good seal. Test its stability by gently tugging it.
- Pole Mounts: Wrap the strap or clamp around the pole. Secure it tightly. Attach the camera mount to the strap/clamp system.
Pro Tip: Always test the stability of your mount *before* attaching the camera. A loose mount can lead to a dropped camera and potential damage.

Credit: support.blinkforhome.com
Optimizing Your Camera’s View With Mount Adjustments
Once your mount is installed, the real work begins: fine-tuning the camera’s angle. This is crucial for capturing the most relevant footage.
The Importance Of Field Of View (fov)
Blink cameras have a specific field of view, which is the extent of the scene that the camera can capture. For example, the Blink Outdoor and Indoor cameras have a 110° horizontal FOV. This means you need to position the camera to capture the widest relevant area.
Fine-tuning Techniques
- Pan and Tilt: Most mounts allow you to pan (move left/right) and tilt (move up/down). Make small adjustments and check the live view in the Blink app.
- Look for blind spots: While adjusting, actively look for areas the camera *isn’t* seeing. If your goal is to monitor a whole room or yard, ensure the mount allows for the necessary range of motion.
- Consider motion detection zones: In the Blink app, you can set motion detection zones. Adjusting the physical camera angle can help you better align these zones with the areas you want to monitor most closely. For instance, if you’re monitoring a doorway, you might want the motion zone to focus on the approach rather than the wall opposite the door.
Common Mistakes To Avoid
Even with the right mount, improper installation or placement can hinder your camera’s performance.
Overlooking Wi-fi Strength
A common mistake is placing a camera in a location with a weak Wi-Fi signal. This leads to choppy video, frequent disconnections, and missed recordings. Always check the signal strength in the Blink app at your chosen mounting spot *before* drilling holes. If the signal is weak, consider a Wi-Fi extender or a different mounting location.
Mounting Too Low Outdoors
Mounting outdoor cameras too low makes them vulnerable to tampering or theft. While you want a clear view, security through height is important. Aim for 8-10 feet, and consider adding a protective cover if necessary.
Ignoring Lighting Conditions
Pointing cameras directly at bright lights (like the sun or a porch light) can wash out the image, making it difficult to see details. If possible, position the camera so the primary light source is not directly in its lens. Many Blink cameras have good night vision, but optimal daytime footage relies on good lighting.
Not Securing The Mount Properly
A wobbly mount is a recipe for disaster. Ensure all screws are tight and any anchors are securely in place. A dropped camera is often damaged beyond repair and will leave you unprotected.
Credit: www.youtube.com