Creating a camera might seem complex. But it’s an exciting journey.
You can build a simple camera with basic tools and materials. This guide will walk you through the process step by step. Cameras have evolved over the years. From pinhole cameras to digital ones, the basics remain the same. Understanding these fundamentals can enhance your appreciation of photography.
Plus, making a camera can be a fun project. You’ll learn about light, lenses, and image capture. This project is perfect for hobbyists and learners. It’s a hands-on way to explore how cameras work. Ready to dive into the world of camera-making? Let’s get started on this creative adventure together.
Table of Contents
Introduction To Diy Camera Making
Building a camera is fun and exciting. It helps you learn how cameras work. You get to create something unique. Making a camera teaches patience and creativity. Plus, you can take cool pictures. It’s a great hobby for kids and adults alike. You can use simple materials to start. The joy of capturing a photo is rewarding.
You need a few parts to make a camera. Start with a lens to capture light. Use a body to hold everything. A shutter controls light entry. Add a sensor to record images. Get a battery for power. Use a screen to view photos. Put it all together to make a camera. These parts are easy to find and use.

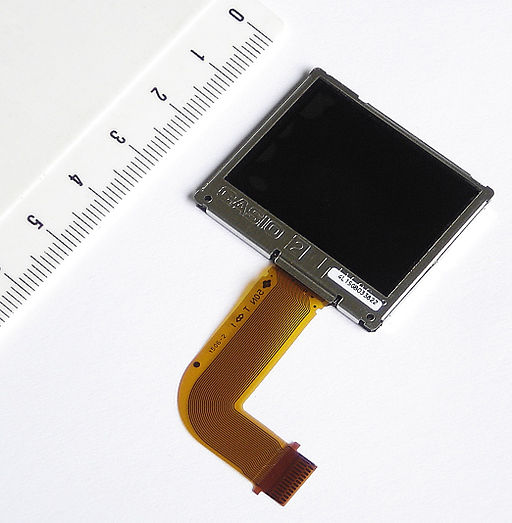
Credit: www.featureshoot.com
Gathering Essential Materials
A lens helps focus light into the camera. Select a lens that fits your camera’s design. Wide-angle lenses capture more of the scene. Zoom lenses bring far things closer. Prime lenses have fixed focus and are very sharp. Lenses are made of glass or plastic. Glass lenses are better for clear pictures. Plastic lenses are lighter and cheaper. Consider the lens size and type.
Cameras need a material to record images. Film and digital sensors do this job. Film is an old method. It uses chemicals to capture light. Digital sensors use tiny pixels to make an image. Choose film if you like old-style photos. Pick digital sensors for modern cameras. Look for high-resolution sensors for better pictures. Ensure the material works with your camera.
Building The Camera Body
Start with a simple plan. Draw your camera body on paper. Decide its shape and size. Keep it small and handy. Think about where to place buttons and lenses. Make sure they are easy to reach.
Choose strong materials for the body. Plastic is light and easy to shape. Metal is more durable but heavier. Foam or cardboard can be used for practice models. Make sure the material can protect the camera inside.
Collect tools like scissors, glue, and tape. These help in cutting and sticking materials together. Always work safely with tools. Keep your hands safe.
Assembling The Camera Parts
The lens is very important. Align the lens with the camera body. Twist the lens gently to lock it in place. Check if the lens is secure before moving on. This step is crucial for clear pictures. Ensure no dust or dirt on the lens.
Open the back of the camera. Place the film holder inside. Make sure it fits tightly. Close the back carefully. Double-check the holder is secure. This will protect the film. Keep the film away from light.
Creating The Shutter Mechanism
Shutters control how light enters the camera. There are two main types. First, the leaf shutter. It opens and closes like a flower. This type is quiet and fast. Second, the focal-plane shutter. It moves curtains in front of the film. This shutter is common in many cameras. Each type has its own benefits.
Making a shutter at home is fun. Start with a cardboard box. Cut a small hole in it. Use a piece of paper as the shutter. Move it up and down to let light in. This simple method helps understand how shutters work. Experiment with different materials. This will teach more about the process.
Light Management And Exposure
The aperture is like the camera’s eye. It opens and closes. A wide aperture lets in more light. A narrow aperture lets in less light. It changes the depth of field. A wide setting makes the background blurry. A narrow setting makes everything clear.
Exposure controls how bright or dark your photo is. Use the ISO to adjust sensitivity to light. A low ISO is for bright places. A high ISO is for dark places. Change the shutter speed to control light. A fast speed captures quick action. A slow speed can blur movement.
Testing And Troubleshooting
Start by taking a few test shots with your camera. Check if the images are clear and bright. If the picture is blurry, look at the camera lens. Make sure it is clean and free from dust. Adjust the focus settings for a sharper image. If the image is too dark, try changing the lighting or the camera’s exposure settings. Make sure all parts are working well.
Sometimes, the camera might not turn on. Check the batteries and replace them if needed. If the photos are not saving, inspect the memory card. Make sure it is inserted properly. Formatting the card might help too. If buttons are stuck, clean them gently with a dry cloth. For any unusual sounds, inspect the internal parts. Tighten any loose screws.
Credit: www.123-cctv.com
Enhancing Your Diy Camera
Adding accessories can make your camera special. Start with a simple tripod. It helps keep your camera steady. Next, consider a lens cap. It protects your camera lens. A camera strap is also useful. It keeps your camera safe around your neck. You might also like a camera bag. It helps carry your camera easily. These accessories can make your camera more fun to use.
Better images start with good lighting. Use natural light when possible. It makes photos clear. Try adjusting the focus. A sharper focus makes details stand out. Clean your lens often. Dust can ruin pictures. Experiment with different angles. Unique angles make photos interesting. Lastly, practice taking pictures. With practice, your photos will get better. Each tip helps make your images great.
Conclusion And Next Steps
Building your own camera offers a unique learning experience. Gather the necessary materials and follow step-by-step guides for assembly. Experiment with different techniques to enhance your skills and create stunning images.
Reflecting On Your Creation
Your camera creation is special. You learned new skills and ideas. Now, think about what you did. Did you enjoy making the camera? What was the hardest part? Next time, you can try to fix any mistakes. Remember, every step is important. Each part makes the camera work.
Exploring Further Camera Projects
Building a camera is fun. Many projects can follow. Make a pinhole camera. Create a digital camera. Try a film camera. Each project offers new challenges. Explore different lenses. Experiment with light. Learn about photography techniques. Each project makes you better. Enjoy the journey of learning.

Credit: www.youtube.com
Frequently Asked Questions
How Can I Make My Own Camera?
Start by gathering essential components: lens, sensor, body, and electronics. Assemble parts carefully following online tutorials. Ensure proper alignment and secure connections. Test functionality and adjust settings for optimal performance. Customize features based on preference, ensuring durability and efficiency. Explore resources for guidance and inspiration.
Enjoy capturing moments with your handmade camera.
How Is A Camera Made?
Manufacturers assemble cameras using precision machinery. They start with creating lenses from optical glass. Technicians then assemble electronic components, including sensors and processors. The casing is molded and assembled to house these components. Quality tests ensure functionality and performance before packaging the final product for distribution.
How To Make Camera Infinite Craft?
To craft an infinite camera in Minecraft, gather 8 glass panes and 1 redstone. Arrange them with glass panes surrounding the redstone in the center on a crafting table. This recipe will create the camera item.
Can You Make A Camera From A Box?
Yes, you can create a pinhole camera using a simple box. Cut a small hole, cover it with foil, and poke a tiny pinhole. Place photographic paper inside, and capture images by exposing the paper to light. This DIY method is a fun way to learn photography basics.
Conclusion
Building your own camera is a fascinating journey. You learn by doing. Materials are simple and easily available. Focus on the basics first. Experiment with lenses and sensors. Document your process step-by-step. Capture stunning images with your creation. Share your experiences with others.
Inspire fellow enthusiasts to try. A homemade camera is unique. It reflects your creativity and dedication. Enjoy the process and celebrate your achievements. Keep exploring and refining your skills. Photography becomes more rewarding with personal touch. Your camera, your masterpiece.