Creating an iPhone tripod is simple. You need a few materials and some creativity.
With just a little effort, you can have a sturdy tripod to capture stable photos and videos. Smartphones have changed how we capture moments. Whether you’re a professional photographer or a hobbyist, an iPhone tripod can improve your shots. Sometimes, buying a tripod isn’t necessary.
Making your own can be fun and cost-effective. Plus, it allows customization to suit your needs. This guide will show you easy steps to make a tripod using household items. You’ll discover that building one is straightforward and rewarding. By the end, you’ll have a reliable tool to enhance your photography skills. Let’s explore how you can craft your own iPhone tripod.

Credit: www.wikihow.com
Table of Contents
Introduction To Diy Tripods
Making a tripod at home is fun and easy. Homemade tripods can be made with simple items. You can use old pipes or sticks. They hold your phone steady. This helps you take better pictures. You do not need to spend much money. Kids can help with this project. It is a great way to learn and create. Follow steps and stay safe. Have fun making your own tripod.
A homemade tripod saves money. Buying tripods can be costly. Making one at home is cheap. You use things you already have. It is a fun project. Learn new skills while making it. You can make it any size you want. Make it tall or short. It is easy to carry. Take it anywhere you go. You can fix it if it breaks. You feel proud using something you made.
Homemade tripods are budget-friendly. Use cardboard, strings, or rubber bands. These items are cheap. It costs less than buying a new one. You can make many tripods. Share them with friends or family. Change the design as you wish. Make it colorful or simple. Use things from around the house. Save money and learn at the same time. These are smart choices for everyone.
Materials Needed
You need a few important tools to make an iPhone tripod. First, get a smartphone holder. This will keep your iPhone safe. You also need a sturdy stick or rod. It should be long enough to stand on its own. Next, find some rubber bands. These will hold your phone steady. A small ball head is useful for adjustments. Lastly, a tripod base or stand is very important. This will support the whole setup.
Think about some extra items for your tripod. A phone clamp can add extra safety. It keeps your phone from falling. Foam grips can help too. They make holding the tripod easy. Consider using a remote shutter. This lets you take photos from far away. LED lights are good for taking bright pictures. Lastly, a level bubble helps keep your tripod straight.
Choosing The Right Base
Picking a stable base is key. It keeps your phone steady. Look for a wide base. This helps balance. Heavy bases are good too. They resist movement. You can use a rock or sandbag. These add weight. They stop wobbling. Think about the surface. Flat surfaces work best. Uneven places can tip your tripod. Choose carefully. Stability matters.
Different materials work well. Plastic is light and easy to carry. But it can break. Metal is strong and lasts longer. It is heavier though. Wood looks nice. It is sturdy too. Some use rubber for grip. It helps keep things firm. Each material has pros and cons. Choose what suits you.
Credit: fixthephoto.com
Constructing The Tripod Legs
Making legs that change size is important. Use telescopic tubes for this. They slide into each other easily. Choose strong materials like aluminum. It keeps the tripod light but durable. Add a locking mechanism. This holds the length firm. Test the locks. Make sure they work well. Each leg should move smoothly. Adjust them to different lengths. This helps when filming on uneven ground. Keep testing the legs. They must stay steady when extended. A tripod that falls is no good.
The tripod must be secure. Use strong joints where the legs meet. Check each joint carefully. Tighten screws to avoid wobbling. A sturdy base is key. Attach a wide base plate. This spreads weight evenly. It stops tipping over. Test the tripod on different surfaces. Make sure it stands firm. Always check the balance. A balanced tripod supports your phone safely.
Creating The Mount
A secure grip is important for your iPhone. Use rubber bands to hold the phone. This keeps it from slipping. Another way is using foam pads. Foam pads are soft and safe. They protect the phone’s back. You can also use a spring clamp. It holds the phone tight. Always make sure the grip is firm.
Rotation helps get the right angle. Use a swivel joint for easy rotation. Tilt features let you move the phone up and down. A ball head is useful for tilting. It allows smooth movements. Adjust the phone’s position with ease. This helps in taking perfect pictures.
Assembling The Components
Gather all parts before starting. You need three wooden sticks. They should be the same length. Also, get a rubber band and a phone holder. Make sure the holder fits your iPhone. Place the sticks in a triangle shape. Secure the top with the rubber band. Tighten it so the sticks don’t move. Attach the phone holder on top. Ensure it is secure and stable. Now your tripod is ready for use.
Do not use sticks of different lengths. This makes the tripod unstable. Avoid wrapping the rubber band too loose. The sticks will fall apart. Make sure the phone holder grips tightly. A loose grip may drop your phone. Don’t force parts together. They might break. Always check stability before using the tripod.
Testing And Adjustments
A tripod should not shake or wobble. Check the base and legs for firmness. Tighten any loose screws or joints. Make sure the surface is flat and even. Adjust the legs to make the tripod level. Test by gently tapping the tripod. It should stay steady. If it moves, adjust again. Repeat until the tripod is stable. Stability keeps the phone safe.
The tripod should be easy to use. Check if you can rotate the phone. Try to tilt it up and down. Make sure it’s not too tight. You should be able to move it smoothly. Adjust any parts that feel stiff. Practice setting it up quickly. Usability makes taking pictures easier. A good tripod saves time.
Customization Ideas
Add a personal touch to your tripod. Use stickers or paint. This makes it unique. Pick colors you love. Match your phone case. This creates a cool look. Friends will notice it. You can even add your name. This helps if you lose it.
Enhance your tripod’s function. Add rubber grips. This stops slipping. Attach a small light. It helps in the dark. Use a holder for extra items. Like a small mic. This makes videos better. Add adjustable legs. It helps with uneven surfaces.
Troubleshooting Common Issues
Wobbly legs can make your tripod less stable. Check if the legs are extended properly. Sometimes, they may not lock in place. Ensure each leg is fully extended. Double-check that the locks are tight. A loose lock can cause wobbling. Adjust the legs to even the height. If one leg is shorter, it might wobble. Look for rubber feet at the bottom. They help in grip. If missing, replace them to avoid slipping.
A loose mount can risk your phone falling. Inspect the mount’s screw. Tighten the screw using a small tool. If the mount wiggles, it might need adjusting. Make sure the phone fits snugly. Some mounts have adjustable sides. Pull them to fit the phone better. Check the spring mechanism. It should hold the phone tightly. If it feels loose, it might need a replacement. Handle with care to prevent damage.
Conclusion And Next Steps
Crafting your own iPhone tripod opens up new possibilities for capturing steady photos and videos. Gather materials like cardboard, rubber bands, and a sturdy base. Follow simple steps to ensure stability and adjustability for different angles.
Reflecting On The Diy Experience
Building an iPhone tripod was fun. You learned how to create things yourself. Making it helps save money. You can use items from home. It teaches patience and problem-solving skills. This project shows creativity. You can customize it. Try different designs next time. Share your ideas with friends. Building more gadgets could be interesting.
Exploring Advanced Projects
After making a tripod, try harder projects. Make a phone stand next. Design a camera stabilizer. Use new materials. Test with different tools. Build a charging station. Explore more tech projects. Experiment with smart home gadgets. These projects enhance skills. Enjoy learning new things. Keep exploring and creating.
Credit: fixthephoto.com
Frequently Asked Questions
What To Use Instead Of A Tripod For Iphone?
Use a smartphone holder or clamp for stability. Employ a selfie stick for adjustable angles. Try a tabletop stand or lean against a stable surface for quick shots. Explore flexible gorilla pods for versatile positioning. Utilize books or other props to create height and steady your iPhone camera.
How To Make A Diy Tripod?
Gather materials like a sturdy stick, rubber bands, and a smartphone holder. Secure the holder to the stick using rubber bands. Adjust angles for stability. Ensure everything is tightly fastened. Test with your smartphone to ensure balance. Enjoy your DIY tripod for steady photos and videos.
How To Stabilize A Phone Without A Tripod?
Hold your phone with both hands for stability. Use a wall or table to support it. Keep your elbows close to your body. Rest your phone on a bag or a stack of books for a steady shot. Use a smartphone stabilizing app for better results.
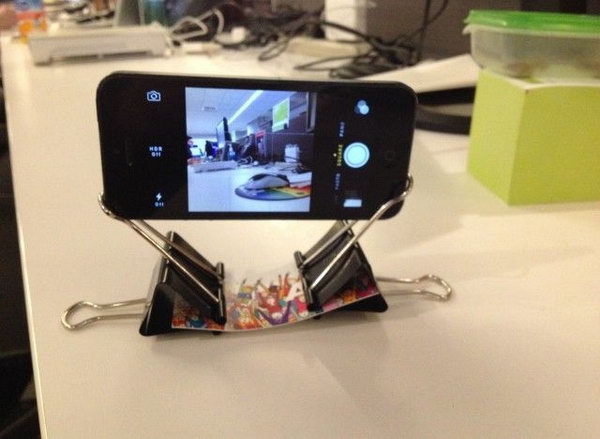
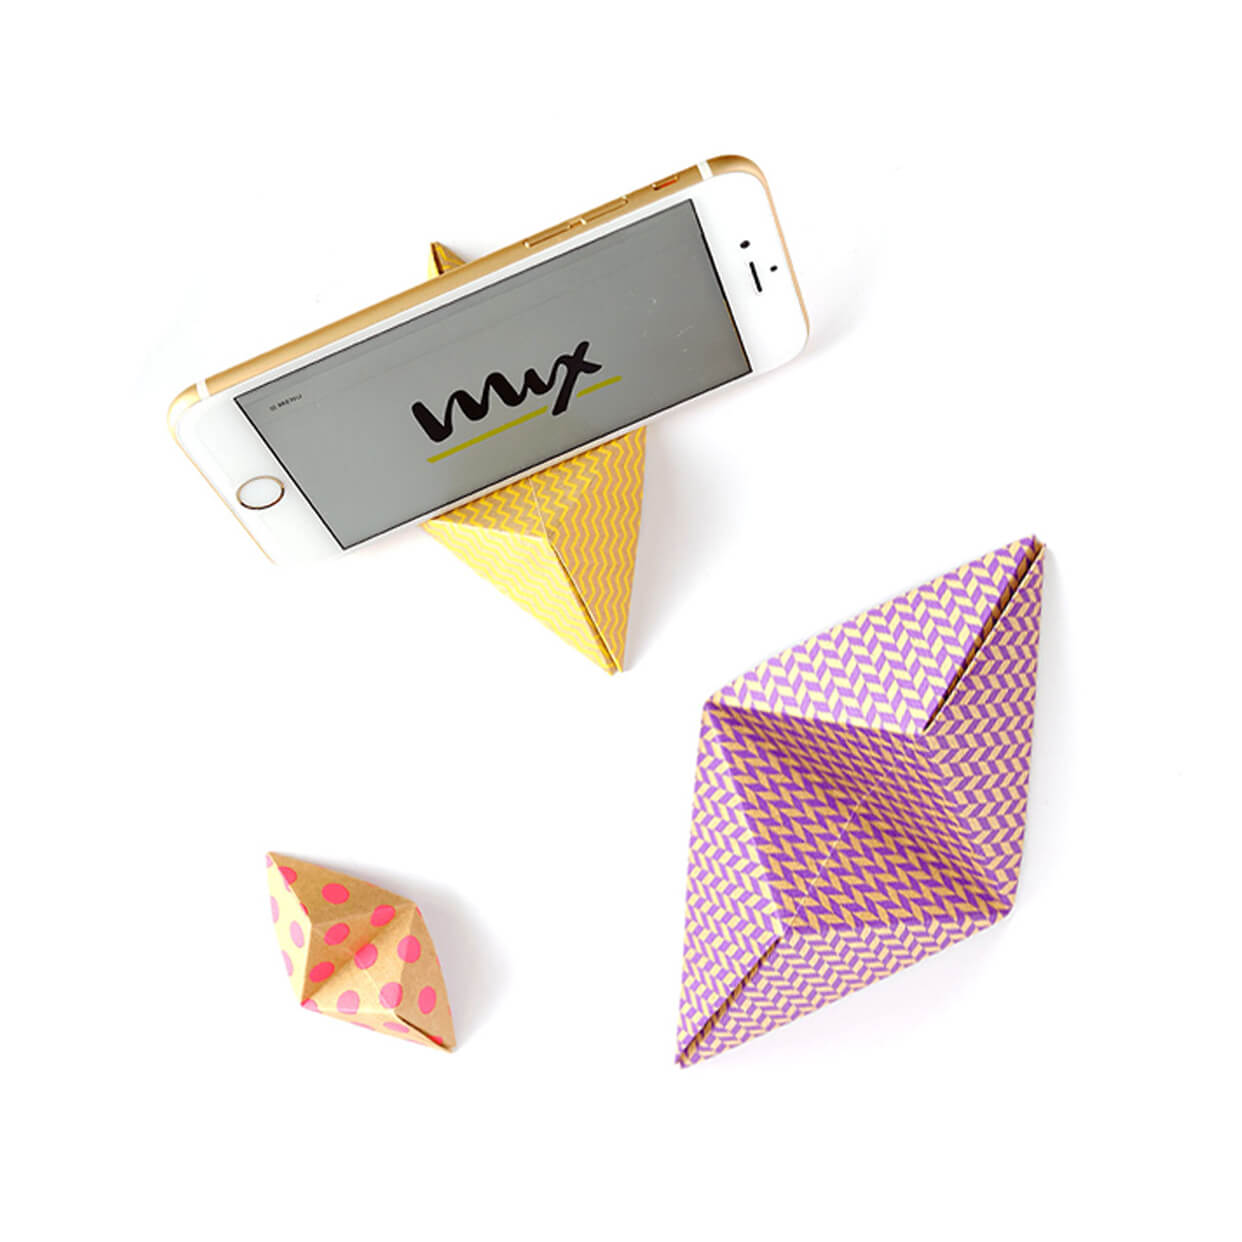
How To Make A Diy Phone Stand For Recording?
Use cardboard or a binder clip to create a simple phone stand. Fold cardboard into a triangle shape. Place your phone on top. Alternatively, clip your phone using a binder clip. Ensure stability for recording by adjusting angles. These DIY methods are affordable and effective for capturing videos.
Conclusion
Crafting your own iPhone tripod can be simple and fun. You save money and get creative. With basic materials, you achieve steady shots. No need for expensive gear. Just follow the steps and enjoy DIY success. Your phone will stay stable for photos or videos.
Perfect for capturing moments without hassle. Share your creations with friends and family. Inspire others to try making their own tripods. It’s a practical project with rewarding results. Get started today and enhance your photography experience effortlessly. Happy snapping!