Creating a makeshift tripod for your phone is simple. You can use household items to stabilize your phone for better photos and videos.
This guide shows how to do it quickly. Capturing steady shots with your phone doesn’t need fancy equipment. A makeshift tripod can be made using items you already have at home. Whether you’re filming a video or snapping a photo, a stable phone is key to quality.
With a little creativity, everyday objects like books, cups, or even rubber bands can serve as effective supports. This method saves money and improves your photo and video quality. Ideal for those moments when you need a quick solution. You’ll be surprised how easy it is to put together a sturdy base for your phone without spending extra cash.
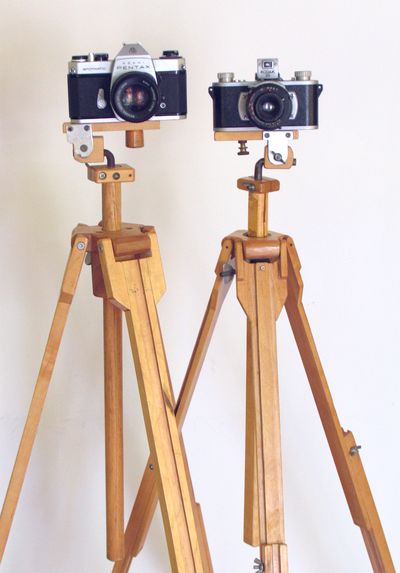
Credit: woodgears.ca
Table of Contents
Materials Needed
Gather rubber bands for holding the phone. Use a plastic cup or a mug as a base. Find some pencils or sticks for legs. A tape can keep things steady. Grab an old sock for extra grip. These items are usually found at home. They are easy to use and help make a simple tripod.
Scissors cut tape and rubber bands. A ruler helps measure leg lengths. A knife can sharpen pencil ends. These tools are safe if used carefully. Always ask an adult for help. They will keep you safe while using sharp tools. Be patient and take your time. Safety is important.
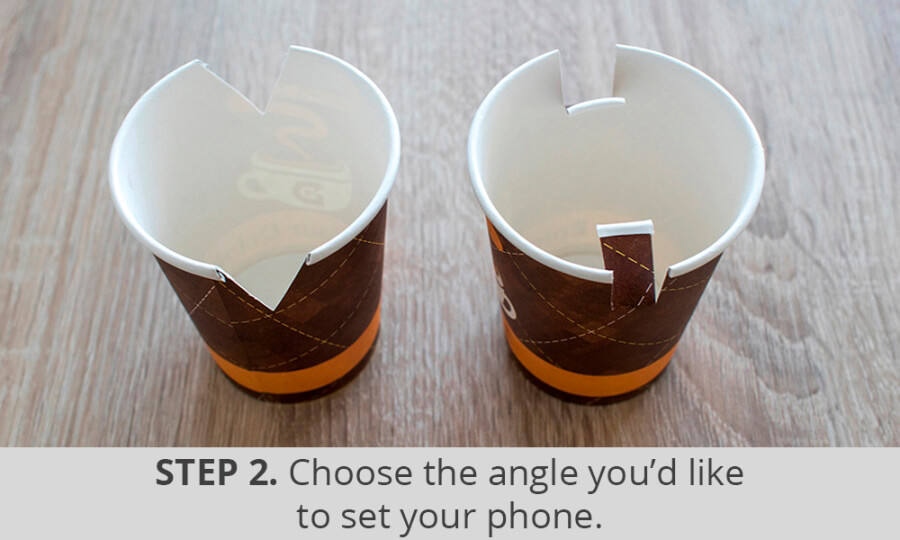
Credit: fixthephoto.com
Choosing A Base
A strong base is key for a stable tripod. Find a surface that is flat and firm. A table or bookshelf can work well. Make sure it does not wobble. This will help keep your phone steady. Place your phone on the surface. Use books to prop it up. Adjust until the phone stays still. A stable base means better photos and videos.
No table? No problem! You can use a chair or a stack of boxes. Even a pile of clothes can work. Just make sure it’s stable and won’t fall. You need something to hold your phone upright. Try different things. Be creative. The goal is to make your phone stand still. A steady phone helps take clear pictures.
Crafting A Phone Holder
Wrap a strong rubber band around your phone. Secure the band on both sides. This keeps the phone in place. Find a bottle or a cup. Place the phone on top. The band will hold it steady. Adjust the angle with care. Make sure it does not slip. Try testing it first. This simple trick is very handy.
Clips can be very useful. Use a large clip to grip the phone. Attach it to a stable object. A book or a box works well. Ensure the clip holds tightly. Adjust the phone’s angle slightly. This keeps the phone from moving. Test it by taking a photo. Check the stability often. Clips can create a quick phone stand.
Assembling The Tripod
Use a sturdy rubber band or hair tie. It helps to hold your phone. Wrap it around a small stick or pencil. This will act as the holder. Secure it tightly. Ensure the phone is stable. You don’t want it to slip or fall.
Find three even-sized objects. Books work well. Arrange them in a triangle shape. This will be the base. Place the pencil holder in the center. Adjust the books for balance. Ensure the structure is steady. Test by gently shaking the setup. If it wobbles, rearrange the base. Make it firm and stable.
Adjusting For Angle
Use a stack of books to hold your phone. This can help you change the angle. Place the phone between the books. Move the books to tilt the phone up or down. Try using a bottle cap. Put it under one side of the phone. This will help with small tilt adjustments.
Tilt Adjustments
Foam or a soft cloth can help. Put it under the phone. This changes the tilt. Make sure the phone stays stable. Small items like erasers work too. Place them under the corners. Adjust them for the right angle.
Height Modifications
Try using a stack of boxes. This can make the phone higher. Use books or magazines for smaller changes. Add or remove one at a time. This helps find the perfect height. Use tape to hold the setup if needed. It keeps everything in place.
Testing Stability
To test stability, tap your phone lightly. Notice if it shakes too much. If it wobbles, adjust the base. Make it tighter or add more support. Use books or a sturdy object. Stability is important for clear photos. A steady tripod helps prevent blurry shots.
Balance is key to a stable tripod. Ensure the phone’s weight is evenly spread. Place heavier items on the base. This prevents tipping over. Check if the tripod stands firm. Adjust until balance is right. A well-balanced tripod makes shooting easier.
Enhancing Durability
Strengthening joints is key for a sturdy tripod. Use strong tape. Wrap it around the joints tightly. This helps them stay firm. Add extra layers for more strength. Choose tape that sticks well. Check if it holds the weight. If not, try a different tape. Use rubber bands for extra support. Wrap them around the joints too. They add grip and hold everything together. Try different sizes for the best fit.
For weatherproofing tips, use plastic wrap. Cover the tripod completely. This keeps water away. Use waterproof tape on the outside. Make sure it’s tight. This prevents water from getting in. If you have spray, use it. Spray over the wrap and tape. Check for holes. Fix them quickly. Keep your tripod dry and safe.
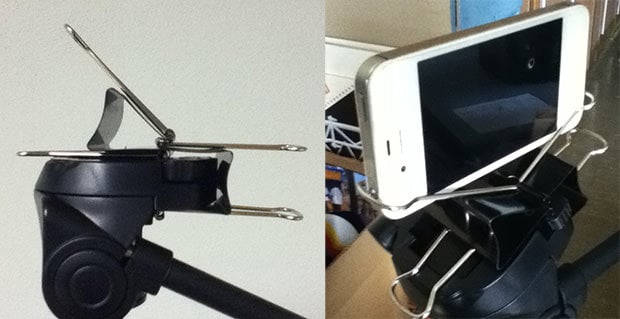
Credit: petapixel.com
Creative Ideas
Old cardboard can become a tripod stand. Cut and fold it to shape. Plastic bottles can hold phones steady. Fill them with sand for weight. Use rubber bands to secure your phone. Sticks and twigs can be tied together. They form a stable base. Look around your home for more reusable items.
Paint your tripod for a colorful look. Add stickers to make it fun. Wrap it with bright ribbons. These add beauty and style. You can glue on small beads or stones. Make it sparkle under light. These simple touches make your tripod special. Craft it to match your room or style.
Frequently Asked Questions
How To Make A Homemade Tripod For Your Phone?
Use cardboard tubes and rubber bands for a sturdy base. Attach a binder clip to hold your phone securely. Adjust angles using the clip’s grip. Ensure stability by placing the tripod on a flat surface. Customize height by stacking materials underneath.
Enjoy hands-free phone usage with your DIY tripod.
What Can I Use If I Don’t Have A Phone Tripod?
Use a stack of books or a stable surface to prop your phone. Secure it with rubber bands.
What Can Be Used As A Makeshift Tripod?
Use a stack of books, a sturdy chair, or a backpack as a makeshift tripod. Secure your camera or phone with elastic bands or tape to ensure stability. This DIY method helps capture steady shots without professional equipment.
How To Make A Makeshift Phone Stand?
Use a sturdy piece of cardboard folded in half. Cut a small notch for the phone. Adjust the angle for stability. Decorate for a personal touch.
Conclusion
Creating a makeshift tripod is simple and effective. With household items, you can stabilize your phone easily. Capture clear photos and videos without spending extra money. Experiment with materials like books or cups for support. Find what works best for your needs.
This DIY approach is budget-friendly and creative. No need for expensive equipment. Perfect for travel or quick setups. Enjoy steady shots and share your moments effortlessly. Keep exploring new ideas for phone photography. With practice, your skills will improve. Happy snapping!