Attaching a ball head to a tripod is simple. First, ensure the tripod has a compatible mounting plate.
Then, screw the ball head onto the plate until secure. A ball head is essential for photographers seeking flexibility and precision. It allows for smooth movement and easy adjustments, making it ideal for capturing dynamic shots. Understanding how to attach it properly ensures stability and enhances your photography experience.
Whether you’re a beginner or an experienced photographer, knowing this process is crucial. This guide will help you attach a ball head quickly and confidently, enabling you to focus on your creative process without technical distractions. Dive in and learn the steps to enhance your tripod setup.
Table of Contents
Choosing The Right Ball Head
Ball heads help control the camera’s position. Some ball heads are simple. Others have extra features. Single-knob ball heads are easy to use. They have one control for movement. Multi-knob ball heads give more options. They allow fine-tuning adjustments. Gimbal heads are for heavy cameras. They help balance the camera well. Panoramic ball heads are great for wide shots. They allow smooth rotation. Convertible ball heads change for different uses. They provide flexibility.
Think about the camera weight. Bigger cameras need stronger heads. Material matters too. Metal ball heads are more durable. Plastic ones are lighter. Price is important. Expensive ball heads often have better quality. Ease of use is key. Simple designs are easier for beginners. Consider compatibility with your tripod. Check if the ball head fits your tripod. Adjustability matters for different angles. Easy locking is useful for quick adjustments.
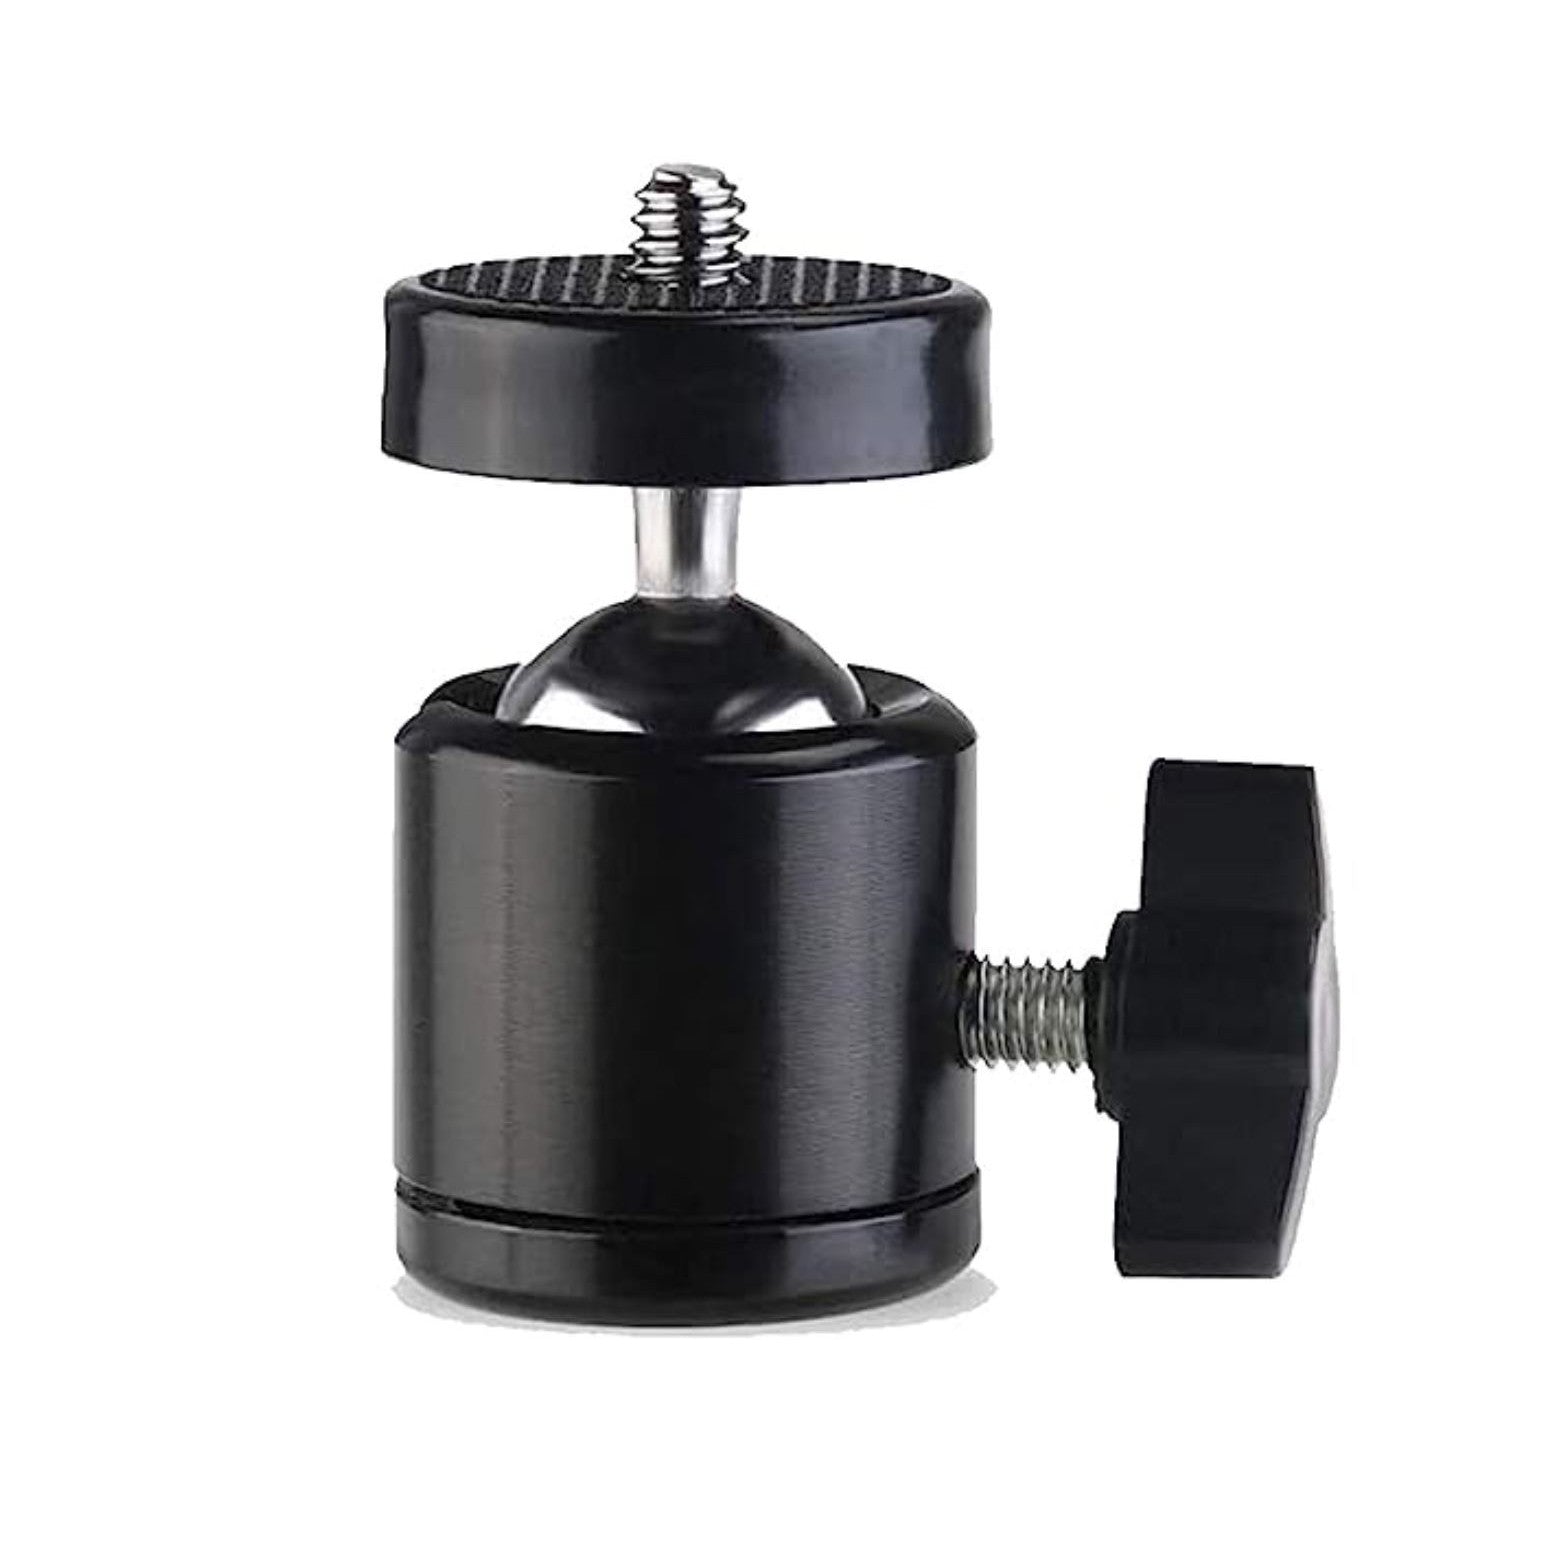
Credit: www.mapir.camera
Understanding Tripod Compatibility
Tripods have different mount types. Some common ones include screw mounts and quick-release plates. These mounts help connect the tripod to other equipment. The screw mount uses a threaded bolt. It is simple to use. The quick-release plate is faster. It uses a lever to secure the equipment. Each mount has its own benefits. Choose the right one for your needs.
A ball head is a useful tool for tripods. It allows smooth movement. The ball head must match the tripod’s mount type. Check the size of the ball head and tripod mount. They should be the same. If they match, the ball head will attach well. Always ensure compatibility before buying.
Gathering Necessary Tools
First, gather all the tools you need. You will need a screwdriver. Make sure it’s the right size. A small wrench is also helpful. Don’t forget the ball head and tripod. Lastly, keep some clean cloth handy.
Find a flat surface to work on. A table is perfect. Make sure the area is well-lit. This helps you see better. Clear away any clutter. You need space to work. Place all your tools within reach. This makes the process easier.
Removing The Existing Head
First, remove the existing head from your tripod by loosening the locking screw. Gently detach it from the central column, ensuring no damage occurs.
Unfastening The Current Head
Turn the tripod upside down. Look at the bottom part. Find the screw or knob. Twist it gently. Hold the tripod tight. Use a wrench if needed. Loosen the head slowly. Check if it’s coming off. Feel it moving. Keep twisting until it’s free. Remove the head carefully. Place it aside. Don’t drop it.
Cleaning The Mount
Inspect the mount area. Look for dust or dirt. Use a soft cloth. Wipe the mount gently. Make sure it’s clean. No dust should be left. Use a brush for small spaces. Avoid using water. Keep it dry. Ensure everything is tidy. Ready for new head attachment.
Attaching The Ball Head
Make sure the threads on the tripod and ball head are clean. Dust can make it hard to attach. Match the threads carefully. This ensures the ball head will not wobble. Hold the ball head steady. Turn it slowly onto the tripod. Do not rush this step. A good fit is very important.
Once the threads are aligned, tighten the ball head. Use a gentle hand. Do not force it. Gently turn until it feels secure. A tight fit keeps the camera safe. Check if the ball head moves. If it does, tighten it more. Make sure it does not move side to side. A secure ball head gives better photos.

Credit: www.youtube.com
Ensuring Proper Tightness
Testing stability is key when attaching a ball head to a tripod. Gently press the camera to check for any wobbles. If it moves, it’s not tight enough. Ensure all screws are tight. The ball head should hold the camera steady. Always check each part after tightening. This keeps your camera safe.
Adjusting the tension can help if the ball head is too loose. Find the tension knob on the ball head. Turn it to make the head stiffer or looser. Adjust until the camera stays still. This ensures your camera won’t move unexpectedly. Always make small adjustments. This helps to avoid over-tightening.
Adjusting Ball Head Movement
Begin by checking the swivel range of the ball head. Turn it slowly. Make sure it moves smoothly. The ball head should turn in all directions. Check its limits. Stop when it can’t move further. It’s important to test this range. Ensure it meets your needs.
Adjust the tension knob to control movement. Loosen it for easy movement. Tighten it for stability. Find the right balance. Too loose, and it may slip. Too tight, and it won’t move. Make small adjustments. Test the ball head as you go. Keep the camera safe and steady.
Maintenance Tips
Attaching a ball head to a tripod involves aligning the screw thread with the tripod’s center column. Twist the ball head clockwise until secure. Ensure it’s tightly fastened to avoid wobbling during use. Regular checks for stability and cleanliness will prolong the lifespan of your equipment.
Regular Cleaning
Clean your tripod and ball head often. Use a soft cloth to wipe them. Dust and dirt can harm the parts. Check every joint and surface for dirt. Make sure no debris is stuck. Clean the screws too. This keeps everything working well.
Checking For Wear And Tear
Look at the ball head and tripod regularly. Check for any cracks or damage. Loose parts need fixing right away. Tighten screws if they are loose. This helps the tripod last longer. Regular checks keep it safe and sturdy. This ensures smooth use every time.

Credit: www.amazon.com
Frequently Asked Questions
How To Attach Head To Tripod?
Align the tripod head base with the tripod’s mounting plate. Secure it by screwing the head tightly clockwise. Ensure it’s firmly attached for stability. Check the head’s movement to confirm proper installation. Always refer to the manufacturer’s instructions for specific guidance.
How Do You Attach A Gimbal Head To A Tripod?
Secure the tripod plate onto the gimbal head’s base. Align it with the tripod’s mounting screw. Tighten firmly for stability. Ensure the gimbal head is level and securely attached before use.
How Do You Change The Ball Head On A Tripod?
Loosen the screw connecting the ball head to the tripod. Carefully remove the old ball head. Attach the new ball head and tighten the screw securely. Ensure it is stable before use.
How Does A Tripod Ball Head Work?
A tripod ball head allows smooth movement in all directions. It consists of a rotating ball and socket mechanism. Users can easily adjust their camera’s position by loosening the control knob. Once positioned, tightening the knob locks the camera in place, ensuring stability and flexibility for photography.
Conclusion
Attaching a ball head to your tripod enhances your photography experience. It’s simple and quick. Secure the head properly for stable shots. Always check the tightness before use. A stable setup ensures sharp images. Practice the process a few times.
Soon, it becomes second nature. Handling your equipment with care prolongs its life. Regular checks keep it functioning well. Experiment with different angles and views. Capture your world with ease. Enjoy the flexibility and precision a ball head offers. Happy shooting!