Attaching an iPad to a tripod is simple. You need the right tools.
First, ensure your tripod has a compatible mount. This setup allows you to use your iPad hands-free. It’s ideal for photography, video calls, or presentations. Tablets have become essential tools. They offer convenience and versatility. Many users want to enhance their iPad’s functionality further.
Using a tripod can improve stability. It also frees up your hands for other tasks. Whether you’re filming a video or reading a script, a tripod can help. The process is straightforward. With a few steps, your iPad will be securely mounted. This guide will walk you through each step. You’ll learn how to set it up effectively. Plus, you’ll discover tips for optimal use. Ready to get started? Let’s explore how to attach your iPad to a tripod.
Table of Contents
Choosing The Right Tripod
Stability is very important for a tripod. It keeps your iPad safe. Make sure the legs are strong. Check if the tripod can hold the weight of the iPad. A stable base is key. Avoid tripods that wobble.
Compatibility is another key factor. The tripod must fit your iPad size. Measure your iPad first. Some tripods have adjustable holders. This makes them compatible with different iPads. Always check the holder before buying.
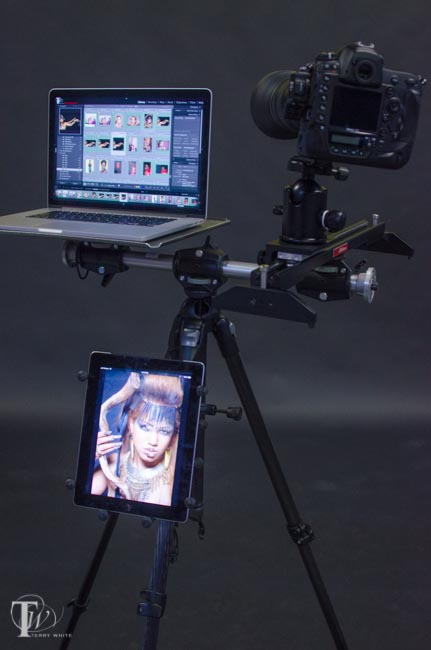
Credit: terrywhite.com
Essential Accessories
Tripod mounts help keep your iPad steady. They are very important. Look for a universal mount. This means it fits all iPads. Some mounts have a 360-degree rotation feature. This helps in getting the right angle. Adjustable mounts fit iPads of different sizes. Make sure it’s easy to attach and remove. It should hold your iPad tight. This keeps your iPad safe from falls.
Adapters let your iPad work with different tripods. Some tripods need special connectors. Check if you need a lightning adapter. Some older tripods use a 3.5mm jack. Make sure the connectors fit well. Loose connectors can cause problems. A good connector ensures a stable setup. Always check for compatibility. This ensures everything works smoothly.
Preparing Your Ipad
The iPad case can be bulky. It might not fit on the tripod. Take off the case carefully. Hold the iPad steady. Avoid dropping it. Check for any dust or dirt. Wipe it clean with a soft cloth. This keeps the iPad looking new. Protect the case for later use.
Hold the iPad with both hands. Place it on a flat surface. Make sure the screen is clean. Use a dry cloth to wipe it. Avoid pressing too hard. Check the screen for any cracks. Fix small issues before attaching to the tripod. This keeps the screen safe.
Mounting The Ipad
Choose a strong mount for your iPad. Ensure it fits your tripod. Most mounts have a universal screw size. Attach the mount to the tripod. Turn the screw clockwise to tighten. Make sure the mount is stable. Test the mount by shaking it gently. It should not move.
Place the iPad in the mount carefully. Ensure it sits securely. Adjust the mount arms to fit the iPad snugly. Check the viewing angle of the iPad. Tilt the iPad slightly for better view. Make sure the screen faces you. Check all angles for best position. Lock the iPad in place. Use the tripod controls to adjust height. The iPad should be stable and easy to use. Confirm the position before starting.
Adjusting The Tripod
Setting the tripod height is easy. First, unlock the leg locks. Then, pull out the legs to the wanted height. Make sure all legs are the same length. This keeps the iPad stable. Next, adjust the angle of the tripod head. Turn the knob to tilt up or down. Find the best view for your iPad screen. Secure the angle by tightening the knob.
Tripods have different locking mechanisms. Some use clips. Others use twist locks. To use clips, open them to extend the leg. Close them to lock in place. Twist locks need turning to loosen or tighten. Always check the locks are tight. This stops the iPad from falling. It keeps everything safe and secure.
Ensuring Safety
Attaching an iPad to a tripod ensures stability and safety during use. Choose a sturdy adapter that fits securely. Tighten all connections to prevent accidental falls and damage.
Balancing The Setup
Use a strong tripod to hold your iPad. Make sure it’s steady. Balance is key. Place your iPad in the center. Check the weight. The iPad should not lean. Adjust the tripod legs. They should be even. This helps with balance.
Preventing Tipping
Prevent tipping by tightening all knobs. Use the right clamp for your iPad. Check the grip. It should be firm. The iPad must not slide. Place tripod on a flat surface. Avoid slopes or uneven ground. Keep the tripod away from foot traffic. This keeps it safe from bumps.
Optimizing For Photography
Position your iPad at eye level for portraits. This creates natural angles. Use a tripod adapter for a secure hold. Adjust the tripod height to match your subject. Ensure good lighting. Natural light works best. Avoid shadows on faces. Check your iPad camera settings. Use portrait mode if available.
Attach your iPad securely for landscape shots. Use a wide-angle lens attachment if possible. Focus on horizon lines. Keep them straight. Capture the scene’s beauty. Check for clear weather. Avoid rainy days. Use a stable tripod. Wind can shake the iPad. Experiment with different angles. Capture unique views.

Credit: caddiebuddy.com
Troubleshooting Common Issues
Discover how to securely attach your iPad to a tripod with ease. Begin by choosing a compatible iPad tripod mount. Ensure it fits snugly for stable video or photo shooting.
Loose Mount Fixes
A loose mount can make your iPad fall. First, check the screws. Tighten them with a screwdriver. If still loose, add a rubber pad. The rubber pad grips better. Sometimes, the holder is not tight enough. Adjust the holder to fit snugly. Always ensure the iPad is secure.
Stability Enhancements
Stability is key for clear pictures. Spread the tripod legs wide. This makes it stand firm. Use a weight on the base for more stability. Sandbags work well. Also, ensure the ground is flat. Uneven ground can make the tripod wobble. Check and adjust as needed. A stable setup helps keep your iPad safe.

Credit: www.amazon.com
Frequently Asked Questions
How Do I Attach Something To A Tripod?
Secure your device using the tripod’s mounting plate. Align it properly and tighten the screw to ensure stability. Check compatibility between the tripod and device for a snug fit. Always verify the locking mechanism is engaged to prevent slipping.
How To Set Up An Ipad On A Tripod?
Attach a tablet holder to the tripod. Secure the iPad in the holder, ensuring it’s stable. Adjust the tripod height and angle for optimal viewing or recording. Ensure the tripod legs are firmly positioned on the ground to prevent tipping.
How Do You Attach A Smartphone To A Tripod?
To attach a smartphone to a tripod, use a compatible phone mount. Secure the mount onto the tripod head. Place the smartphone in the mount, ensuring it is snug. Adjust the tripod for stability. Ensure your phone’s camera aligns with the mount’s opening for optimal use.
How To Make An Ipad Holder?
Create an iPad holder using cardboard. Cut a piece to fit your iPad’s width. Fold and secure with tape for stability. Use a separate piece to create a stand, attaching it to the back. Decorate as desired. This simple DIY holder is functional and cost-effective.
Conclusion
Attaching your iPad to a tripod is easy with these steps. Start with a compatible tripod and a sturdy adapter. Secure the iPad tightly to prevent falls. Check its stability before use. Make sure the angle suits your needs. Adjust the height if necessary.
This setup enhances photography and video recording. Enjoy hands-free operation and better framing. This method suits various creative projects. Explore different angles and heights for unique shots. Practice makes perfect. Soon, you’ll handle the setup with ease. Keep experimenting and have fun capturing moments!