Building a telescope tripod is straightforward. You need basic materials and tools.
With some guidance, you can create a sturdy tripod for your telescope. Telescopes are fascinating instruments that open up the night sky. They let us see stars and planets clearly. A good tripod is essential for steady viewing. It supports your telescope securely, preventing wobble.
But buying a tripod can be expensive. Making one yourself saves money and is rewarding. You learn about the parts and how they fit together. You also customize it to suit your needs. In this guide, discover steps to build a telescope tripod at home. Whether you’re a beginner or experienced, this project is fun and educational. Let’s start creating your own telescope tripod.

Credit: astrosetz.com
Table of Contents
Introduction To Telescope Tripods
A telescope tripod is very important. It helps keep the telescope stable. A shaky telescope makes it hard to see stars. Tripods are easy to make at home. They save money and are fun to build.
Importance Of A Stable Base
A stable base is needed for clear star viewing. It stops the telescope from moving. A strong tripod base helps you see stars better. Without it, stars look blurry and move around.
Benefits Of Diy Tripods
Building your own tripod is fun. It helps you learn new skills. DIY tripods are cheap to make. You can make them just how you like. This way, you can see stars the best way possible.
Gathering Materials And Tools
Building a telescope tripod needs some essential tools. A drill is very important. Make sure to have a hammer too. Screwdrivers are needed as well. You will need a tape measure. Don’t forget a saw. A wrench can be handy. Keep a pencil for marking.
Wood is a great choice. It is strong and stable. Aluminum is another option. It is lightweight and durable. Consider using plastic for some parts. It is easy to cut and shape. Each material has its own benefits. Choose what fits your needs best.
Designing Your Tripod
Choosing the right design is crucial for a sturdy tripod. Some tripods have adjustable heights. These allow you to change the height. This feature is great for different viewing needs. Fixed height tripods stay the same size. They can be more stable. But they lack flexibility. Think about where you will use your telescope. Indoors or outdoors? On a hill or flat ground?
Consider weight and portability too. Adjustable tripods might be heavier. Fixed ones are often lighter. If you move your telescope a lot, this matters. Also, think about the material. Wood, aluminum, and steel are common. Each has pros and cons. Wood is light but not very strong. Steel is strong but heavy. Aluminum is a good middle choice. Choose wisely for a good experience.
Cutting And Preparing Materials
Use a measuring tape for accurate measurements. Mark the spots with a pencil. Double-check measurements to avoid errors. Precision is key for stability. Ensure all parts are equal in length. Check angles for correct alignment. A straight edge helps in marking lines. Keep a clear workspace for easy movement.
Wear protective goggles to shield eyes. Use gloves for hand safety. Keep fingers away from cutting edges. Ensure the tool is sharp for clean cuts. Secure materials before cutting. Clamp them tightly. Work in a well-lit area. Clear any clutter around the workspace. Always cut away from your body. Take breaks to avoid fatigue.
Assembling The Legs
Crafting the tripod’s legs requires attention to detail and precision. Each leg must be securely attached to ensure stability. Proper alignment guarantees a steady base for the telescope, enhancing your stargazing experience.
Connecting The Legs
First, gather all the parts for the legs. Place the legs on a flat surface. Make sure they are evenly spaced. Use bolts to connect the legs together. Tighten each bolt with a wrench. Be careful not to over-tighten. Check that all legs are secure.
Ensuring Stability And Balance
Adjust the legs to the correct height. This keeps the telescope steady. Spread the legs wide for better balance. Test the tripod by gently shaking it. It should not wobble. Add weight to the base if needed. This helps make the tripod more stable. Now, your tripod is ready to use!
Building The Tripod Head
The mounting plate holds the telescope. Make sure it is strong. Use screws to attach it. Ensure the screws are tight. The plate should not move. Check the balance. It must be even. If the plate wobbles, adjust it. A steady plate keeps the telescope safe.
Place the telescope on the plate. Align it properly. Secure with clamps. The clamps should fit snugly. No gaps should be visible. Tighten the clamps gently. Ensure the telescope does not shake. A stable base is crucial. It helps in clear viewing. Always double-check the setup.
Finishing Touches
Smooth surfaces feel nice. Use sandpaper for this task. Start with coarse sandpaper. It removes rough spots. Next, use finer sandpaper. This will make the wood soft and smooth. Check for any splinters. Sand them down gently. Feel the wood with your hand. It should be even and polished.
A protective finish keeps wood safe. Choose a wood sealant. It protects from water and scratches. Apply it with a brush. Cover all surfaces evenly. Let the sealant dry completely. This may take a few hours. After drying, check for missed spots. Apply more if needed. Your tripod will now be durable and shiny.
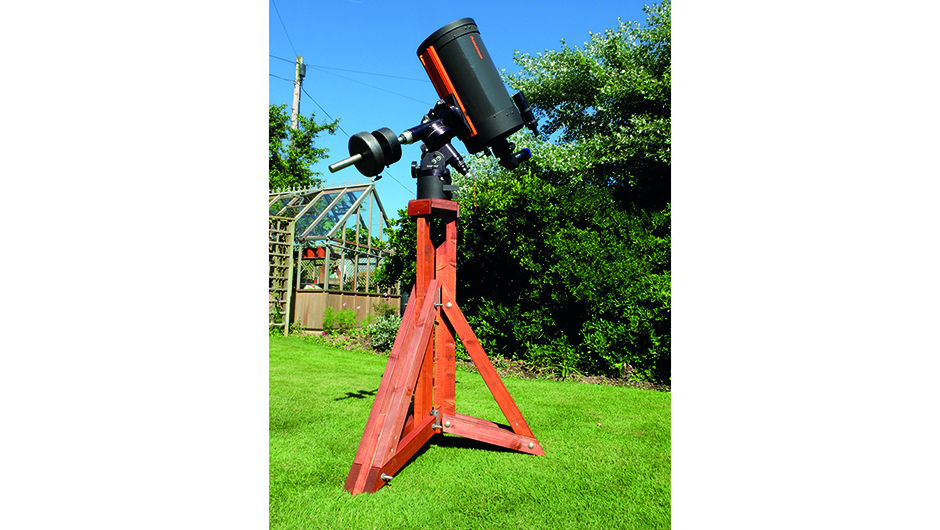
Credit: www.skyatnightmagazine.com
Testing And Adjustments
Adjusting your telescope tripod ensures a stable viewing experience. Begin with testing its balance and sturdiness. Make necessary tweaks to the legs and fittings for a clear, steady observation.
Checking Stability
A tripod must be stable. It should not shake or wobble. Start by placing your telescope on the tripod. Make sure all legs touch the ground. Push the tripod gently. Check if it moves or tips. If it does, find out why. Look at each leg closely. Is there a loose screw? Is the ground uneven? Fix these problems to make the tripod steady. Safety is important. A stable tripod keeps your telescope safe.
Making Necessary Adjustments
Sometimes, tripods need adjustments. If one leg is longer, shorten it. Use the locking mechanism to hold it in place. Check the tripod’s height. Make sure it is comfortable for viewing. Adjust the angle if needed. Tilt it slightly forward or backward. This helps in better viewing. Tighten all knobs and screws. This prevents slipping. Adjustments make the tripod more reliable. It improves your viewing experience.
Conclusion And Tips
Keep your tripod clean for smooth use. Wipe off dust regularly. Tighten screws to avoid wobbling. Lubricate joints to keep them moving well. Store it in a dry place. This prevents rust and damage. Check for loose parts often. Replace damaged parts quickly.
Common issues can be fixed easily. If legs won’t lock, check the locks. Adjust them until they hold tight. If the head is shaky, tighten the screws. Make sure it’s level. If a leg is stuck, clean it. Remove dirt and debris. Use a gentle cleaner. If the tripod isn’t stable, check the feet. Ensure they’re clean and intact.

Credit: www.cloudynights.com
Frequently Asked Questions
How To Make A Tripod For A Telescope?
Use sturdy wood or metal for tripod legs. Secure legs with hinges at the top. Attach a flat base for the telescope. Ensure stability by adding rubber feet. Adjust height with sliding mechanism.
How To Make A Diy Tripod?
To make a DIY tripod, use sturdy materials like PVC pipes. Cut them to desired length. Connect with elbow joints for stability. Attach a screw or mount for your camera on top. Ensure all parts are tightly secured. Test for balance and adjust as needed.
Enjoy your homemade tripod!
Can You Use Any Tripod For A Telescope?
Not all tripods are suitable for telescopes. Use a sturdy, compatible tripod designed for telescopes. It must support the telescope’s weight and provide stability. Check the tripod’s load capacity and compatibility before purchasing.
How To Make A Telescope Tripod More Stable?
Extend tripod legs fully to increase stability. Use weight bags to anchor the tripod securely. Ensure ground is level and firm. Adjust tension knobs tightly on the tripod. Consider using rubber pads on feet for better grip.
Conclusion
Building a telescope tripod can be easy and rewarding. You now have the basic steps to create your own sturdy tripod. Focus on the materials and tools needed. Keep safety in mind during the process. Enjoy the experience of crafting something useful.
A homemade tripod enhances your stargazing adventures. Remember, patience is key. Take your time and follow instructions closely. With effort, you can build a reliable tripod. Your telescope will have stable support. Explore the night sky with confidence and joy.
Happy stargazing!