Attaching an iPhone to a tripod is simple. It enhances photo and video quality.
Secure your iPhone and explore its full potential. Smartphones are versatile tools for capturing life’s moments. But shaky hands can ruin the perfect shot. A tripod offers stability, making your photos and videos clear and professional. Whether you’re documenting a journey or filming a vlog, attaching your iPhone to a tripod is essential.
It allows for hands-free operation and creative angles. In this guide, learn how to securely attach your device to a tripod. With the right equipment and technique, you can take stunning photos and videos easily. Let’s dive into the steps needed to transform your photography experience.
Table of Contents
Choosing The Right Tripod
Choosing the right tripod is important. Tabletop tripods are small and fit on desks. Flexible tripods can bend, twist, and grip objects. Traditional tripods are tall and stable. Each type has its own use. Think about what you need.
Important features include height and weight. A tripod should be light but strong. Easy setup means you can use it quickly. Check if it has a universal mount. This helps attach your iPhone easily. Look for a rotating head. This allows for better angles. These features make using a tripod simple.

Credit: www.instructables.com
Understanding Tripod Mounts
Standard mount types are common for tripods. These mounts help hold devices. Most tripods use a screw mount. This is called a 1/4-inch screw. It’s the same for cameras. Many phones need an adapter. This helps fit them on the tripod. Adapters can hold phones of any size. They are easy to use.
Not all mounts fit all phones. It’s important to check compatibility with iPhones. Some mounts are made for iPhones. Others might need extra parts. Always choose a mount that fits well. A good fit keeps your phone safe. Make sure the mount is strong. This keeps the iPhone steady. A steady phone means better photos and videos.
Essential Tools And Accessories
Choosing the right phone holder is important. It keeps your iPhone safe. Some holders have adjustable arms. This helps to fit different phone sizes. Others rotate, allowing different angles. Clamp holders are popular. They hold the phone tight. There are also spring-loaded holders. These are easy to use. They snap onto your phone quickly. Some holders have a rubber grip. This keeps the phone from slipping.
Consider buying extra gear. It makes filming easier. A remote shutter is handy. It lets you take pictures from far away. An LED light helps in dark places. It brightens your video. A microphone boosts sound quality. It makes voices clearer. Some tripods have a level indicator. This helps in keeping the camera straight. A carrying case protects your gear.
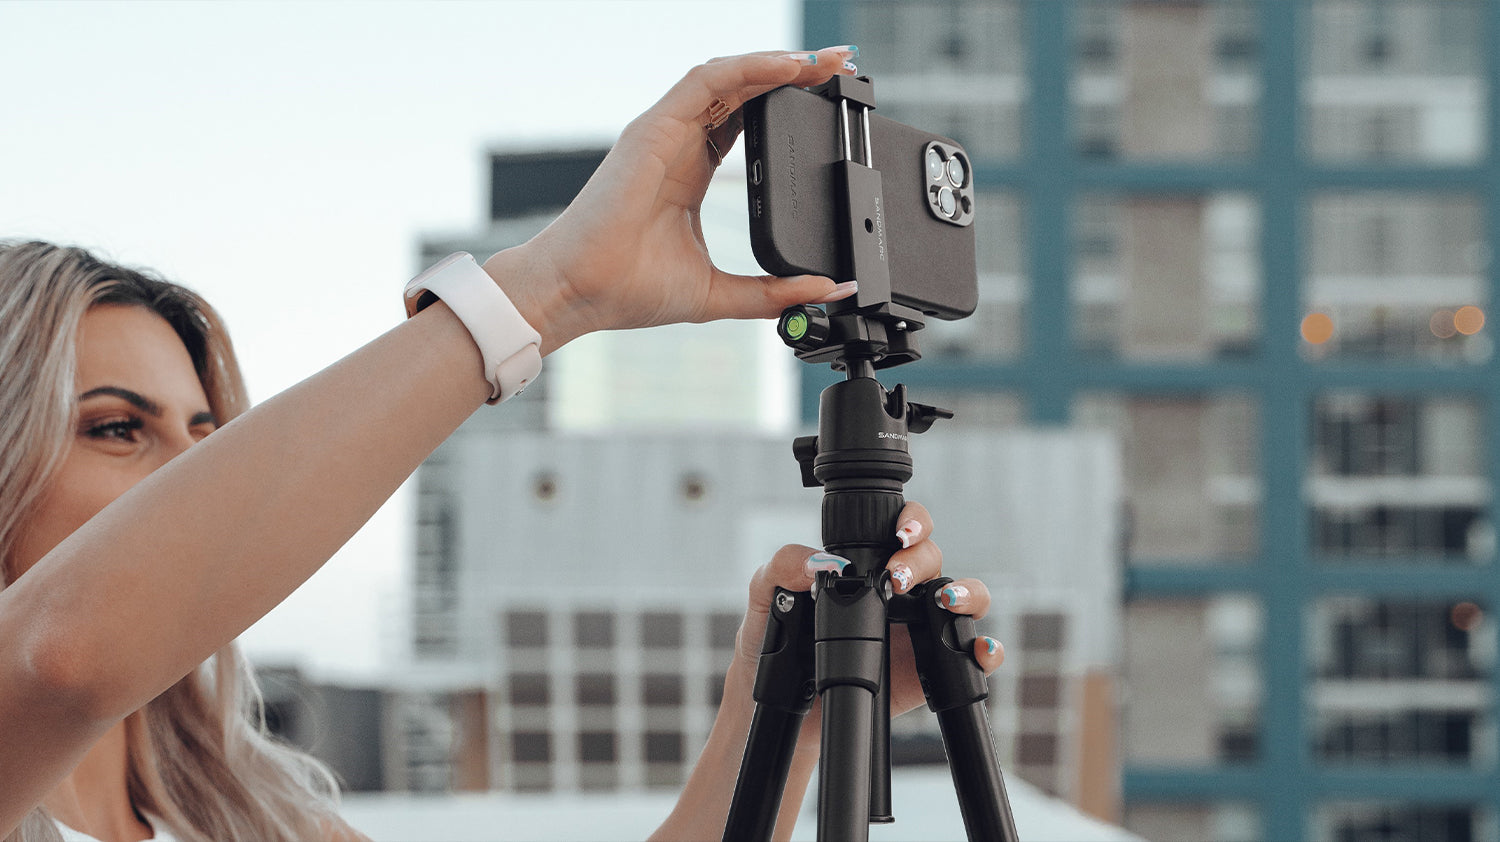
Credit: www.sandmarc.com
Preparing Your Iphone
Remove the phone case first. It makes attaching easier. Cases can be bulky. They may not fit well on tripods. Without the case, the phone is lighter. It connects better. Ensure the phone is clean. Dust can affect grip. Handle the phone gently. Avoid dropping it.
Safety is important. Use a tripod with a secure holder. Make sure it is tight. Check the holder’s grip. It should not be loose. Avoid shaky tripods. They can drop your phone. Keep your phone steady. A stable tripod helps. Always test before use. Ensures safety every time.
Attaching Your Iphone To The Tripod
First, get a phone holder that fits your iPhone. Many holders have a spring grip. Place your iPhone in the holder. Ensure it is secure. You don’t want it to fall.
Make sure the tripod is on a flat surface. This helps keep it stable. Adjust the tripod legs if needed. If the tripod is shaky, it can affect your photos. Double-check that everything is tight. Your iPhone should not wobble.
Adjusting The Tripod
First, make sure the tripod is on a flat surface. This helps it stand strong. Extend the legs to make the tripod taller. Always check that the legs are the same length. This keeps your iPhone steady. Lock the legs once they are at the right height. This prevents the tripod from slipping. If you need a shorter height, simply push the legs back in.
Tilt the head of the tripod to adjust the angle. This helps get the best view. You can tilt it up or down. Turn the knob to lock the angle. This stops the head from moving. Try different angles to see which one looks best. Check the screen of your iPhone to make sure it looks good.
Ensuring Stability
Stabilizing your iPhone on a tripod enhances photo and video quality. Use a tripod mount adapter for secure attachment. Ensure the grip is firm to prevent shaking during recording.
Checking For Stability
First, make sure the tripod is on a flat surface. Uneven ground can make it wobble. Extend the tripod legs equally. This helps in keeping it balanced. Lock the legs securely. Loose legs might cause a fall. Check the tripod’s head. It should be tight and not shaky. A stable tripod keeps your iPhone safe.
Preventing Device Falls
Use a good phone holder. It should grip the iPhone firmly. Avoid using weak or broken holders. Attach the iPhone properly to the holder. Listen for a click sound. This means it is secure. Keep the tripod away from busy areas. Someone might bump into it. Always check everything before stepping away. A little care can prevent accidents.
Troubleshooting Common Issues
Securely attaching an iPhone to a tripod can be tricky. Ensure the mount fits your device perfectly to avoid slips. Double-check the tripod’s stability before capturing your shots for a hassle-free experience.
Loose Connections
Sometimes, the iPhone may not fit tightly on the tripod mount. This can be due to a loose screw or clamp. Always check that the screws are tightened properly. If the clamp is loose, adjust it to hold the phone securely. Using a rubber band can help make the grip stronger. This simple trick can stop the phone from slipping.
Device Weight Problems
The weight of the iPhone can cause the tripod to tilt. Ensure the tripod is stable and balanced. If the tripod wobbles, spread its legs wider. This provides better support. Sometimes, adding a small weight at the bottom helps. It keeps the tripod from falling over. Always place the tripod on a flat surface for safety.

Credit: www.youtube.com
Frequently Asked Questions
How To Place Phone On Tripod?
Secure the phone in the tripod’s adjustable mount. Align it for balance. Tighten screws to ensure stability. Check the angle and adjust as needed. Ensure the tripod legs are stable on the surface.
How To Attach Camera To Tripod?
Secure the tripod base by unfolding its legs. Align the camera’s mounting hole with the tripod’s screw. Turn the screw clockwise to tighten. Ensure the camera is stable before use. Adjust the tripod head for optimal angles. Always check the connection’s security for safety.
How To Take Iphone Pictures With A Tripod?
Mount your iPhone on the tripod using a suitable tripod mount. Open the Camera app. Frame your shot and tap the shutter button. Use a timer or remote shutter for stability. Ensure good lighting for clear photos.
Can A Tripod Hold A Phone?
Yes, many tripods can hold a phone with the right adapter or mount. These mounts are widely available. They securely attach your phone, making it easy to capture stable photos and videos. Always ensure compatibility between the tripod and phone mount for best results.
Conclusion
Attaching your iPhone to a tripod is simple and effective. Start with a compatible tripod mount. Securely fasten your iPhone in place. Ensure it’s stable before use. Tripods offer enhanced stability for photos and videos. No more shaky shots. Ideal for capturing memorable moments.
Easy adjustments allow perfect angle capture. Lightweight tripods are portable for on-the-go use. Achieve professional-quality shots effortlessly. Now, enjoy crisp and clear images. Your photography skills just got a boost. Explore creative possibilities with your setup. Practice makes perfect, so keep experimenting.
Keep your iPhone safe and secure always. Enjoy snapping those perfect pictures!