Adding camera stabilizer effects in DaVinci Resolve can turn shaky, handheld footage into smooth, professional-looking video. Even if you’re new to editing, DaVinci Resolve makes this process simple with powerful built-in tools. Let’s walk through the steps and tips for getting great stabilization results.
Table of Contents
Why Use Camera Stabilization?
Shaky video distracts viewers and reduces quality. A stabilizer corrects unwanted movement, making your shots look more polished. This is important for YouTube creators, filmmakers, and anyone who wants a cinematic touch. Even minor shakes, like walking with a camera, can be fixed with the right settings.
Steps To Add Camera Stabilizer In Davinci Resolve
- Open Your Project: Import your video file into DaVinci Resolve and drag it to the timeline.
- Select the Clip: Click on the clip you want to stabilize.
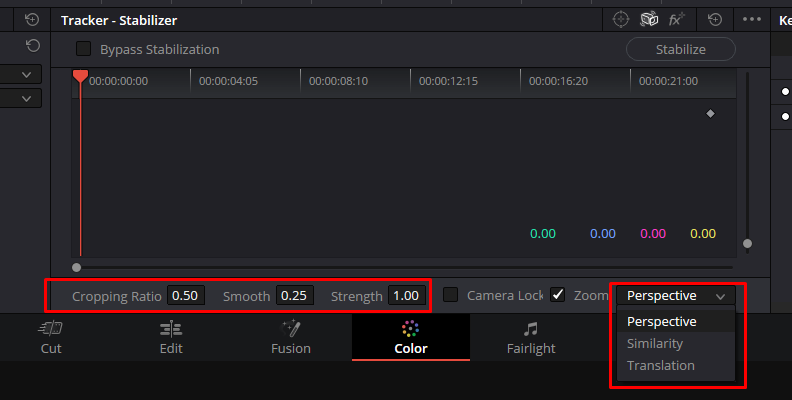
- Go to Color or Edit Page: You can stabilize clips from both the Color and Edit pages. Most beginners use the Edit page.
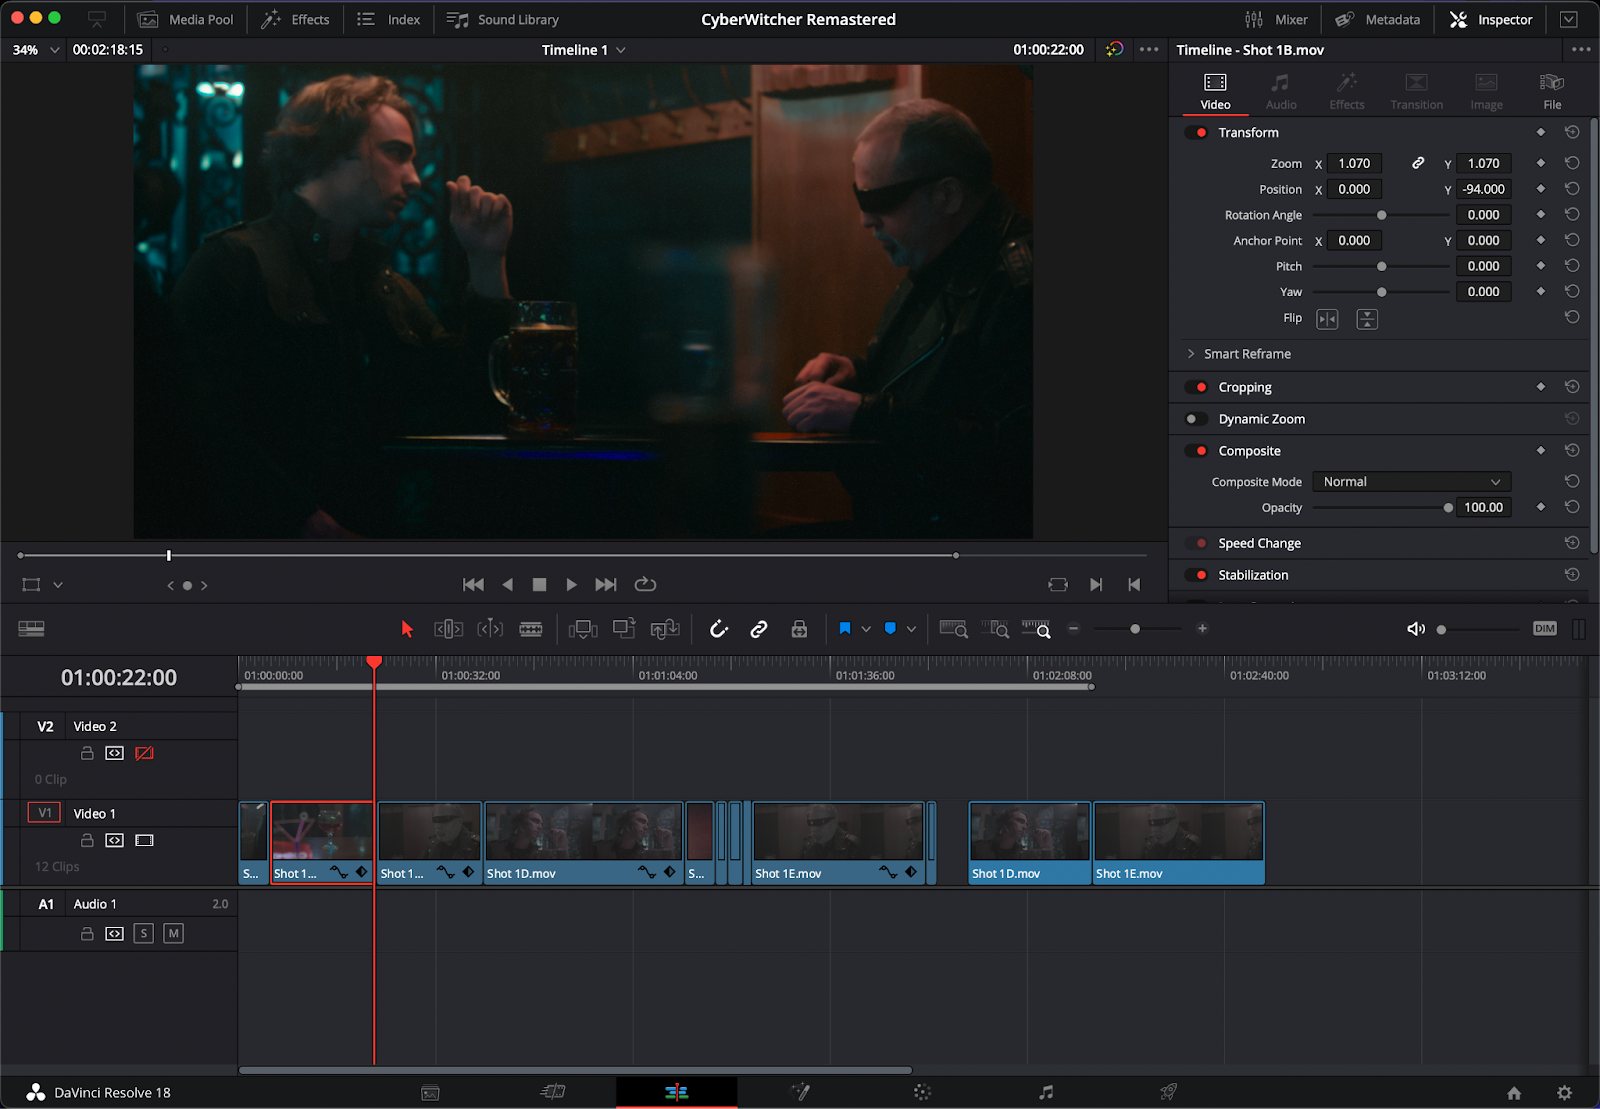
- Open Inspector: With your clip selected, open the Inspector (top right corner).
- Find Stabilization Section: Scroll down to the Stabilization area in the Inspector.
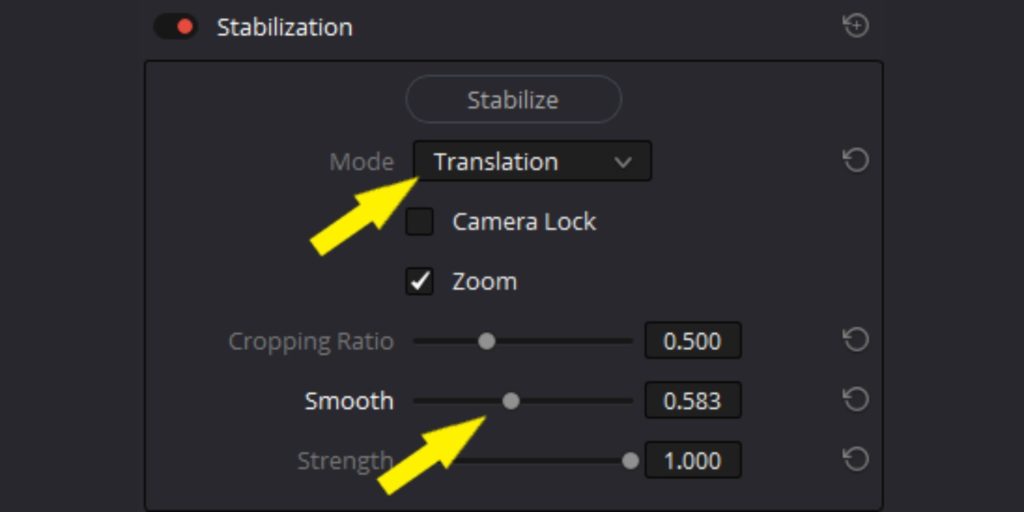
- Choose Stabilization Mode:
- Perspective (corrects complex motion)
- Similarity (for simple shakes)
- Translation (least aggressive)
- Click “Stabilize”: Hit the Stabilize button. DaVinci Resolve will analyze your clip and apply the effect.
Here’s a quick comparison of the three stabilization modes:
| Mode | Best For | Stability Level |
|---|---|---|
| Perspective | Complex/3D movement | High |
| Similarity | Simple handheld shakes | Medium |
| Translation | Minor jitters | Low |
Credit: www.simonsaysai.com
Pro Tips For Better Stabilization
- Trim Your Clip First: Stabilization works best on short, trimmed clips.
- Watch for Cropping: The software may zoom in to hide edges. If too much is cropped, try a less aggressive mode.
- Preview Before Export: Always check the result. Sometimes, over-stabilization creates a “wobbly” look.
Here’s how stabilization can affect your final video:
| Before Stabilizer | After Stabilizer |
|---|---|
| Visible shakes and jitters | Smoother, steady motion |
| Distraction for viewers | Professional appearance |
Two common mistakes are stabilizing very long clips (which slows down your workflow) and not previewing the result. If the footage looks strange, undo and try a different mode.
Exporting Your Stabilized Clip
Once you’re happy, go to the Deliver page, choose your export settings, and render your video. DaVinci Resolve supports common formats like MP4, MOV, and others.
Credit: motionarray.com
Final Thoughts
Adding a camera stabilizer in DaVinci Resolve is a fast way to improve video quality. With just a few clicks, you can make your handheld shots look almost like they were filmed on a tripod. Try different modes and settings to see what works best for your footage. For more details about DaVinci Resolve’s features, visit the official Wikipedia page.
Frequently Asked Questions
How Do I Undo Stabilization If I Don’t Like The Result?
Go back to the Inspector, uncheck the Stabilization box, or click Reset to remove the effect.
Does Stabilization Reduce Video Quality?
It can crop edges to hide shakes, slightly reducing resolution, but usually the improvement is worth it.
Is Stabilization Available In The Free Version?
Yes, the free version of DaVinci Resolve includes stabilization tools.
Can I Stabilize 4k Or High-resolution Footage?
Absolutely. DaVinci Resolve handles 4K and even higher resolutions.
What If My Video Still Shakes After Stabilizing?
Try a different mode or split the clip into smaller sections for better results.
Credit: borisfx.com