Using camera filters on Instagram can take your photos and videos from ordinary to eye-catching in seconds. Whether you want a vintage feel, vibrant colors, or something playful, Instagram’s filters offer quick ways to enhance your content. Many users miss out on the full potential of these filters, or use them without understanding how they work best.
Knowing how to use camera filters well can help you stand out in a crowded feed and express your personal style.
Table of Contents
Accessing Camera Filters On Instagram
Opening your Instagram app and swiping right brings you to the Instagram Camera. Here, you’ll see a row of filter icons at the bottom of the screen. These are called Effects. You can swipe left or right to scroll through the available options.
To explore more, tap the Browse Effects icon (a magnifying glass). This opens the Effect Gallery, where you can search by categories like Trending, Selfies, or Color & Light. Tap on any effect to try it instantly.
Pro tip: Save your favorite filters by tapping the bookmark icon. This adds them to your main camera screen for quick access next time.
Applying And Customizing Filters
After choosing a filter, you can adjust the intensity. Tap and hold the filter icon—this brings up a slider. Move it left or right to control how strong the effect appears. This is useful if you want a more subtle look or a dramatic change.
You can also combine multiple effects. After capturing a photo or video, swipe left or right on the preview screen to add Instagram’s classic photo filters on top of your camera effect. Some popular choices are Clarendon, Juno, and Lark.
Here’s a quick comparison of three popular Instagram filters and their typical effects:
| Filter Name | Color Tone | Best For |
|---|---|---|
| Clarendon | Cool, bright | Landscapes, selfies |
| Juno | Warm, vivid | Food, portraits |
| Lark | Bright, soft | Outdoor scenes |
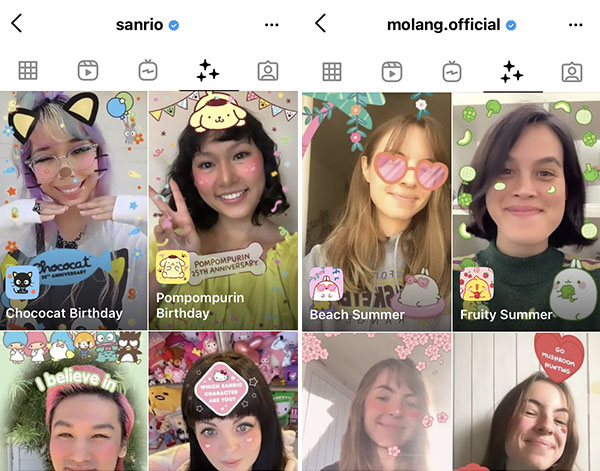
Credit: www.supercutekawaii.com
Tips For Better Results
- Use natural light. Filters look best when your photo is well-lit.
- Avoid over-filtering. Too much effect can make images look fake.
- Experiment with new filters. Instagram adds new effects often.
- Check before posting. View your photo on a different screen if possible to see how it looks to others.
Here’s a quick summary of common filter types and their strengths:
| Type | Main Effect | Common Use |
|---|---|---|
| Color Pop | Boosts colors | Fashion, food |
| Vintage | Fades and warms | Travel, nostalgia |
| Face Effects | AR masks | Stories, selfies |
Two things many beginners miss: First, you can use filters in Instagram Stories and Reels, not just posts. Second, you can create your own custom filters using the Spark AR Studio app, which opens up creative possibilities.
Instagram filters are a fast way to give your content a professional touch. Try different combinations, and don’t be afraid to experiment. The key is to enhance—not hide—your story.
Frequently Asked Questions
How Do I Save A Filter To Use Later?
Tap the filter in the Effect Gallery, then tap the bookmark icon. It will appear on your main camera screen.
Can I Use Filters On Both Photos And Videos?
Yes, almost all filters work on both. Some effects may be video-only.
Are Instagram Filters Free?
All built-in and user-created filters are free to use.
How Do I Find Trending Filters?
Go to the Effect Gallery and check the Trending tab. New effects appear here daily.
Can I Create My Own Instagram Filter?
Yes, with Spark AR Studio. Learn more on the official Spark AR website.

Credit: www.youtube.com