Getting creative with your live streams or recordings often means adding camera filters in OBS Studio. Filters can improve your look, add fun effects, or enhance video quality. If you’re new to OBS, adding these filters might sound tricky. But with the right steps and a little practice, you can easily transform your camera feed and stand out online.
Table of Contents
What Are Camera Filters In Obs?
Camera filters in OBS are digital tools that change how your webcam video looks. They can fix color, blur backgrounds, add logos, or even make you appear in black and white. OBS Studio comes with several built-in filters, and you can add more using plugins. Many streamers use filters for both practical fixes and creative effects.
How To Add Camera Filters In Obs
To add filters, first make sure you have OBS Studio installed and your camera source set up.
1. Select Your Camera Source
In OBS, look at the Sources box. Right-click your camera source (like “Video Capture Device”).
2. Open The Filters Menu
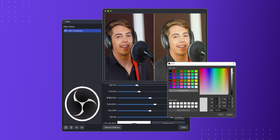
Click on “Filters.” A new window appears with two sections: Audio/Video Filters and Effect Filters.
3. Add A New Filter
Under “Effect Filters,” click the “+” button. Choose a filter, such as Color Correction, Chroma Key, or Sharpen.
4. Adjust Settings
Each filter has its own sliders and options. For example, Color Correction lets you adjust brightness, contrast, and gamma. Experiment until you like the result.
5. Stack Multiple Filters
You can add more than one filter to the same camera. The order matters—move filters up or down to see different effects.
Here’s a quick comparison of popular built-in filters:
| Filter Name | Main Use | Common Scenario |
|---|---|---|
| Color Correction | Fix colors/lighting | Bad room lighting |
| Chroma Key | Green screen removal | Virtual backgrounds |
| Sharpen | Crisper video | Blurry webcam |
Credit: www.streamingvideoprovider.com
Using Plugins For Advanced Filters
OBS supports plugins for more advanced or fun filters. The most popular is StreamFX. This plugin adds blur, 3D effects, and more.
Steps to install a plugin:
- Download from a trusted site like OBS Project.
- Follow the install instructions.
- Restart OBS, then repeat the filter steps above. New filter options will appear.
Here’s a quick look at what you get with and without StreamFX:
| Feature | OBS Only | OBS + StreamFX |
|---|---|---|
| Basic Filters | Yes | Yes |
| Blur Filter | No | Yes |
| 3D Transform | No | Yes |
Practical Tips And Common Mistakes
- Always test filters before going live. Sometimes they slow down your computer if you add too many.
- If a filter doesn’t work, check if your graphics drivers are up to date.
- Not all plugins work with every OBS version. Check compatibility before installing.
Many new users forget to save their scene collection after adding filters. This can lead to lost settings if OBS crashes. Also, remember that strong filters can hurt video quality. Less is often more.
Adding camera filters in OBS can make your stream look professional or just more fun. With a few clicks, you can fix lighting, add backgrounds, or create unique effects.

Credit: www.youtube.com
Frequently Asked Questions
How Do I Remove A Filter In Obs?
Right-click your camera source, open “Filters,” select the filter, and click the “-” button to remove it.
Can I Use Snapchat Or Instagram-style Filters In Obs?
Yes, but you need plugins or third-party tools. OBS doesn’t have these filters built-in.
Does Adding Filters Slow Down Obs?
Some filters use more CPU or GPU. Too many filters, especially with plugins, can reduce performance.
Are Obs Filters Available On Mac And Linux?
Most built-in filters are cross-platform. Some plugins, like StreamFX, may only support Windows.
Where Can I Find More Filters For Obs?
Visit the official OBS resources page for plugins and guides.