Building your own camera gimbal can help you capture smooth, professional-looking videos without spending hundreds on commercial models. With a bit of patience and some basic tools, you can design a gimbal that matches your filming needs. Whether you’re a beginner or a hands-on videographer, this guide will show you how to make your own camera gimbal from scratch.
Table of Contents
What Is A Camera Gimbal?
A camera gimbal is a device that keeps your camera stable while you move. It uses pivoted supports and sometimes motors to balance your camera, even if your hands shake or you walk around. Gimbals are popular for vlogging, filmmaking, and action shots.
Key Materials And Tools Needed
You don’t need expensive parts to make a DIY gimbal. Here are the essentials:
- Aluminum or plastic frame (lightweight, sturdy)
- Brushless motors (3 units for 3-axis stabilization)
- Gimbal controller board (like the SimpleBGC)
- Battery pack (LiPo recommended)
- Ball bearings
- Screws and nuts
- Hand grip or handle
- Basic tools: Screwdriver, drill, soldering kit
Choosing the right motors is important. Look for motors with at least 80-100g/cm torque for mirrorless or DSLR cameras. Too weak, and the gimbal won’t stabilize properly.
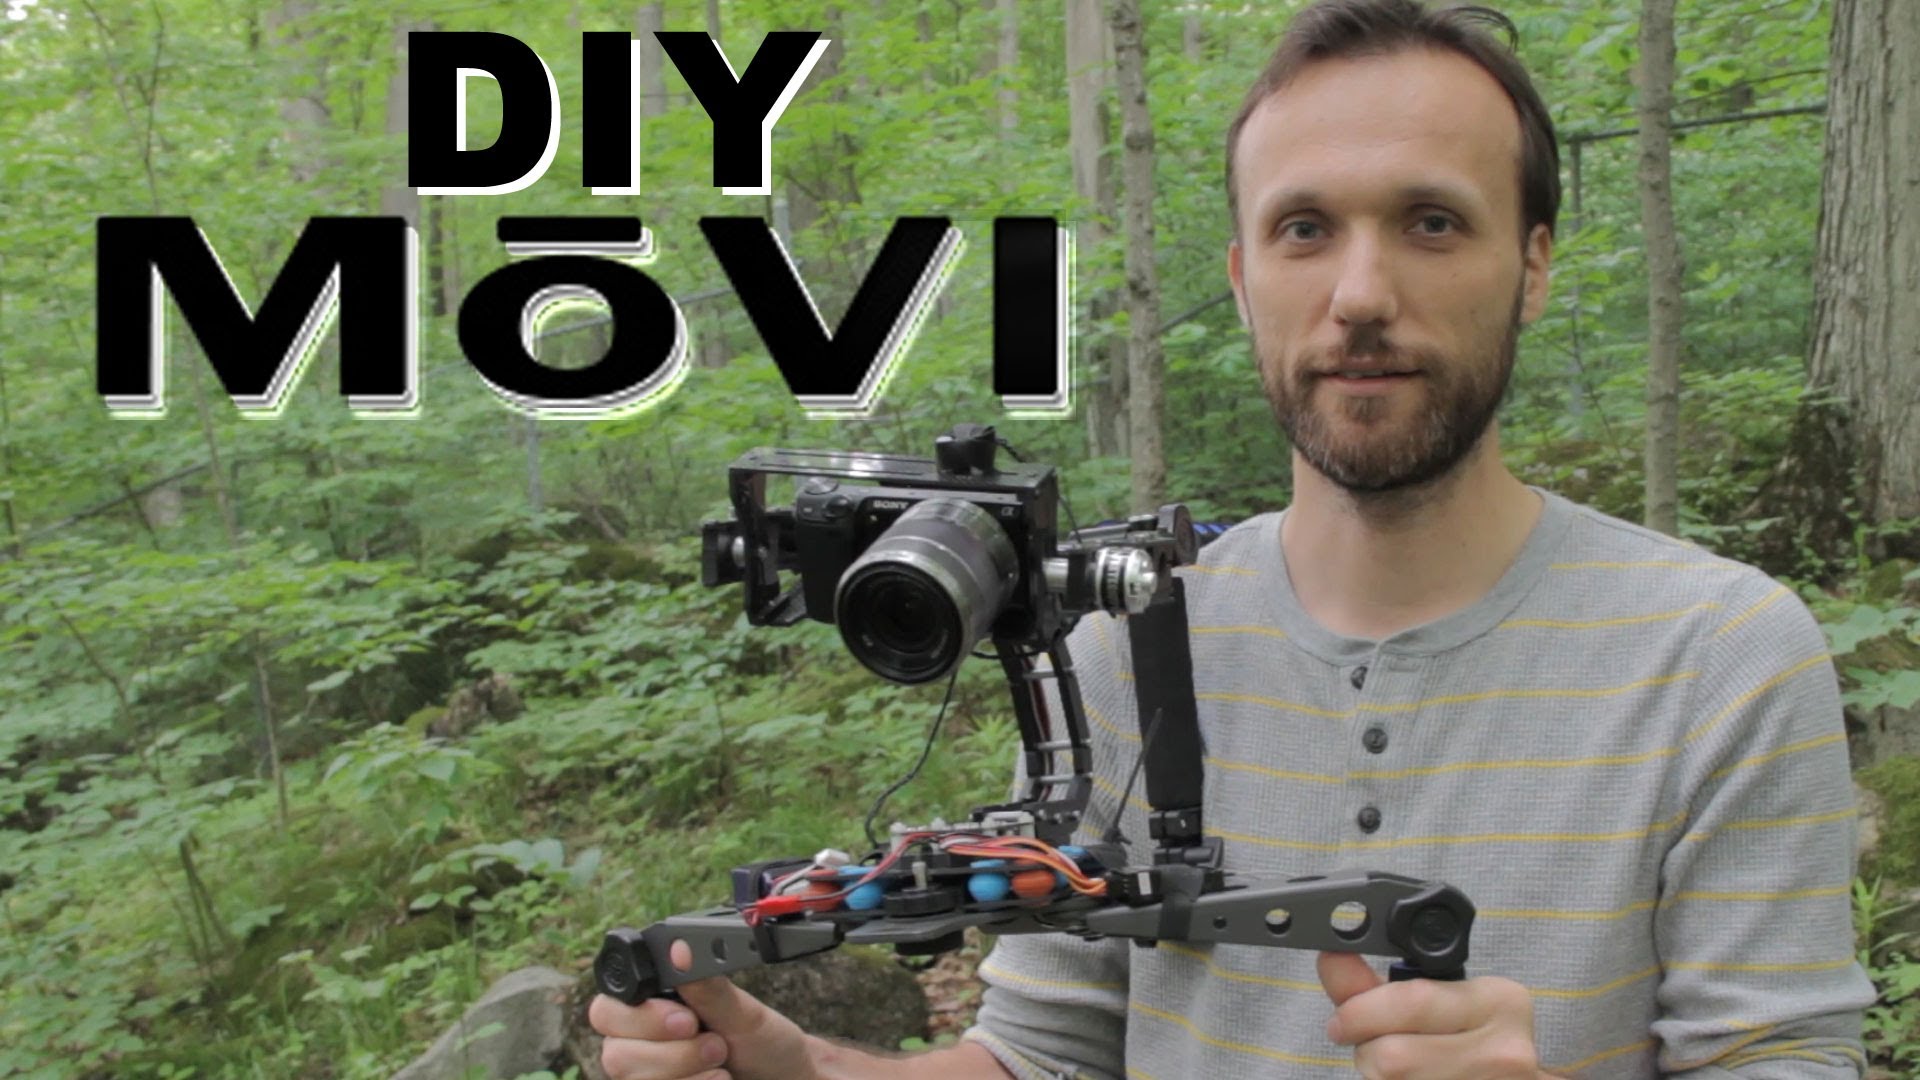
Credit: lensvid.com
Step-by-step Assembly Guide
- Build the frame: Cut the aluminum or plastic to size, and assemble a U-shaped frame. Secure ball bearings at the pivot points for smooth rotation.
- Install motors: Attach one motor on each axis—pan, tilt, and roll. Ensure the motors fit tightly and align with the frame.
- Wiring and electronics: Connect the motors to the controller board. Follow wiring diagrams provided by the controller manufacturer.
- Mount the camera platform: Use screws to secure the camera tray to the roll motor. Test the fit with your camera.
- Balance the gimbal: Before powering up, adjust the camera’s position so it stays level when you let go. Good balance reduces strain on the motors.
- Power up and calibrate: Connect the battery, turn on the controller, and use the software to calibrate each axis. Fine-tune motor settings for best performance.
Here’s a quick look at how a DIY gimbal compares to a commercial one:
| Feature | DIY Gimbal | Commercial Gimbal |
|---|---|---|
| Cost | $80–$150 | $300–$800 |
| Customization | High | Limited |
| Setup Time | 3–5 hours | Ready to use |
Practical Tips For Success
- Test with different cameras to ensure your gimbal can handle the weight.
- Use thread locker on screws to prevent loosening from vibrations.
- Watch for overheating motors—a sign of poor balance or heavy camera.
- Regularly check connections and calibrate for best results.
Many beginners miss the importance of balancing before calibration. Skipping this step often leads to jerky movement and motor burnout. Also, using a lightweight battery can reduce arm fatigue during long shoots.

Credit: www.youtube.com
Frequently Asked Questions
How Much Does It Cost To Build A Camera Gimbal?
Most DIY camera gimbals cost between $80 and $150 depending on materials and camera size.
Can I Use 2 Motors Instead Of 3?
You can, but 3-axis gimbals offer much better stabilization, especially for walking shots.
What Cameras Are Compatible With Diy Gimbals?
Most mirrorless, action, and small DSLR cameras work well. Heavier cameras may need stronger motors.
Is Soldering Always Required?
For most motor and controller connections, soldering gives stronger, safer joints.
Where Can I Learn More About Gimbal Calibration?
Check out the official gimbal Wikipedia page for detailed info and further resources.
Building your own camera gimbal is a rewarding project that teaches both electronics and mechanics. With careful setup and calibration, you’ll capture steady, cinematic footage—no expensive gear needed.