Installing a PoE camera is a straightforward task. First, connect the camera to the network.
Then, ensure it receives power through the Ethernet cable. PoE cameras simplify surveillance with a single cable for power and data. Many homeowners and businesses choose them for easy setup and reliability. Understanding how to install a PoE camera can enhance security without complex wiring.
This guide will walk you through the process, ensuring your camera functions efficiently. Whether you’re tech-savvy or a beginner, following these steps will make installation hassle-free. You’ll gain insights on positioning, wiring, and configuration. By the end, you’ll have a clear view of your surroundings. Let’s dive into the world of PoE cameras and secure your space with ease.
Credit: planetechusa.com
Table of Contents
Choosing The Right Poe Camera
Many types of Poe cameras exist today. Dome cameras are small and round. They fit well in small spaces. Bullet cameras are long and easy to notice. They are best for big areas. Turret cameras have a round head. They can move and look in different directions. PTZ cameras can pan, tilt, and zoom. They are great for large, open spaces.
Think about the area you need to cover. A big area needs a PTZ camera. Small areas do well with dome cameras. Check for night vision. Some cameras see in the dark. Weatherproof cameras are best for outside use. Look at the camera resolution. Higher resolution gives clearer pictures. Budget is key too. Pick a camera that fits your budget.
Gathering Necessary Tools
Start with a PoE camera and a PoE switch. Ensure you have an Ethernet cable. The cable connects the camera to the switch. The switch powers the camera. Have a computer or laptop ready. This device helps to set up and monitor the camera. Use a screwdriver for mounting. A drill may be needed for tough walls.
Consider a surge protector. This protects your equipment from power surges. A camera mount is helpful. It secures the camera in place. Use cable clips to organize wires. A ladder is useful for high placements. Keep a level tool handy. It ensures the camera is straight.
Preparing The Installation Site
Choose a spot where the camera can see clearly. Avoid corners and blocked views. Check for nearby power sources and network connections. Make sure the camera is safe from rain and snow. A high spot gives a better view. But, it must be easy to reach for maintenance.
Wear safety gear like gloves and goggles. Keep a stable ladder if needed. Make sure the area is dry and safe. Watch out for wires and cables. Avoid touching electric parts. Tell someone where you are working. Always be careful and alert. Safety first!

Credit: www.youtube.com
Setting Up Network Connection
Start by connecting the Poe switch to the power source. Plug in the network cable from the switch to the router. Make sure the switch is powered on and all lights are flashing. These lights show that the switch is working. Connect the Poe camera to the switch using another cable. The camera should also be powered on.
Check if the network settings on the router match the camera. Both should be on the same network range. If not, adjust the settings in the router to match. This helps the camera connect smoothly. Ensure the camera and switch are compatible with each other. Check the user manual for details on compatibility. If both devices are compatible, the camera should work well.
Mounting The Poe Camera
Different mounting options are available for your Poe camera. Wall mounts are common and easy to use. Ceiling mounts give a higher view and cover more area. Choose a mount that fits your space and needs. Make sure it’s sturdy and can hold the camera’s weight. Always follow the instructions for the mount. Proper mounting ensures better camera performance.
Once the mount is ready, attach the camera securely. Use screws and brackets to fix it in place. Ensure all parts are tight and firm. A loose camera can fall and get damaged. Point the camera in the right direction for best coverage. Test the camera after securing it. Make sure it is stable and working well.
Connecting Camera To Network
Installing a PoE camera involves connecting it directly to a network using an Ethernet cable. This cable provides both data and power, eliminating the need for separate power sources. Make sure your network switch or injector supports Power over Ethernet to ensure proper functionality.
Wiring Poe Connections
Connect the camera using Ethernet cables. Ensure cables are securely attached. Use Poe ports for power and data. Double-check connections for tightness. Poe makes wiring simple and clean. No need for extra power sources. This helps in reducing clutter.
Testing Connectivity
Verify the camera connection. Use your computer or network device. Check if the camera lights up. Ensure the camera is visible on the network. Test by accessing the camera’s IP address. See if you can view the feed. A successful test means proper connectivity.
Configuring Camera Settings
Make sure the image is clear. Open the camera’s settings menu. Find the image quality section. Set the resolution to high. This makes the picture sharper. Adjust the brightness and contrast too. It helps in low light. Remember, lower resolution saves space. But high resolution shows more detail. Check the focus settings. Keep the image clear. It is important.
Alerts tell you if something happens. They keep you informed. Go to the alert settings in the menu. Turn on motion alerts. Choose the areas to watch. These are zones. Select a sound for the alert. It should be loud. Set the sensitivity level. Not too high or low. Test the alerts after setting up. Ensure they work. Stay safe and aware.

Credit: www.techage.com
Troubleshooting Common Issues
Poe cameras sometimes face connectivity problems. First, check the network cables. They should be securely connected. Next, ensure the router is working. Restart the router if needed. Verify the camera’s IP address. It should match the network settings. Update the camera’s firmware for better performance. Use the camera’s app to check for updates. If issues persist, contact technical support.
Image quality can degrade for several reasons. Clean the camera lens with a soft cloth. Check the camera’s resolution settings. Adjust them for clearer images. Ensure there is enough lighting in the area. Poor lighting affects image clarity. Adjust the camera’s focus settings if images are blurry. For night vision problems, ensure the infrared lights are working. Regular maintenance can help avoid quality issues.
Frequently Asked Questions
How Do You Hook Up A Poe Camera?
Connect the PoE camera to the PoE switch using an Ethernet cable. Ensure the switch is plugged into power. Link the switch to your router. Access the camera’s IP address via a web browser to configure settings. Ensure all devices are on the same network for seamless operation.
Are Poe Cameras Easy To Install?
Yes, PoE cameras are easy to install. They use a single Ethernet cable for power and data. This simplifies setup, reducing the need for multiple cables. Most come with user-friendly instructions. Basic technical skills are sufficient for installation, making them ideal for DIY enthusiasts.
Can I Connect Poe Camera Directly To Router?
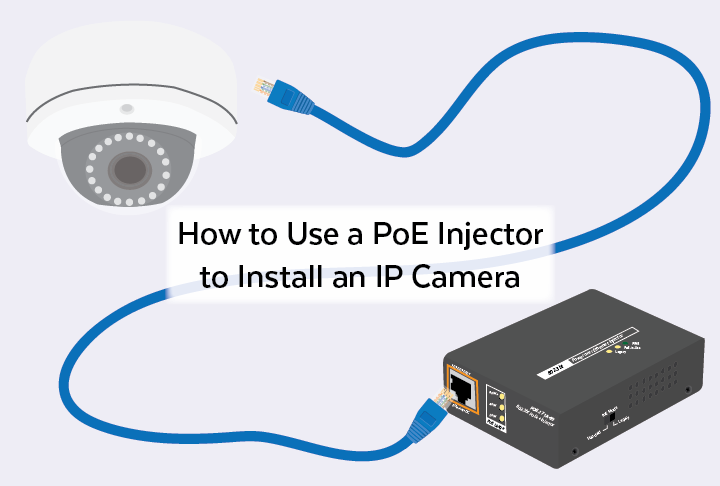
Yes, you can connect a PoE camera directly to a router, but ensure it supports PoE. Use a PoE injector or switch if the router lacks PoE capabilities. This setup allows easy network connection and power supply through a single Ethernet cable, simplifying installation and reducing clutter.
What Do I Need To Run A Poe Camera?
To run a PoE camera, you need a PoE switch or injector, Ethernet cables, and a compatible NVR or computer. Ensure the camera and network support PoE standards for seamless connectivity and power supply.
Conclusion
Installing a PoE camera can seem tricky at first. With these steps, it’s straightforward. Power over Ethernet simplifies the setup. No separate power cables needed. Just connect the camera to the network. Check connections for stability. Ensure the network switch is PoE compatible.
Test the camera once installed. Adjust angles for the best view. Regular maintenance keeps the system running smoothly. Follow manufacturer guidelines for updates. Now, enjoy a safer environment with your new PoE camera. Keep learning. Enhance your skills. Happy monitoring!