To shoot a portrait on a tripod, start with setting it up properly. Adjust the height, angle, and ensure stability.
A tripod is your best friend in photography. It helps capture sharp and consistent portraits. Whether you are a beginner or an expert, using a tripod can significantly enhance your portrait shots. It reduces camera shake and allows precise composition.
Tripods also help in experimenting with different angles and lighting. This guide will walk you through the steps to shoot stunning portraits using a tripod. You’ll learn how to choose the right tripod, set it up, and optimize your camera settings. Get ready to elevate your portrait photography skills with these simple yet effective tips.
Table of Contents
Choosing The Right Tripod
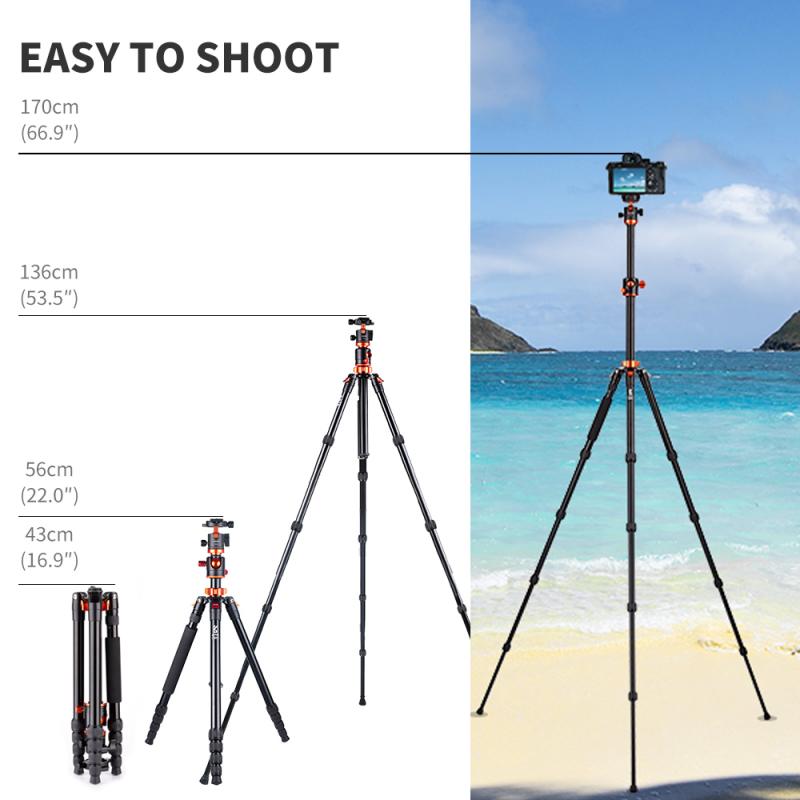
Tripods come in different sizes. Some are tall, others are short. Lightweight tripods are easy to carry. Heavy tripods are strong and stable. Mini tripods fit in bags and travel tripods are perfect for trips. Flexible tripods can bend and hold on trees. Tall tripods help in shooting high places. Each tripod has its own advantages. Choose the one that fits your need.
Portraits need a steady tripod. Adjustable legs help in uneven ground. Quick release lets you change cameras fast. Ball heads allow smooth movements. Bubble levels ensure straight shots. Center columns add height. Rubber feet keep the tripod still. Look for these features when buying a tripod. A good tripod makes your portraits look amazing.
Setting Up Your Tripod
Positioning for Stability: Place the tripod on a flat surface. This helps keep it stable. Spread the legs wide for better balance. Use the spirit level if available. Check that the tripod is not wobbling. It should be firm and steady.
Adjusting Height and Angles: Start by setting the height to your eye level. This helps in getting the right angle. Adjust the center column if needed. Make sure the camera is not tilted. Use the head of the tripod for minor angle changes. Tighten knobs to keep the camera secure.
Camera Settings For Portraits
Choose a wide aperture for portraits. This makes the background blurry. A common choice is f/2.8 or f/4. This setting lets in more light. It helps focus on the person. Shutter speed also matters. A faster shutter speed can freeze motion. Try 1/125 or 1/250. These settings help keep the image sharp.
ISO affects photo brightness. Use low ISO for bright places. ISO 100 or 200 is good. It keeps photos clear. In darker spots, increase ISO carefully. High ISO can make photos grainy. Try ISO 400 or 800 indoors. Balance is key for the best shot.

Credit: digital-photography-school.com
Lighting Techniques
Natural light is free and easy to use. It makes photos look warm. You can use the sun or daylight through a window. Artificial light is from lamps or flashes. It helps indoors and at night. You can control its brightness and color. Both types have their own beauty. Mixing them can create special effects. Always check where the light comes from. This helps in making your portrait look nice.
Reflectors bounce light onto the subject. They make shadows softer. You can use white, silver, or gold reflectors. Each gives a different effect. Diffusers spread light evenly. They make the light soft and smooth. You can use them on windows or lamps. Both tools help in controlling light. They are easy to carry and use. They make portraits look professional.
Framing Your Subject
The Rule of Thirds helps make photos look balanced. Imagine your frame split into three parts. Both horizontally and vertically. Place your subject where the lines meet. This makes the photo more interesting. It draws eyes to the main part. Try moving your camera or tripod a little. See how the picture changes. Practice this with different angles. It can be fun!
Creative composition makes portraits unique. Use leading lines to guide the eyes. These are lines that point to your subject. Look for things like roads or fences. Try different angles with your tripod. Find the best spot for your picture. Change the background sometimes. This can add a nice touch. Experimenting brings creativity. Each photo can tell a story.

Credit: www.digitalphotomentor.com
Capturing Expressions
Directing a subject is important in photography. Guide them gently. Smile or serious looks change a photo. Use simple words. Tell them where to look. Eyes can tell a story. Hands can show emotion. Position matters. Stand or sit, it makes a difference.
Candid shots are natural. They capture real emotions. They happen without planning. Posed shots are arranged. They look neat. Each has its charm. Choose based on mood. Both styles are beautiful. One is relaxed. The other is formal. Mix them for variety.
Editing And Post-processing
Basic Adjustments help make photos look better. Adjust brightness to make it clear. Change contrast to show differences in light and dark. Fix colors to make them look real. You can crop to focus on the face. Rotate the picture to keep it straight. These changes help the photo look nice.
Enhancing Details brings out small parts of the photo. Sharpening makes lines clear and sharp. You can add texture to show skin details. Adjust clarity to make the picture crisp. Noise reduction helps remove dots or spots. It makes the photo smooth. Make sure the picture looks real and nice.
Tips For Perfect Portraits
A good background makes your portrait stand out. Look for simple and clean places. A busy background can distract from your subject. Green trees or plain walls work well. Keep the background far from your subject. This makes your subject pop. Use colors that match your subject’s clothes. This adds harmony to your picture.
Different angles can change your portrait’s feel. Try moving the tripod up or down. Capture your subject from above for a unique look. Shoot from the side for more depth. Ask your subject to tilt their head. This can add interest to the photo. Always remember to keep the camera steady on the tripod.
Credit: www.kentfaith.co.uk
Frequently Asked Questions
Should You Use A Tripod For Portraits?
Using a tripod for portraits ensures stability and sharp images. It allows precise composition and control over angles. Tripods are helpful for low-light conditions, long exposures, and consistent framing. They support advanced techniques like HDR and panoramic shots, enhancing the overall quality of portrait photography.
What Height Tripod For Portrait Photography?
A tripod height of 5 to 6 feet is ideal for portrait photography. This allows flexibility in camera positioning. Ensure the tripod is sturdy and adjustable for different angles. Using a tripod enhances stability and sharpness in portrait shots.
How To Mount Camera On Tripod Portrait?
To mount a camera on a tripod in portrait mode, adjust the tripod head to a vertical position. Secure the camera using the quick release plate. Ensure the camera is tightly fastened. Double-check stability to prevent any accidental falls. Adjust the angle as needed for the perfect shot.
At What Shutter Speed Should You Start Using A Tripod?
Start using a tripod at shutter speeds slower than 1/60 seconds to avoid camera shake. Tripods ensure sharp images in low light or long exposure photography. Stability is crucial for capturing clear photos, especially with slower shutter speeds.
Conclusion
Capturing portraits on a tripod offers stunning results. Stability improves photo quality. Experiment with angles and lighting. Try different tripod heights. Adjust camera settings for best outcomes. Patience is key in portrait photography. Practice makes perfect. Use a tripod for sharper images.
Explore your creativity with new techniques. Keep learning and enjoy the process. Portrait photography can be fun and rewarding. Share your photos and see the difference. You’ll capture memorable moments with ease. Happy shooting!