Building a wooden tripod is simpler than you might think. With the right tools and a bit of patience, you can create a sturdy support for cameras or telescopes.
This guide will walk you through the essential steps to construct a wooden tripod at home. A wooden tripod offers several advantages. It’s durable, customizable, and has a classic look. You can tailor it to your specific needs, ensuring it fits your equipment perfectly.
Unlike store-bought versions, a homemade tripod allows for personal touches and adjustments. It’s a rewarding DIY project that combines creativity with practicality. Whether you’re an amateur photographer or a stargazer, having a reliable tripod enhances your experience. Let’s dive into the process of building a wooden tripod that meets your needs and style.

Credit: www.reddit.com
Table of Contents
Introduction To Wooden Tripods
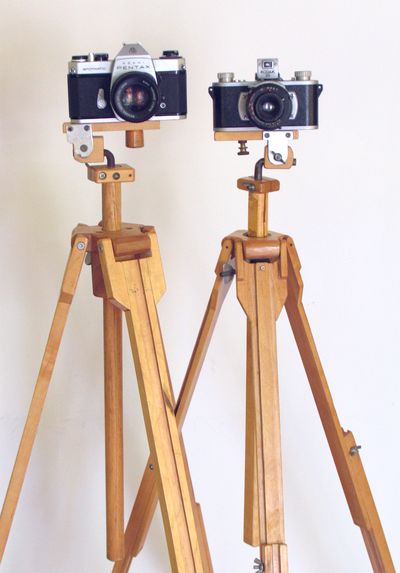
Wooden tripods are strong and stable. They give a classic look to your photography setup. Wood absorbs vibrations well. This makes photos less blurry. Many photographers love using wooden tripods. They feel natural and warm to touch. These tripods can be heavy. But they offer good support for cameras. Long-lasting and durable. They also fit well with outdoor settings. Wooden tripods can be a great choice for many.
Wooden tripods reduce camera shake. They are stable in windy conditions. This helps to take sharp pictures. Wood is eco-friendly. It is a renewable resource. Using wood helps the environment. Wooden tripods are often handcrafted. This means they have unique designs. They can be a beautiful part of your gear. Easy to repair if broken. Many find them elegant and timeless.
| Material | Purpose |
|---|---|
| Wood | Base and legs |
| Screws | Hold parts together |
| Glue | Secure joints |
| Sandpaper | Smooth surfaces |
| Varnish | Protect wood |
| Drill | Make holes |
Choosing The Right Wood
Different woods work well for tripods. Oak is strong and durable. Pine is light and easy to cut. Cherry is smooth and pretty. Each wood has special features. Choose based on what you need. Oak is great for heavy cameras. Pine is good for a light tripod. Cherry adds beauty to your project.
Wood quality affects your tripod. Straight grain is best for strength. Avoid wood with knots. Knots can make the wood weak. Dry wood is better than wet wood. Wet wood can bend or break. Check for cracks before buying. Cracks weaken the wood. Good quality wood lasts longer. It keeps your tripod sturdy.
Essential Tools For Construction
Building a wooden tripod needs some basic hand tools. A hammer is useful for nails. It helps keep parts together. Use a screwdriver for screws. It makes parts tight. A measuring tape checks length. Parts must be the right size. A saw cuts wood. It creates the tripod’s shape. A chisel shapes wood. It helps in making joints. These tools are easy to find. They are simple to use. Each tool has a purpose. They work well together.
Power tools make work fast. A drill creates holes. It fits screws and bolts. Use a power saw for big cuts. It saves time. A sander smooths wood. It makes surfaces nice. Power tools need care. Use them safely. They are strong and loud. Keep cords away from water. Wear safety gear. Eye protection is important. Gloves keep hands safe.
Cutting And Preparing Wood
First, gather your tools. You’ll need a ruler and a pencil. Measure the length of the wood pieces. Mark them carefully. Use a straight edge for clean lines. Accurate marks mean fewer mistakes later. Measure twice. Cut once.
Choose a saw. A handsaw or electric saw works well. Safety first! Wear gloves. Hold the wood firm. Begin with slow strokes. Keep the saw steady. Follow the marks closely. Smooth edges are important. They help fit the tripod parts. Sand the edges if needed.
Assembling The Legs
Crafting the tripod’s legs involves attaching three wooden pieces together. Each piece should be cut to the same length. Secure them using screws for stability.
Joining Techniques
Start with cutting the wooden pieces to the same length. Use a saw for this. Each leg needs to be strong and equal. Drill holes at the top of each leg. Make sure they are in the same spot. This helps in joining them together.
Securing The Structure
Use screws to join the legs. Place the screws through the drilled holes. Tighten the screws with a screwdriver. Make sure the legs don’t move. Check each joint carefully. The legs should stand firm. This ensures the tripod is safe to use. A firm base is important.
Creating The Tripod Head
Crafting the tripod head is a key step in building a sturdy wooden tripod. Cut and shape the wood pieces carefully for a smooth connection. Use screws to secure the joints firmly, ensuring stability for the tripod’s upper part.
Design Options
Choosing the right design for the tripod head is crucial. There are various designs available. Ball heads allow smooth movement. Pan-tilt heads offer precise control. Fluid heads are great for video work. Each type serves a different purpose. Consider what you need most. Think about the size and weight. Ensure it can hold your camera safely. Simplicity is key for beginners. Start with a basic design. You can upgrade later if needed.
Attachment Methods
Attaching the head to the legs is important. Screws are a common method. They provide strong support. Bolts can be used for heavy cameras. Clamps are quick and easy. Each method has pros and cons. Screws are more secure but take time. Clamps save time but may slip. Choose the best method for your needs. Make sure everything is tight. Loose parts can cause problems. Safety comes first.
Finishing Touches
Crafting the perfect wooden tripod involves careful attention to finishing touches. Sanding surfaces smooth and applying varnish ensures durability and enhances aesthetics. These final steps bring out the natural beauty of the wood, making the tripod not just functional, but a piece of art.
Sanding And Smoothing
Start with coarse sandpaper. Rub the wood gently. Remove rough spots and splinters. Switch to finer sandpaper. Smooth the wood further. Feel the surface with your hand. It should be soft and even. Sanding helps the wood look clean. It makes the tripod safe to use. Take your time. Sand carefully and evenly. Enjoy the process.
Applying Finish
Choose a wood finish. Options include varnish, oil, or wax. Each gives a different look. Use a brush or cloth. Apply the finish in thin layers. Let each layer dry. Add more layers for a shiny look. Protect the wood from scratches and spills. A good finish helps the tripod last longer. Make sure to cover all surfaces. Don’t rush this step. The finish adds beauty and durability.

Credit: www.youtube.com
Testing And Adjustments
Testing and adjustments ensure your wooden tripod is steady and functional. Check each joint for stability and tighten loose screws. Adjust the legs for balance on uneven surfaces, ensuring reliable support for your equipment.
Stability Checks
Check the tripod’s legs for firmness. They should not wobble. If they do, tighten the screws. Make sure the tripod stands straight. Use a level tool if needed. Place it on different surfaces. Test on grass, wood, and tiles. The tripod should stay steady. If not, adjust the leg angles. This keeps the tripod from tipping over. Safe tripods hold cameras well. Ensure no part feels loose. Tighten any weak joints. A stable tripod makes taking photos easy.
Fine-tuning Height
Measure each leg to check the height. All legs should be equal. Adjust if one is longer. Use the locking mechanism. It must hold the leg in place. Ensure each section stays firm. Practice changing the height quickly. This helps in different shooting situations. Try using the tripod at low and high levels. Adjusting height gives more creative options. A well-adjusted tripod helps take better pictures.
Maintenance Tips
Creating a sturdy wooden tripod involves selecting quality wood, precise measurements, and careful assembly. Regularly check for loose joints and tighten screws to ensure stability. Apply a protective finish to guard against moisture and enhance durability.
Cleaning And Care
Dust gathers fast on wooden tripods. Wipe the tripod with a soft cloth. Avoid using water. Water can harm wood. Use wood cleaner if needed. Check joints often. Tighten screws if loose. Oil the wood sometimes. This keeps it smooth. Store in a dry place. Moisture can warp the wood.
Repair Suggestions
Wood can crack. Glue helps fix cracks. Sand rough spots gently. Replace broken parts with new wood. Check metal parts. Rust can damage them. Use rust remover if needed. Keep spare parts handy. Learn basic repair skills. Seek help for big repairs.
Credit: woodgears.ca
Frequently Asked Questions
How Do You Make A Homemade Tripod?
Create a homemade tripod by using sturdy sticks or PVC pipes. Secure them with tape or rope. Attach a camera mount on top using screws or strong adhesive. Ensure stability by spreading the legs wide. Adjust height by cutting the sticks or pipes to desired length.
What Are The Three Parts Of A Tripod?
A tripod consists of three main parts: the legs, the head, and the center column. The legs provide stability and height adjustment. The head allows for camera movement and positioning. The center column offers extra height and flexibility for various shooting angles.
How Do You Tie A Wooden Tripod?
Use a sturdy rope to secure the wooden tripod legs. Wrap it tightly around the top joint. Knot the rope firmly, ensuring stability. Adjust the tension for balance. Check for any wobble and tighten as necessary. Ensure the tripod stands securely before use.
How To Make A Bbq Tripod?
Gather three sturdy metal rods and bind them together at one end. Spread the legs to form a stable tripod. Attach a hook or chain to the top for hanging your grill or pot. Ensure the structure stands firm on the ground.
Enjoy your homemade BBQ tripod!
Conclusion
Building a wooden tripod can be a rewarding project. With basic tools and patience, you create something useful. A wooden tripod offers stability and charm. Perfect for photography or supporting gear. Always ensure your measurements are precise. Double-check connections for sturdiness.
Sand edges for a smooth finish. Wood choice matters for durability. Follow steps carefully for best results. This DIY task enhances skills and creativity. Enjoy the process and your new tripod. Proudly display your handiwork. Ready for your next adventure or project.
Craftsmanship meets functionality. You’ve got this.