Table of Contents
Why You Need To Mount Your Camera Vertically On A Tripod
Many photographers focus on horizontal shots, but sometimes the best composition is vertical. Think about tall buildings, grand trees, or portraits where you want to capture the full height of your subject. Mounting your camera vertically, also known as shooting in “portrait mode,” can dramatically change the feel and impact of your images.
However, simply tilting your camera isn’t always the best solution. This is where mounting your camera vertically on a tripod comes in. It’s a technique that offers stability and creative control, helping you achieve professional-looking results.
This guide will walk you through why and how to mount your camera vertically on a tripod. We’ll cover the different methods, the gear you might need, and some tips to make the process smooth and effective. Getting this right means sharper images, better framing, and more creative freedom for your photography.
Understanding Vertical Mounting
When we talk about mounting a camera vertically, we mean orienting the camera so its longest dimension is parallel to the ground, and its shortest dimension is pointing up and down. This is the opposite of the standard landscape (horizontal) orientation.
Many modern cameras have built-in mechanisms or can be easily adapted to mount this way.
Why Shoot Vertically?
The choice between horizontal and vertical orientation often comes down to the subject matter and the story you want to tell. Vertical compositions naturally draw the viewer’s eye up and down, emphasizing height, scale, and vertical lines.
- Portraits: Capturing a person from head to toe is often best done vertically. It allows for more negative space above or below the subject, creating a sense of presence.
- Architecture: Tall buildings, towers, and monuments gain a sense of grandeur and scale when shot vertically. It helps emphasize their height and lines.
- Nature: Tall trees, waterfalls, or expansive landscapes with a strong vertical element can be powerfully represented in portrait mode.
- Storytelling: Sometimes, a vertical frame simply fits the narrative better, guiding the viewer’s eye through the scene in a specific way.
The Problem With Just Tilting
You might be tempted to just tilt your camera sideways on a standard tripod head. While this works for quick snapshots, it often leads to problems for serious photography. The camera’s weight distribution can become unbalanced, making it harder to keep steady.
Also, the viewfinder or LCD screen might be at an awkward angle, and it can be difficult to adjust settings precisely. Most importantly, tilting can lead to less stable shots, especially in windy conditions or with heavy lenses.

Credit: www.youtube.com
Methods For Vertical Camera Mounting
There are several ways to mount your camera vertically on a tripod. The best method for you will depend on your camera, tripod head, and budget.
Method 1: Using Your Tripod Head’s Features
Some advanced tripod heads are designed with vertical mounting in mind.
Ball Heads With A Notch
Many ball heads have a drop notch. This is a V-shaped or U-shaped slot on the side of the ball head’s mounting platform. You can loosen the ball, rotate the camera 90 degrees, and then place the camera’s L-bracket (explained below) into the notch. This provides a secure and stable vertical lock.
- Pros: Quick and easy to switch orientations, very stable when using an L-bracket.
- Cons: Not all ball heads have this feature; can be slightly less secure than other methods if not properly tightened.
Pan-tilt Heads (3-way Heads)
These heads have separate controls for panning (left-right), tilting (up-down), and sometimes rotation. Many 3-way heads have a dedicated vertical tilt axis. You can loosen the camera plate, tilt the camera vertically, and then re-tighten.
- Pros: Precise control over camera angle, good stability.
- Cons: Can be slower to adjust than ball heads, bulkier.
Gimbal Heads
Gimbal heads are designed for heavy telephoto lenses. They allow for very smooth and balanced movement in any direction. While not their primary purpose, most gimbal heads can easily accommodate vertical mounting by simply rotating the camera within the gimbal’s cradle.
- Pros: Excellent for heavy setups, very smooth movement.
- Cons: Overkill for smaller cameras and lenses, expensive.
Method 2: Using An L-bracket (vertical Grip)
An L-bracket, also known as a L-plate or vertical grip, is a piece of equipment that attaches to the bottom of your camera. It has two arms that form an “L” shape. One arm attaches to your camera’s tripod socket, and the other arm extends down the side of the camera.
- How it works: You attach the L-bracket to your camera. Then, you mount the L-bracket onto your tripod head. To go vertical, you simply loosen your tripod head and rotate the camera on the L-bracket’s side arm. The L-bracket keeps the camera’s center of gravity directly over the tripod’s center, ensuring maximum stability. Many L-brackets are arca-swiss compatible, meaning they fit most standard tripod quick-release plates.
- Pros: Extremely stable, keeps the camera balanced, allows quick switching between horizontal and vertical, maintains access to ports and battery.
- Cons: An extra purchase, can add some bulk.
A good L-bracket is a worthwhile investment for serious photographers who shoot both horizontally and vertically. For example, brands like Really Right Stuff and Peak Design offer high-quality L-brackets specifically designed for popular camera models.
Method 3: Using A Panoramic Head (less Common For Vertical)
While panoramic heads are primarily for creating 360-degree photos, some can be adapted for vertical shooting. However, this is generally not the most efficient or stable method for simple vertical mounting.
Method 4: The Camera’s Built-in Grip (for Some Dslrs/mirrorless)
Some professional DSLRs and mirrorless cameras come with an integrated vertical grip. This grip adds extra battery power and often includes duplicate controls (shutter button, dials) for shooting in portrait mode. When using a camera with a built-in vertical grip, you mount the camera directly onto the tripod head via the grip. The grip usually has its own tripod socket.
- Pros: All-in-one solution, convenient controls.
- Cons: Only available on specific camera models, adds significant weight and bulk.
Gear You Might Need
To mount your camera vertically effectively, you might need a few specific pieces of gear.
Tripod Head Considerations
Your tripod head is the most crucial component.
- Ball Head: A good ball head with a drop notch is ideal. Look for one that can support the weight of your camera and lens securely. Brands like Manfrotto, Gitzo, and Really Right Stuff offer excellent options.
- 3-Way Pan-Tilt Head: If you prefer precise control and don’t mind a slower setup, a 3-way head with vertical tilt capabilities is a solid choice.
The L-bracket: A Smart Investment
As mentioned, an L-bracket is highly recommended for most cameras. It ensures your camera remains balanced over the tripod leg, which is vital for stability.
- Custom vs. Universal: You can buy custom L-brackets made specifically for your camera model. These offer the best fit, ensuring access to all ports and buttons. Universal L-brackets are also available but might not be as perfectly fitted.
- Material: Most L-brackets are made from aluminum alloy or carbon fiber, offering a good balance of strength and weight.
Quick-release Plates
If your tripod head uses a quick-release system (like Arca-Swiss), ensure your L-bracket or camera plate is compatible. This allows you to attach and detach your camera quickly without screwing it in each time.
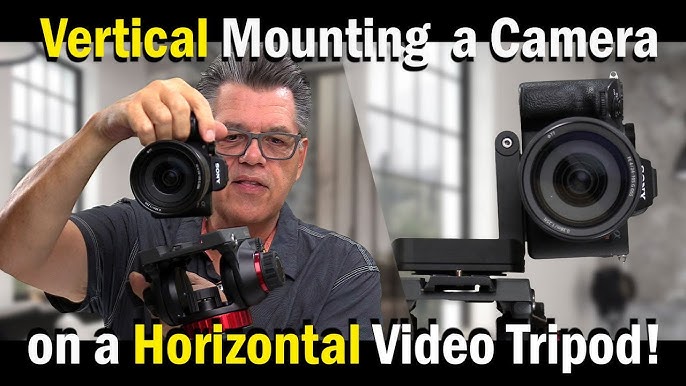
Credit: www.youtube.com
How To Mount Your Camera Vertically
Let’s walk through the process, assuming you’re using an L-bracket and a ball head with a drop notch, as this is