Fixing a broken tripod mount can seem daunting. But it’s often simpler than you think.
A tripod is essential for stable photography and videography. When its mount breaks, it disrupts your creative flow. Understanding the structure of a tripod mount helps in addressing the issue effectively. The mount connects your camera to the tripod, ensuring stability and security.
A broken mount can lead to shaky images or even damage to your camera. This makes fixing it a priority for any photographer. The good news is, many common issues can be resolved with basic tools and a little patience. Whether it’s a loose screw or a cracked plate, solutions are at hand. Let’s explore how you can restore your tripod to perfect working condition.
Table of Contents
Identifying Common Tripod Mount Issues
Loose screws and bolts can make the tripod wobbly. Check the mount area regularly. Tighten any loose screws using a screwdriver. Use a small wrench for bolts. Do not overtighten; it might strip the threads. If screws are damaged, replace them. New screws can be found in hardware stores. Keeping screws tight can make your tripod last longer.
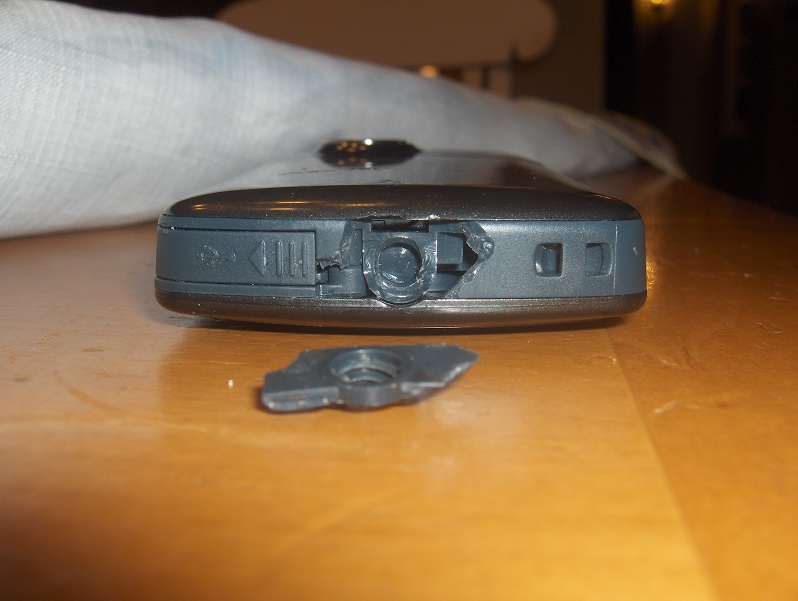
A cracked mount base is a serious issue. Check for cracks or breaks. If found, consider using glue to fix small cracks. For bigger breaks, replacement is the best option. Contact the tripod’s maker for a new base. Replacement parts can be bought online too. Fixing the base keeps the camera safe.

Credit: www.reddit.com
Essential Tools For Repair
Repairing a broken tripod mount becomes manageable with the right tools. Start with a screwdriver to dismantle components. Then, use adhesive glue to secure loose parts firmly. Lastly, a wrench helps tighten screws for stability. These essential tools restore functionality, ensuring your tripod serves you reliably.
Basic Repair Kit
Repairing a broken tripod mount needs some tools. Start with a basic repair kit. This kit should have a screwdriver, a wrench, and pliers. These tools help to open and tighten parts.
A small magnifying glass can be useful. It helps see tiny parts clearly. A clean cloth is needed to wipe dirt away. Keep a small bag handy to store screws safely.
Specialized Tools For Tripod Mounts
Some mounts need special tools. A tripod replacement bolt is crucial. It fits perfectly into the mount. Use a thread locker to keep bolts tight. This prevents them from loosening.
A plastic pry tool can help open delicate parts. It avoids damage. Keep a precision screwdriver set ready. These screwdrivers fit small screws.
Preparing Your Work Space
Gather all necessary tools before starting. You will need a screwdriver, glue, and a clean cloth. Keep tools within reach. Arrange them neatly. Use a tray or box. It helps to avoid losing small parts. Check if you have the correct mounting piece. If not, you may need to buy one.
Choose a clean and bright space. Make sure the surface is stable. Avoid working near edges. Keep liquids away from the area. They can damage your tools. Ensure good lighting. It helps you see small details. Ventilate the room properly. This is important if using strong glue.

Credit: www.youtube.com
Step-by-step Repair Guide
Carefully remove screws with a screwdriver. Keep screws in a small box. Gently pull apart the mount pieces. Examine each part for damage or wear. Identify broken or faulty parts. Clean dust and dirt with a soft cloth. Ensure all parts are dry before proceeding.
Check the condition of each part. Replace damaged parts with new ones. Secure loose pieces with glue or tape. Use strong adhesive for broken areas. Let adhesive dry completely before reassembling. Test each part for stability. Ensure everything fits perfectly. Reassemble all parts carefully. Tighten screws securely.
Reassembly Tips
Always check if screws and bolts are tight. Loose screws may cause wobbling. Use a screwdriver to fix them in place. Double-check each screw’s position. Tighten each bolt securely. Ensure no parts are missing. Missing parts can lead to instability. Always use the right size screwdriver. Wrong size can damage screws. Handle screws gently to avoid stripping. Stripped screws may need replacement. Look for screws in hidden areas. Hidden screws often get overlooked.
Test the tripod’s stability by placing it on flat ground. Wiggle each leg gently. If it moves, check connections. Ensure all legs are sturdy. Adjust any loose parts immediately. Test camera mount by attaching a camera. Camera should sit firmly. If it wobbles, tighten the mount. Try moving the tripod head. Smooth movement indicates good function. If it sticks, check for dirt. Clean any debris for better movement.
Credit: unicyclist.com
Diy Solutions For Cracked Mounts
Epoxy and glue can fix a cracked tripod mount. Start by cleaning the cracked area. Remove any dirt or dust. Apply epoxy or strong glue to the crack. Let it dry for a few hours. Check if the mount is strong. Repeat if needed. This helps the mount hold the camera safely. Always use glue that is made for plastic.
Metal plates can make cracked mounts stronger. Cut a small metal piece. Place it over the crack. Secure it with screws. Use strong screws for better hold. This method gives extra strength to the mount. Make sure the metal is not too heavy. Lightweight metal is best for mounts. This keeps the tripod balanced and steady.
Preventative Measures For Longevity
Keep your tripod clean for longer life. Dust can harm the moving parts. Use a soft cloth to wipe the mount after use. Inspect it regularly for any loose screws. Tighten them with the right tools. Avoid over-tightening, as it can damage the mount. Check for any cracks or wear. Replace parts when necessary. Lubricate the joints with light oil. This helps them move smoothly.
Always carry your tripod carefully. Use both hands to avoid dropping it. Never force the legs open or closed. This can cause stress and breakage. Keep the tripod away from extreme heat or cold. Such conditions can weaken the material. Store it in a dry place to prevent rust. Use a tripod bag for protection during travel. These practices help in avoiding accidents and damage.
When To Seek Professional Help
Experiencing difficulty with a broken tripod mount might require professional help if DIY fixes seem inadequate. Persistent issues, like loose screws or cracked parts, can hinder stability and performance. Seeking expert assistance ensures the tripod functions optimally and prevents further damage.
Recognizing Unfixable Damage
Some tripod mount damages can’t be fixed at home. If the mount is cracked or bent, it might be unfixable. The tripod might also wobble or not hold steady. These signs mean the mount has serious issues. Replacing it yourself might not work well. It’s best to get help from a professional. They have the right tools and knowledge.
Finding A Reliable Repair Service
Finding a good repair service is important. Ask friends for recommendations. Look for reviews online. Choose a service with good feedback. Check their experience with tripod mounts. Make sure they use quality parts for repairs. A reliable service ensures your tripod works like new again.
Frequently Asked Questions
How To Fix Camera Tripod Mount?
To fix a camera tripod mount, tighten loose screws or replace them. Check for broken parts and replace if necessary. Use a compatible quick release plate for secure mounting. Ensure proper alignment and functionality before use. Regular maintenance can prevent future issues.
How To Fix A Tripod Head?
First, identify the issue with the tripod head. Tighten loose screws using a screwdriver. Clean dirt or debris affecting movement. Apply lubricant for smooth operation. Replace damaged parts by ordering from the manufacturer. Ensure regular maintenance to prevent future problems.
Can A Tripod Be Repaired?
Yes, you can repair a tripod. Many issues like broken legs, loose screws, or damaged locks can be fixed. Check the manufacturer’s warranty or seek professional repair services for complex problems. Regular maintenance can also extend your tripod’s life.
What Is The Tripod Screw Mount Called?
The tripod screw mount is commonly referred to as the “1/4-20 UNC” or “1/4-20 thread. ” This standard size ensures compatibility with most cameras and accessories. It features a quarter-inch diameter and 20 threads per inch, making it universally recognized in photography and videography.
Conclusion
Fixing a broken tripod mount is simpler than it seems. Start by identifying the damage. Then, gather your tools and follow the steps. Ensure each part is secure. Test your tripod after repairs. A sturdy mount improves photo quality. Regular maintenance prevents future breaks.
Be gentle when handling your tripod. Store it safely when not in use. Understanding your tripod helps avoid mishaps. Remember, patience is key. With these tips, your tripod will serve you well for years. Enjoy capturing perfect shots with your trusty equipment.
Always prioritize safety and care.