Using a laser level without a tripod can feel tricky, especially if you want clear, accurate lines. But there are smart ways to do it, whether you’re hanging shelves, tiling, or framing a wall. With the right approach, you can make your laser level work perfectly—no tripod required.
Table of Contents
Why Skip The Tripod?
Tripods are handy, but not everyone owns one. Sometimes, space is limited, or the floor isn’t stable. Luckily, most laser levels are designed with flexible mounting options and self-leveling features. You can still get professional results with simple household items.
Methods To Use Laser Level Without Tripod
Flat Surface Placement
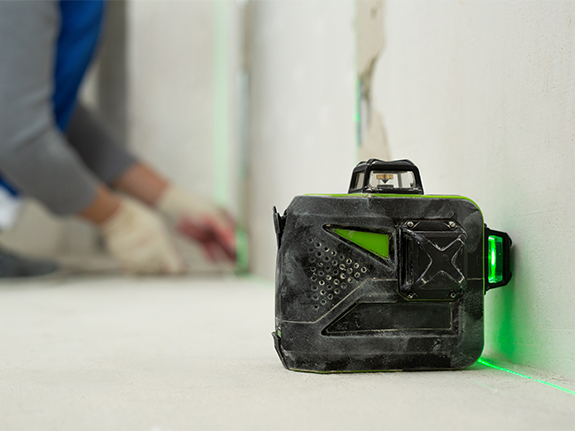
Put your laser level on a steady flat surface like a table, box, or shelf. Make sure it doesn’t wobble.
- Use a small spirit level to check the surface.
- Avoid soft or uneven spots.
- Adjust the height with books or blocks.
Wall Mounting
Many laser levels come with a mounting bracket or magnets. Attach the device directly to metal studs or wall hooks.
- Stick to clean, solid surfaces.
- If your level has magnets, press it firmly onto a metal corner bead or electrical box.
Clamp And Holder Options
Some models include clamps that grip onto pipes, doors, or window frames. If not, you can buy universal clamps at hardware stores.
- Secure the clamp tightly.
- Check for movement before turning the laser on.
Diy Support Solutions
Create your own holder using a camera mount, adjustable shelf, or even a stack of bricks. Just make sure the laser beam isn’t blocked.
- Place the level at the correct height.
- Double-check alignment with a tape measure.
Here’s a comparison of popular placement options:
| Method | Stability | Setup Time | Best For |
|---|---|---|---|
| Flat Surface | Medium | Quick | Small jobs |
| Wall Mount | High | Moderate | Vertical lines |
| Clamp | High | Quick | Pipes, frames |
| DIY Support | Low–Medium | Slow | Creative solutions |

Credit: huepar.com
Common Mistakes And How To Avoid Them
Many beginners overlook these points:
- Not checking for level surfaces. Even slight tilting can throw off your line.
- Ignoring the laser level’s self-leveling range. Most can only correct small angles.
Here’s a quick table of self-leveling ranges for different models:
| Laser Level Model | Self-Leveling Range | Correction Time |
|---|---|---|
| Bosch GLL 55 | ±4° | 5 seconds |
| DEWALT DW088K | ±2° | 4 seconds |
| Huepar 901CG | ±3.5° | 3 seconds |
Practical Tips For Best Results
- Use painter’s tape to mark lines before drilling.
- Always double-check the laser line with a tape measure.
- If working outside, avoid direct sunlight since it can make the laser hard to see.
For more details about laser levels, visit Wikipedia.
Getting good results without a tripod is easier than you think. With careful setup and attention to detail, you’ll achieve perfect lines for your project. It’s all about using what you have and checking your work.
Credit: www.engineersupply.com
Frequently Asked Questions
How Can I Keep My Laser Level Stable On A Flat Surface?
Use a spirit level to check the surface. Add weight or tape if needed to prevent movement.
Can I Use A Laser Level For Ceiling Projects Without A Tripod?
Yes. Place it on a tall, steady object or use a wall mount. Make sure the beam reaches the ceiling area.
What’s The Best Way To Mark Lines After Using The Laser?
Painter’s tape or a pencil works well. Mark at several points, then connect them with a straightedge.
Are Self-leveling Laser Levels Better For Tripod-free Use?
Definitely. Self-leveling models correct small angles and make setup easier.
What Should I Avoid When Using A Laser Level Without A Tripod?
Avoid soft surfaces, ignore self-leveling limits, and never block the laser beam. Always secure the device before starting.