Transforming a backpack into a camera bag is simpler than it sounds. You don’t need expensive gear to keep your camera safe.
With a few adjustments, your regular backpack can work perfectly. Photography enthusiasts know the value of a good camera bag. It protects your equipment and makes it easy to carry. But specialized bags often come at a high price. Many people already own a sturdy backpack.
Why not use it for your camera gear? This approach is cost-effective and practical. It allows you to customize the space based on your needs. You can add padding, dividers, and compartments. This setup ensures your camera and accessories stay organized. Additionally, it offers flexibility for other items you might carry. Let’s explore how to convert your backpack into a reliable camera bag.
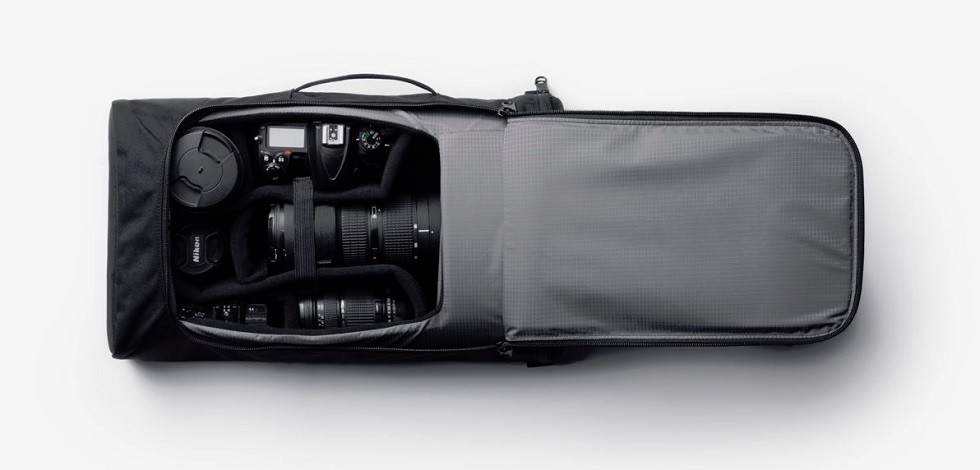
Credit: www.carryology.com
Table of Contents
Choosing The Right Backpack
Backpacks come in many sizes. Pick one that fits your camera gear. Large backpacks hold more. Small ones are easy to carry. Think about the gear you have. More gear needs more space. Less gear needs less space. Choose wisely.
Strong materials last longer. Look for water-resistant fabric. Cameras need protection from rain. Durable backpacks handle heavy use. Check for tough zippers and seams. Weak zippers can break. Good seams stop tearing. Your gear stays safe inside.
Gathering Essential Materials
Padded inserts are a must for camera safety. They keep cameras safe and snug. Inserts can be placed inside any backpack. They provide extra cushioning for cameras. Choose inserts with soft material. This protects against bumps and drops.
Dividers and compartments help organize the backpack. Create spaces for different camera parts. Keep lenses separate from the camera body. Dividers can be moved around easily. This allows customization based on needs. Compartments help find items quickly. No more searching for lost gear.
| Item | Purpose |
|---|---|
| Padded Inserts | Protects camera from shocks |
| Dividers | Organizes camera parts |
| Compartments | Easy access to items |
Designing The Interior Layout
Make special pockets for your camera. Use soft cloth. Avoid scratches. Sew small pockets. Keep batteries and memory cards safe. Use Velcro or zippers. Easy open and close. Keep dust out.
Use dividers to separate gear. Arrange camera, lens, and accessories. Keep them neat. Easy to find. Use foam pads. Protect from bumps. Keep everything in place. Make space for each item. Avoid clutter.
Installing Protective Padding
Start with the base. It’s the foundation of your camera bag. Use soft foam or sponge. Cut it to fit inside the backpack. Make sure it’s thick enough. This helps protect your camera gear. Secure the foam with glue or tape. This keeps it in place. Your gear will be safe from shocks and bumps. A well-cushioned base is key.
Next, focus on the sides. They need extra padding too. Use foam strips or bubble wrap. Attach them to the backpack sides. Velcro or double-sided tape works well. Padding should cover all sides. This keeps your camera gear secure. No sliding or moving around. Safe and snug inside the backpack. Your camera gear deserves protection.
Creating Adjustable Dividers
First, gather all your camera gear. Lay them out for easy measuring. Use a ruler to measure each item. Write down the length, width, and height. Cut foam pieces to fit each measurement. Use a sharp knife or scissors for clean cuts. Ensure each foam piece fits snugly in your backpack.
Attach Velcro strips to each foam piece. One side of the Velcro goes on the foam. The other side goes inside the backpack. This helps the foam pieces stay in place. Press the foam into the backpack. Make sure they stick well. Adjust the foam as needed. Your backpack is now a camera bag!
Adding Extra Features
Protecting your camera from water is important. Use a waterproof cover for your backpack. Many covers are easy to attach and remove. A plastic bag can also help. Place your camera inside before putting it in the bag. This adds an extra layer of protection. You can also use waterproof spray. Spray it on the outside of the backpack. This makes water slide off easily. Always test spray on a small area first. It ensures it does not damage the fabric.
Adding straps gives more space. Attach extra pouches for gear. Use adjustable straps for comfort. Clips help secure small items. Attach clips to the bag’s sides. They hold things like tripods and water bottles. Velcro straps are useful too. They are easy to adjust. Straps and clips keep your gear safe and handy.
Ensuring Comfort And Accessibility
Padded straps are important. They make carrying easier. Without padding, straps can hurt shoulders. Soft padding helps. It reduces pressure. Long walks are more comfortable. Choose backpacks with soft, thick padding. It helps a lot. Ensure straps adjust easily. Adjustable straps fit better. They offer better support. Comfort is key when carrying cameras.
Quick access pockets save time. They store small items safely. Batteries, memory cards, and lens caps fit in them. Easy access is important. You won’t miss a shot. No more digging in the bag. Reach items fast. Pockets should be strong. Zippers should work smoothly. Check pocket placement. Pockets should be reachable. Quick access keeps cameras ready.
Credit: www.youtube.com
Testing And Final Adjustments
Ensure your backpack offers adequate protection by testing it in various environments. Adjust dividers and padding to secure the camera gear. Verify comfort and accessibility for a perfect fit.
Field Testing
Take your new camera bag outside. See how it feels on your back. Check the straps and zippers. Make sure they are strong and secure. Try walking with it for some time. Does it stay comfortable? Is the camera safe inside? These checks are important. They help you know if the bag is ready.
Making Necessary Tweaks
Adjust the bag if needed. Maybe the straps need to be tighter. Or the padding is too thin. Add more cushions if the camera moves too much. Little changes can make a big difference. Make sure the bag is perfect for your next adventure. Happy clicking!

Credit: photolisticlife.com
Frequently Asked Questions
How To Put A Camera In A Normal Backpack?
Place the camera in a padded insert for protection. Position it upright to avoid damage. Organize accessories in separate compartments. Securely zip the backpack and handle it with care. Ensure the backpack has enough space to prevent squeezing the camera.
How Do You Pack A Camera Without A Camera Bag?
Wrap the camera in a soft cloth for protection. Use bubble wrap for extra cushioning. Place it inside a padded backpack or sturdy handbag. Secure it with clothing or towels to prevent movement. Ensure the lens cap is on to protect the lens.
What Can You Use Instead Of A Camera Bag?
Use backpacks, messenger bags, or tote bags as camera bag alternatives. Choose padded inserts for protection. Consider using hiking bags with compartments or repurpose diaper bags for organization. Opt for a stylish purse with padding for smaller cameras. Ensure the bag is water-resistant for added safety.
How Do You Put A Camera Lens In A Bag?
Place the lens in a padded lens pouch. Ensure the lens cap is secure. Position it upright in the bag. Use dividers for protection. Avoid stacking heavy items on top.
Conclusion
Transforming a backpack into a camera bag is simple. You need thoughtful planning and the right gear. Use padded inserts for safety. Choose adjustable dividers for flexibility. Ensure easy access to your equipment. Include waterproof covers for protection. Organize essentials like batteries and lenses.
Consider comfort with padded straps. Your creative approach makes it personal. Now, you’re ready for adventures. Capture memories with confidence and style. Enjoy the journey with your customized camera bag. Happy shooting and safe travels!