Attaching your Sony camera to a tripod is simple. Start by aligning the camera’s mounting hole with the tripod’s screw.
Secure it by turning the screw until tight. Mounting your Sony camera correctly enhances your photography experience. Tripods offer stability for clear and sharp images. They are essential for capturing long exposures, videos, and professional shots. Whether you’re an amateur or a seasoned photographer, knowing how to mount your camera properly on a tripod is crucial.
It ensures your camera remains safe and steady. This process is straightforward and requires only a few steps. With the right technique, you can focus on creativity instead of worrying about shaky hands. Let’s dive into the steps and tips for a secure and stable setup.
Credit: www.manbily.com
Table of Contents
Choosing The Right Tripod
Tripods come in different materials. Aluminum is strong and light. Carbon fiber is lighter but costs more. Plastic tripods are cheap but may break. Choose a tripod with sturdy legs. This helps keep your camera safe. A good tripod has secure locks. Locks keep legs steady. Rubber feet grip the ground. This stops slipping. Make sure the head can hold your camera. Some tripods have a ball head. Others have a pan-tilt head. Both types can work well.
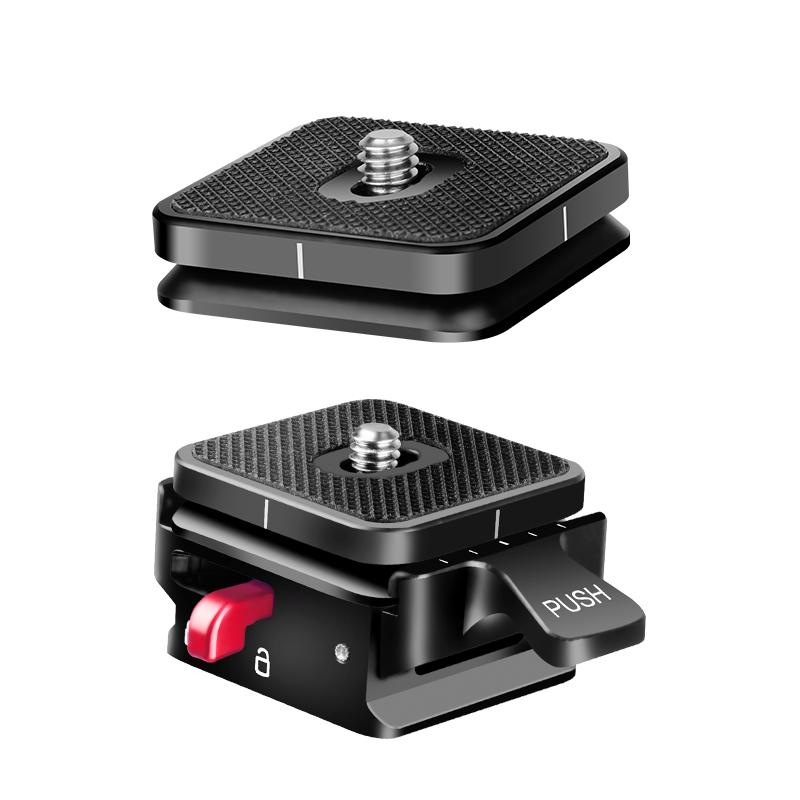
Check if the tripod fits your Sony camera. Look for universal mounts. Most tripods use the 1/4-inch screw. This fits many cameras. Some tripods have special adapters. These help if your camera needs it. Sony cameras often work with most tripods. Read the tripod’s specs. Make sure it can hold your camera’s weight. A good tripod should be easy to attach. This saves time when setting up. Quick release plates are useful. They let you remove the camera fast.
Credit: sunwayfoto.com
Gathering Necessary Tools
A tripod has three main parts. The legs give support. The head holds the camera. The mounting plate connects the camera. These parts work together. They help keep the camera steady. Each part is important.
Camera accessories help attach your camera. A quick-release plate is useful. It makes connecting simple. A screwdriver might be needed too. Make sure you have the right tools. They make mounting easier.
Preparing The Camera
Removing Lens Caps is the first step. Take off the caps carefully. This keeps the lens safe. Always handle the lens with care. Place the lens caps in a safe spot. You might need them later. Keep them clean and dust-free.
Attaching Mounting Plate is easy. Find the mounting plate. It’s usually at the bottom. Align the plate with the tripod screw. Turn the screw gently. Make sure it is tight but not too tight. The camera should be stable. Double-check the attachment. This prevents accidents.
Setting Up The Tripod
Start by unlocking the clips on the tripod legs. Pull each leg down to extend. Make sure all the legs are evenly extended. This helps the tripod stand steady.
Open the center column and spread the legs wide. This gives the tripod a strong base. Check if the ground is flat. Adjust the legs if it’s not level. You can use the built-in bubble level for checking.
Attaching The Camera
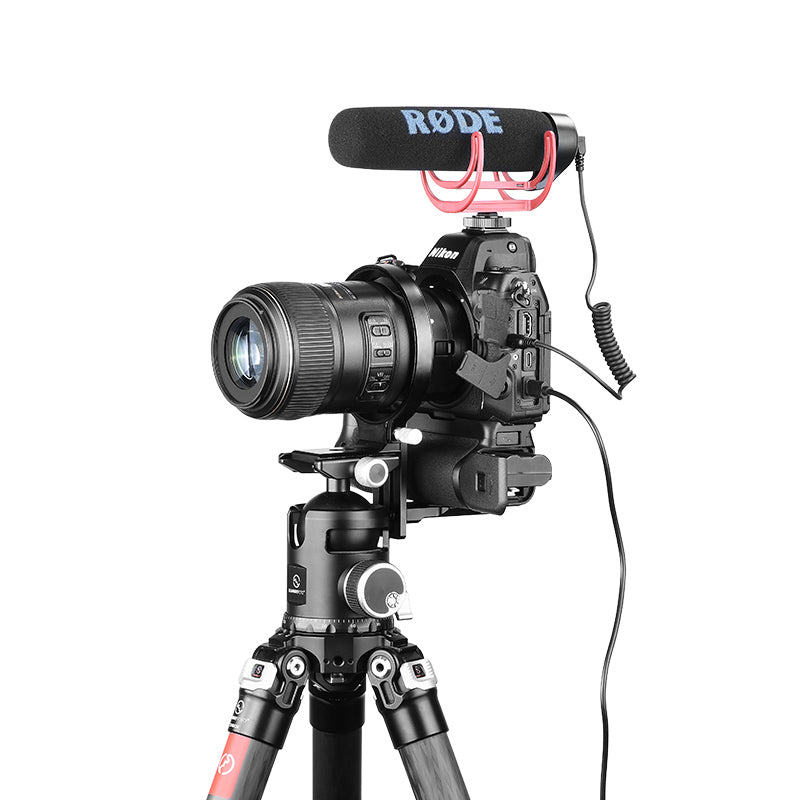
First, find the mounting plate on the tripod. It is the small, flat piece. Look at the bottom of your Sony camera. You will see a hole there. This is for the screw. Place the mounting plate under the camera. Make sure both holes line up. This is very important. If they do not align, the camera will not fit.
Hold the camera steady. Use one hand to turn the screw. Turn it clockwise to tighten. Do not over-tighten. This can damage the camera. Make sure the camera feels secure. Try to gently move it. It should not wobble or fall. Now, your camera is ready to use on the tripod.

Credit: www.amazon.com
Adjusting Camera Position
Use the tripod head to move the camera. Tilting helps you look up or down. Panning lets you move left or right. This is useful for wide shots. Ensure the movements are smooth. Use the tripod’s handles for better control. Practice makes it easier. Start slow and steady. This helps in capturing clear images.
Adjust the tripod legs to change height. Shorten or lengthen each leg. Make sure the camera is level. Check the bubble level on the tripod. A level camera takes better photos. Double-check the tightness of all locks. This prevents the camera from falling. Always handle the camera gently. Safety comes first.
Checking Stability
Place the camera on the tripod. Check if it feels secure. Shake the tripod gently. Watch the camera for wobbles. If it wobbles, tighten the screws. Make sure the legs are firm. Stability is important for clear photos.
Look at the camera’s weight. It should be evenly spread. Adjust the tripod head if needed. Balance the camera carefully. Use a level tool for accuracy. Proper balance prevents falls. Protect your camera by checking weight balance.
Troubleshooting Common Issues
Mounting a Sony camera to a tripod involves securing the camera with the mounting plate. Ensure the plate fits snugly onto the tripod’s head. Tighten the screw firmly to prevent wobbling during use, ensuring stable shots for your photography projects.
Loose Connections
Sometimes, camera connections become loose. This can affect stability. Check the screws and knobs on your tripod. Tighten them if they are loose. Ensure the camera mount is secure. A loose mount can cause problems. Make sure all parts fit well. Double-check your connections for safety.
Tripod Instability
Tripod legs can wobble. This makes the camera shaky. Adjust the leg locks properly. They should be tight. Spread the legs evenly for balance. Use the center column for extra support. Avoid using it too much. Keep the tripod on a flat surface. This helps with stability. A stable tripod keeps your camera safe.
Frequently Asked Questions
How To Attach Sony Camera To Tripod?
To attach a Sony camera to a tripod, align the camera’s base with the tripod’s mounting plate. Secure by screwing in the tripod’s quick-release plate. Ensure it’s tightly fixed for stability. Check the camera’s position and adjust if needed.
How To Attach Camera To Tripod Without Plate?
Use a universal tripod mount adapter. Secure your camera directly using the tripod screw. Ensure a snug fit to prevent movement. Avoid overtightening to protect the camera’s base. Always check stability before use.
How To Attach Camera To Tripod Screw?
Ensure your camera has a tripod socket. Align the camera’s socket with the tripod screw. Turn the screw clockwise until tight. Avoid overtightening to prevent damage. Check stability before use.
How Do You Mount A Camera On A Tripod Vertically?
Attach the camera to the tripod’s quick-release plate. Rotate the plate to a vertical position. Secure it tightly. Use a ball head or pan-tilt head for better control. Ensure the camera is balanced and stable before shooting. Adjust angles as necessary for desired composition.
Conclusion
Mounting your Sony camera on a tripod is straightforward. Follow the steps, and you’re set. First, ensure your tripod is stable. This prevents accidents. Then, securely attach the camera. Double-check the fit. A loose connection might cause damage. Adjust the tripod height for the best angle.
Remember, practice makes perfect. With a few tries, it becomes easy. Capture stunning photos with your steady setup. Enjoy the difference a tripod makes. With patience and care, your photography skills will improve. Safe mounting ensures lasting equipment. Happy shooting with your Sony camera!