Installing security camera wiring can enhance your home’s safety. It requires some basic tools and understanding.
Security cameras offer peace of mind. But they need proper wiring to work effectively. Many homeowners find this process daunting. Yet, with the right guidance, it becomes manageable. This introduction will help you understand the basics of wiring your security cameras.
It covers key steps and tips to get you started. Whether you’re securing your home or office, knowing how to install wiring is crucial. It ensures your cameras function optimally. This guide aims to simplify the process for you. By the end, you’ll feel confident in setting up your security system. Let’s dive into the essentials of camera wiring. Your journey to a safer environment starts here.
Credit: www.youtube.com
Table of Contents
Preparation For Installation
Before you start, collect all the necessary tools. You need a drill, screws, and a screwdriver. Don’t forget the cable ties and a level. These help keep wires neat and straight. A measuring tape is useful too. It helps ensure proper placement. Have a pencil for marking spots on walls. A ladder is needed if the cameras are high. Ensure the tools are nearby, so you won’t have to search for them. This saves time and effort.
Pick the best spots for your security cameras. Choose corners for a wider view. Avoid direct sunlight hitting the lens. Place cameras near entry points like doors and windows. This helps catch any intruders. Ensure the camera can see the desired area. Obstructions can block the view. Think about the height too. Too high or low can miss details. Make sure the camera is safe from rain and wind.
Understanding Camera Wiring
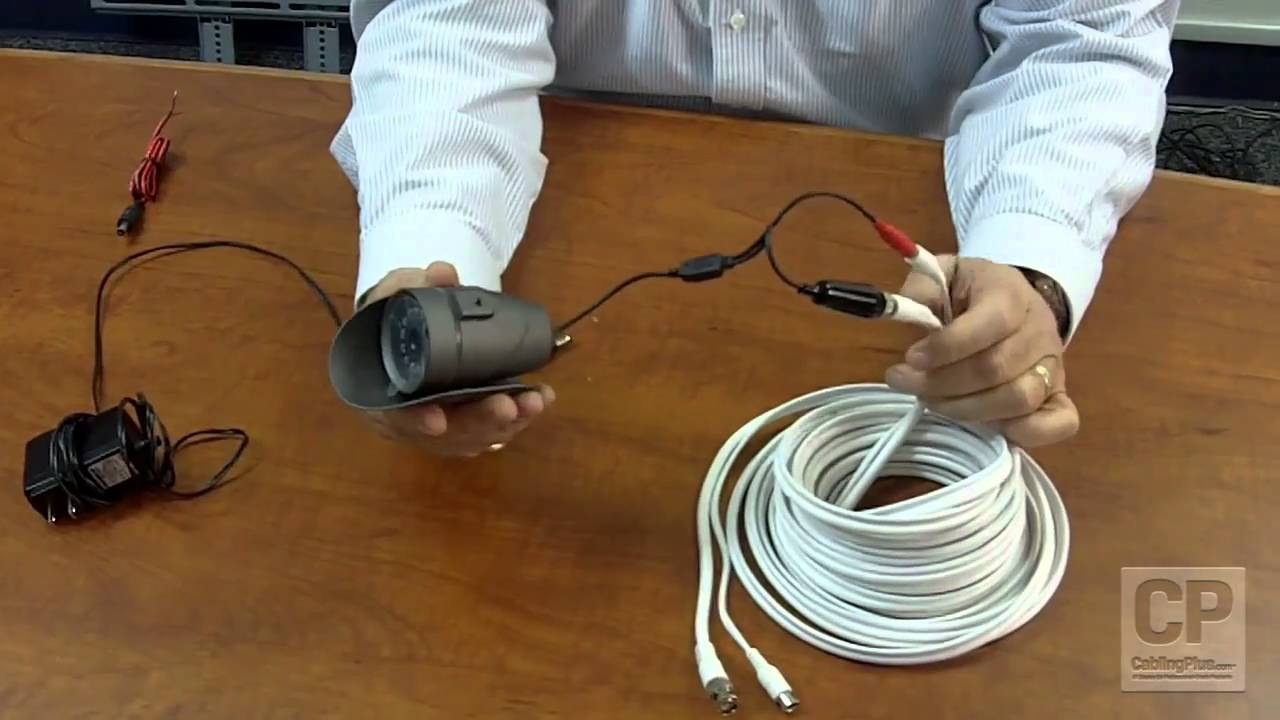
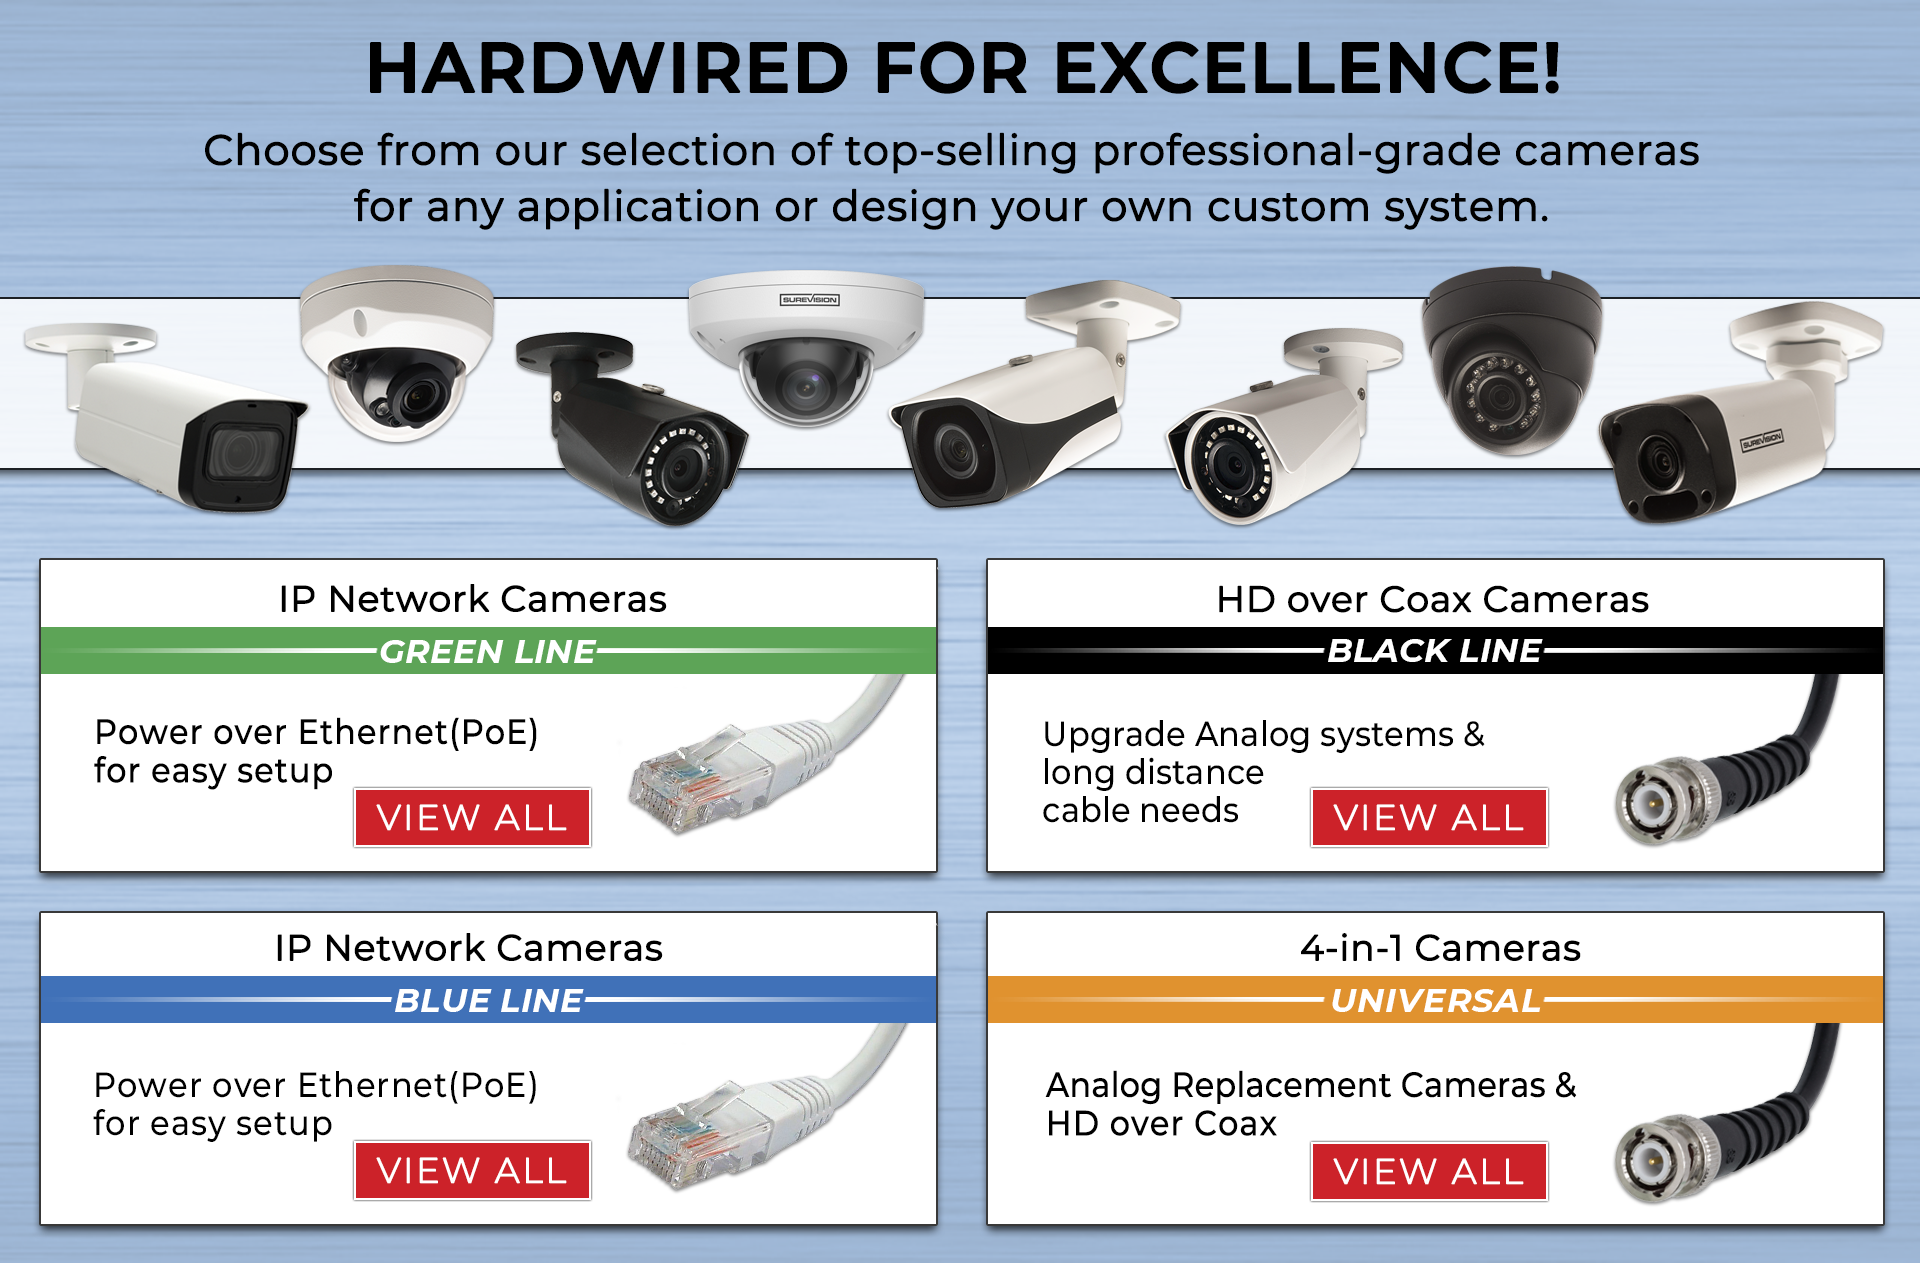
Camera wires come in different types. Coaxial cables are common for analog cameras. Ethernet cables are used for digital cameras. These cables send video signals. Power cables supply electricity to cameras. Some cameras use wireless connections. Wireless cameras do not need wires. Fiber optic cables offer high-speed data transfer. They are used for long distances. Choosing the right cable is important. It depends on your camera type.
Security cameras need power to work. AC adapters are simple options. They plug into outlets. Battery-powered cameras are portable. They do not need cables. Power over Ethernet (PoE) cables send power and data. This reduces cable clutter. Solar-powered cameras use sunlight. They are eco-friendly. Choose power options based on your needs. Consider the location and power availability.
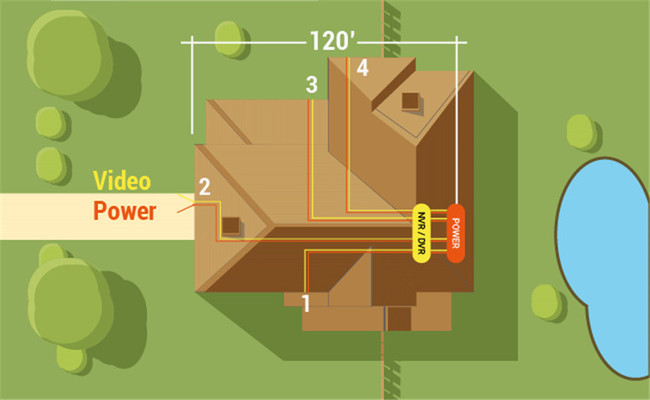
Planning The Wiring Route
Indoor routes can be easier to plan. Walls and ceilings hide wires well. Choose paths with little clutter. Avoid running wires near power lines or electronics. These can cause interference.
Outdoor routes need more care. Weather can damage wires. Use weatherproof wires for safety. Avoid placing them near trees or branches. They can break or block signals. Also, keep wires high to avoid tampering.
Interference can blur camera images. Keep wires away from strong magnets and large metal objects. These can disturb signals. Use shielded cables for better protection. This helps keep images clear.
Credit: www.cctvsecuritypros.com
Installing Mounts And Brackets
Choose mounts that fit your camera type. Some cameras need special mounts. Wall mounts are common for indoor cameras. Ceiling mounts work well for outdoor use. Consider the mounting surface. Wood, brick, and metal need different mounts. Look for adjustable mounts. They help aim the camera better. Check if the mounts are weather-resistant. This is important for outdoor cameras.
Brackets hold the camera in place. Use strong screws to secure them. Measure the area before drilling holes. This prevents mistakes. Use a level to make sure brackets are straight. Uneven brackets make cameras tilt. Tighten screws firmly but not too tight. Loose brackets can cause the camera to fall. Test the bracket strength after installing. Safety is key.
Running Wires Safely
Drilling holes helps guide wires through walls. Use a drill with a long bit. Make sure the holes are straight. This keeps wires from bending. After drilling, use a fish tape. It helps pull wires through. Thread the wire carefully. Avoid knotting or twisting. Check that the wire moves freely.
Clips keep wires neat and safe. Use plastic clips for better grip. Place clips every few feet. This stops wires from hanging. Press clips firmly into place. Make sure wires are not tight. A little slack is good. It helps in case of pulls. Check all clips once done.
Credit: reolink.com
Connecting To Power And Network
Security cameras need power to work. Connect them safely. Use a power adapter or a battery. Some cameras have solar panels. Solar panels save energy. Plug the camera into a socket. Make sure the socket is near. Check the voltage before connecting. Wrong voltage can damage the camera. Some cameras use PoE. PoE means Power over Ethernet. One cable sends power and data. It is simple and neat.
Cameras send videos using network. Connect them well. Use Wi-Fi for wireless setup. Wi-Fi is easy but less stable. Ethernet is another option. Ethernet is more stable than Wi-Fi. Run a cable from the camera to the router. Configure the camera settings. Use the app or the website. Make sure the connection is secure. Test the network to check video quality. Good setup helps in monitoring.
Testing The System
Verify the camera is on. Check if the video feed is clear. Look for any fuzzy images. Adjust the lens if needed. Ensure the camera angle is correct. Make sure the camera covers important areas. Inspect for blurry spots in the video. Confirm there are no obstructions. Test during day and night.
Ensure the camera connects to the network. Check the cables for damage. Inspect the connections for tightness. Test the Wi-Fi signal strength. Move the router closer if needed. Confirm the camera is online. Look for network errors. Restart the router if needed. Verify the settings are correct. Ensure software updates are applied.
Troubleshooting Common Issues
Installing security camera wiring often encounters common issues. Incorrect wire connections lead to malfunctions. Damaged cables cause signal loss. Ensure proper tools and follow instructions carefully. Avoid sharp bends to prevent cable damage.
Signal Interference Problems
Signal problems can cause blurry camera pictures. Wireless devices like routers may interfere. Keep the camera away from them. Thick walls can block signals too. Try moving the camera to a better spot. Metal objects can also be a problem. Remove them if possible. Use quality cables for wired cameras. They help reduce interference.
Power Supply Solutions
Cameras need the right power to work well. Check if the power adapter is plugged in. Make sure it matches the camera’s needs. Long cables can weaken power. Use shorter ones if you can. Power surges might hurt the camera. Use a surge protector to keep it safe. Backup batteries are helpful in power cuts. They keep the camera running.
Frequently Asked Questions
What Is The Best Way To Run Wires For Security Cameras?
Run wires through walls or ceilings to conceal them. Use conduit for protection and neatness. Ensure wires avoid interference.
Can I Install Wired Security Cameras Myself?
Yes, you can install wired security cameras yourself. Ensure you have basic electrical and drilling skills. Follow the manufacturer’s instructions carefully. Use proper tools and safety gear. Consider consulting a professional for complex systems or if you’re unsure.
How To Run Power For Outdoor Security Cameras?
Use a weatherproof extension cord or install outdoor-rated electrical outlets. Consider solar-powered cameras for areas without electricity. Use power-over-Ethernet (PoE) for cameras compatible with this feature. Ensure cables are protected from weather and potential damage. Consult a professional for complex installations to ensure safety and compliance.
Do I Need An Electrician To Install Security Cameras?
Hiring an electrician for security camera installation is recommended. They ensure proper wiring and safety. Some systems, like wireless ones, might not require an electrician, but professional installation guarantees optimal performance and minimizes risks. Always consider the complexity of your system before deciding.
Conclusion
Installing security camera wiring is easier with a clear plan. Start with gathering tools. Follow each step carefully to ensure safety. Use the right cables for your camera type. Securely connect wires to avoid future issues. Double-check all connections before turning on the system.
Regular maintenance helps keep everything running smoothly. With patience, you can enhance your home’s security. Remember, practice makes perfect. Enjoy the peace of mind that comes with a well-installed system. Now you can feel safer in your space.