Changing the network on your Roku Camera is simple. Just follow a few steps to switch your Wi-Fi network.
This guide will help you make the change without hassle. Roku Cameras offer great security features. But sometimes, your Wi-Fi network needs updating. Maybe you’ve switched internet providers. Or perhaps you’re setting up your camera in a new location. Whatever the reason, adjusting the network settings is crucial for smooth operation.
In this post, you’ll learn how to easily change the network on your Roku Camera. We’ll break down the process in a straightforward way. So, you’ll have your camera back online in no time. Stay with us to ensure your Roku Camera stays connected and ready to keep your home secure.
Table of Contents
Introduction To Roku Camera
The Roku Camera is a handy tool for home security. It offers clear video quality and easy setup. You can check your home from anywhere. It connects to Wi-Fi and sends alerts to your phone. The camera works well in both day and night. It has motion detection features. You will get a notification if something moves. This helps keep your home safe.
- High-definition video for clear images.
- Night vision to see in the dark.
- Motion alerts sent to your phone.
- Two-way audio for communication.
- Easy setup with Wi-Fi.
Network problems can stop the camera from working. Slow Wi-Fi can make video lag. Sometimes, the camera can’t connect to the network. A weak signal can cause connection drops. It’s important to check your router. Make sure it is close to the camera. Ensure Wi-Fi settings are correct. This helps keep the camera online and working well.
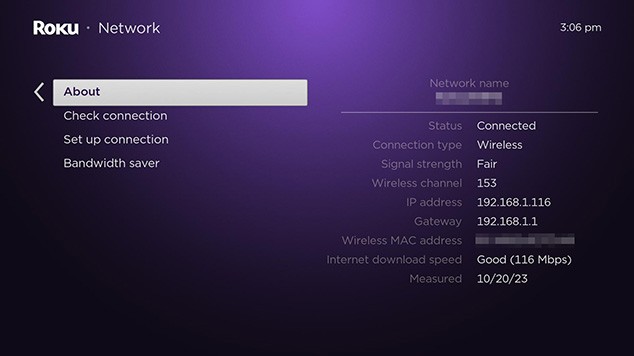
Credit: support.roku.com
Preparing For Network Change
Always check the camera manual first. It has important details. Find your network password. You need it later. Note down the camera’s model number. It’s useful for support. Ensure your Wi-Fi router is working well. This prevents issues. Keep your phone or computer nearby. You’ll use them soon. Double-check your Roku account details. They might be needed.
Ensure your Roku camera works with your network type. Some cameras need specific Wi-Fi bands. Check the camera specifications. They tell you what it needs. Look at your router’s settings. Make sure they match. Sometimes, newer cameras need updated routers. If unsure, ask Roku support. They can help. Avoid using too old equipment. It might not work well. Compatibility is key.
Accessing Roku Camera Settings
To find the settings, first turn on your Roku camera. Use the remote to go to the Main Menu. Look for a menu icon that says “Settings.” Click on it. Now, you can see different options. This is where you find all the camera settings.
Inside the settings, look for the Network section. It might have a Wi-Fi symbol. Click on “Network” to see your options. Here, you can change the network. Make sure the camera is connected to the right network. This helps your camera work better.
Changing Network On Roku Camera
Find the settings menu on your Roku camera. Tap the network option. It shows available networks. Choose the new network you want. Tap to select it. Wait for the connection to start.
Now enter the password for the new network. Type it correctly. Make sure there are no spaces. Double-check each letter. Tap the confirm button. Wait for the camera to connect. You will see a success message.
Troubleshooting Connection Problems
Experiencing connectivity errors? Let’s fix it. First, check your Wi-Fi signal. Make sure it’s strong. Move the camera closer to the router if needed. Sometimes, simply restarting the camera helps. Press the reset button on the camera. Wait a few seconds. Then, connect again. If still not working, restart the router. This can solve many issues. Ensure your network settings match. Wrong settings can cause problems. Double-check your username and password. They must be correct. Try reconnecting one more time.
Stable network is important for smooth streaming. Keep your router in a central spot. This helps the signal reach everywhere. Avoid placing it near metal objects. Metal can block the signal. Use a dual-band router if possible. It offers better connectivity. Check for interference from other devices. Microwaves, phones, and baby monitors can cause trouble. Turn off other devices while using the camera. Keep your firmware updated. Updates fix bugs and improve performance. Regular checks can save you time later.
Credit: www.security.org
Testing The New Network Connection
First, check if the camera connects to the new network. Look at the camera’s light. It should be green. This means the connection is good. If the light is red, the connection is bad. Try moving the camera closer to the router. This may help. Restart the camera if needed. Some cameras need a restart to work well.
Once connected, test the camera’s functionality. Open the camera app. See if the live feed works. Move something in front of the camera. Make sure the movement shows on the screen. Check sound too. Speak near the camera. Listen to your voice through the app. If anything fails, redo the setup. Sometimes setups need more tries.
Watch how the camera performs over time. Observe the connection daily. Ensure the video stays clear. Sound should always be clear too. If issues arise, troubleshoot them early. Regular checks help maintain good performance. Keep the software updated. Updates fix bugs and improve quality. A well-maintained camera always works better.
Maintaining Optimal Network Settings
Keeping your Roku camera’s firmware updated is very important. Firmware updates fix bugs and improve performance. They can also enhance security features. Check for updates often. Follow the instructions provided by Roku. This helps your camera work better and stay secure. You can find update options in the settings menu. Make sure your camera is connected to the internet. Then, update it to the latest version available.
Strong network security keeps your Roku camera safe. Use a strong password for your Wi-Fi. Change it regularly to stay secure. Enable network encryption like WPA2. This adds an extra layer of protection. Keep your router’s firmware updated too. This protects all devices in your network. Secure networks help in preventing unauthorized access. Always ensure your camera and network settings are secure.
Advanced Tips For Network Management
Network tools help manage your Roku camera’s connection. Check network status regularly. Use these tools to find issues early. Network analyzers can spot weak spots. They show where the signal is weak. Use this info to improve your connection. Regular checks can prevent problems. Always keep your network tools updated.
Strong signals are key for smooth camera use. Place your camera near the router. Avoid walls or large objects. These can block the signal. Check the router’s position. Elevate it if possible. This improves coverage. Try using a range extender. It boosts the signal reach. Ensure devices are not too close. Interference can weaken the connection.

Credit: www.youtube.com
Frequently Asked Questions
How Do I Connect My Roku Camera To A New Wi-fi Network?
Open the Roku app and select your camera. Go to Device Settings, choose Wi-Fi, and select your new network. Enter the password to connect.
How Do I Change The Network My Roku Is Connected To?
Go to “Settings” on your Roku device. Select “Network” and then choose “Set up connection. ” Pick “Wireless” and follow the prompts to connect to your new network.
How Do I Get My Roku Camera Back Online?
Restart your Roku camera and router to resolve connectivity issues. Check Wi-Fi settings and ensure both devices are on the same network. Update the camera firmware through the Roku app for optimal performance. Contact Roku support if the issue persists for further assistance.
How To Reset Roku Wireless Doorbell Camera?
Press and hold the reset button on the back of the Roku wireless doorbell camera for 15 seconds. Release it and wait for the camera to reboot. Reconfigure the camera settings through the Roku app on your smartphone. Ensure the doorbell is connected to Wi-Fi for a successful reset.
Conclusion
Changing the network on your Roku Camera is simple. Follow the steps carefully. A stable internet connection is crucial. It ensures your camera functions properly. If you face issues, check your Wi-Fi settings. Reboot your router if needed. Regular updates keep your device secure.
They also improve performance. Stay informed about any changes. This keeps your camera reliable. Always keep your login details safe. This prevents unauthorized access. Enjoy a seamless viewing experience with your Roku Camera. Happy streaming!