Lashing a tripod involves securing three poles together. This creates a sturdy structure.
It’s useful for various outdoor activities like camping or building temporary shelters. In this guide, you’ll learn the basics of tripod lashing. Understanding how to lash a tripod is essential for outdoor enthusiasts. It offers a simple yet effective way to construct support systems.
Whether you’re setting up a cooking station or building a shelter, mastering this skill is valuable. You’ll need a few basic materials: rope, poles, and a bit of patience. Once you grasp the technique, you’ll find it straightforward. The process involves wrapping and tying ropes around the poles, ensuring they stay firm and secure. This introduction will help you get started on learning how to lash a tripod efficiently and safely.

Credit: www.youtube.com
Table of Contents
Introduction To Tripod Lashing
Lashing a tripod makes it strong and stable. Tripod lashing is important for building structures. It holds three poles together. This helps in building frames for tents or shelters. Camping and outdoor adventures need secure tripods.
Lashing keeps poles from moving. It stops them from falling. Safety is the main reason. Strong support is needed for tents. It helps to hold up heavy things. Tripods need lashing for balance. Good lashing makes tripods last longer.
| Tool | Purpose |
|---|---|
| Rope | Wrap around poles |
| Poles | Build the tripod |
| Knife | Cut rope |
| Gloves | Protect hands |
Choosing The Right Materials
Rope is key for lashing a tripod. Use natural fibers like jute or sisal for a firm grip. These ropes are strong and flexible. Synthetic ropes like nylon are smooth and can be slippery. They are durable and work in wet conditions. Cotton rope is soft and easy to handle. Always check the rope for frays or damage.
Wooden poles should be strong and straight. Use poles with no cracks or splits. Bamboo is lightweight and durable. Pine is easy to find and work with. Make sure poles are similar in length. This helps the tripod stand steady. Remove any sharp edges for safety.
Step-by-step Lashing Process
Creating a secure tripod lash involves precise steps. First, gather three sturdy poles. Then, position them in a triangle. Carefully wrap rope around them, ensuring even spacing. Tighten the lash firmly. This technique ensures stability for various outdoor projects and activities.
Setting Up Your Workspace
Find a level area. Make sure it’s free from clutter. This helps in easy movement. Gather all tools needed. Have ropes, tripod, and any other gear ready. Keep them close for convenience. Check your tripod. Ensure it’s sturdy and clean.
Initial Knot Techniques
Start with a simple knot. The clove hitch is a great choice. It’s easy to tie and secure. Wrap the rope around the tripod leg. Cross it over and under. Pull tight for a snug fit. Practice makes perfect. Repeat until you feel confident. It’s important to keep knots firm. Loose knots can cause instability. Always check your knots. Safety first!
Creating A Secure Tripod Base
Start by laying the poles on the ground. Use three poles of the same size. Arrange them in a triangle shape. Make sure the ends are even. This helps the tripod stand strong. Keep the poles close together. This prevents slipping.
Wrap a strong rope around the poles. Loop the rope tightly. Pull the rope after each loop. Check if the poles are steady. Tie the rope at the end. Use a knot that holds firm. Test the tripod’s stability. Adjust if needed. Safety is important, so ensure it’s secure.
Testing Stability And Safety
Tripods should hold weight without shaking. Check if it can support a camera. Heavy cameras need strong support. Light cameras need less support. Always ensure the tripod legs are tight. This keeps it from falling. Make sure the head holds the camera tight. A loose head can cause accidents.
Balance is key for a tripod. The center column helps in adjustments. Keep the column straight for better balance. Adjust each leg to the right height. This keeps the tripod stable. Uneven legs can make it fall. Always check the bubble level. It helps you see if the tripod is straight.
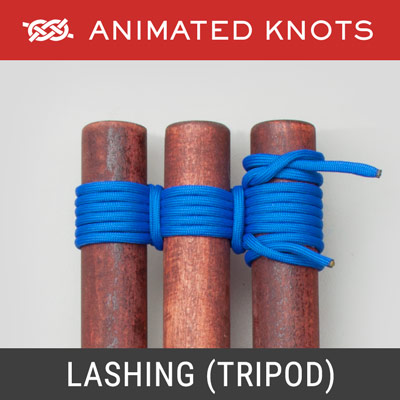
Credit: www.animatedknots.com
Common Mistakes To Avoid
Securing a tripod properly prevents it from tipping over. Ensure knots are tight to avoid instability. Use strong, durable ropes for extra support, keeping equipment safe during usage.
Incorrect Knotting
Many tie knots wrong on tripods. Incorrect knotting can make tripods unstable. It’s essential to learn proper knot techniques. Knots like the clove hitch or bowline are strong. Choose knots that hold tight and don’t slip. Weak knots can cause accidents. Practice tying knots until they are secure. A loose knot is dangerous and unreliable.
Using Weak Materials
Weak materials can ruin tripod support. Materials must be strong and durable. Rope should not break easily. Avoid ropes that fray or stretch too much. Nylon rope is a good choice. It is strong and flexible. Check materials before using them. Strong materials keep tripods stable and safe. Weak materials may lead to falls or damage.
Applications Of A Lashed Tripod
A lashed tripod can hold a cooking pot over a fire. This setup is great for making hot soup or stew. The tripod keeps the pot steady. It also keeps it at a good height above the flames. This helps to cook food evenly and prevents burning. It’s a simple way to cook meals in nature. People use this method when camping or during survival training. Easy to set up and useful in many ways.
Tripods can support a tent or tarp. They form a strong frame for shelter. This keeps you safe from rain and wind. Using a tripod for shelter is common in the wild. It provides a quick and efficient solution. Many hikers and campers trust this method. It’s a helpful skill for any outdoor adventure. You can feel more secure and cozy under a lashed shelter.
Tips For Beginners
Practice is key to learning knots. Start with simple knots first. Try the clove hitch or square knot. Use a piece of rope to practice. Repeat the knots until you are confident. Watch videos for help. Follow step-by-step guides. It’s okay to make mistakes. You will improve with time.
Safety is very important. Always check your knots before use. Make sure the tripod is stable. Avoid loose knots. They can cause accidents. Never rush while tying knots. Take your time. Wear gloves to protect your hands. Be careful with sharp tools. If unsure, ask for help. Safety first, always.
Credit: www.bsatroop1424.com
Frequently Asked Questions
How To Make A Tripod Using Lashings?
Create a tripod by tying three poles with clove hitch knots at the top. Use square lashings to secure the legs together. Ensure the lashings are tight and even. Spread the legs apart for stability. Adjust the lashings if needed.
Test the tripod’s balance before use.
What Are The 5 Types Of Lashing?
The five types of lashing are: chain lashing, web lashing, wire rope lashing, synthetic rope lashing, and steel band lashing. Each type is used to secure cargo during transportation, ensuring safety and stability. Proper lashing prevents movement, minimizing damage and risk during transit.
Which Lashing Is Used To Prepare A Tripod?
The tripod lashing is used to create a stable tripod structure. This lashing effectively binds three poles together at the top, allowing them to spread at the base. It’s commonly used in pioneering projects and camping setups.
How To Do A Tripod Step By Step?
1. Extend the tripod legs to the desired height. 2. Lock the leg locks securely. 3. Adjust the center column for stability. 4. Attach your device to the tripod mount. 5. Ensure everything is tightened and stable.
Conclusion
Lashing a tripod can be simple and effective. Follow the steps closely for stability. Secure each leg firmly to prevent movement. Use quality rope for better grip and durability. This ensures your tripod stays upright in all conditions. Practice makes perfect, so try it a few times.
You’ll gain confidence with each attempt. Remember, a well-lashed tripod supports your gear safely. It also keeps your projects running smoothly. Whether in the field or studio, secure equipment is vital. Keep these tips in mind for your next setup.
Happy shooting!