Fixing a broken tripod leg is easier than you think. You need some basic tools and a bit of patience.
Tripods help capture steady shots. But a broken leg can disrupt your photography plans. This guide will show you how to repair it. Whether it’s a loose joint or a snapped section, the right fix can save you time and money.
Learn to identify the problem and choose the correct solution. You’ll be back to shooting in no time. With clear steps and practical advice, fixing your tripod becomes straightforward. Avoid costly replacements. Restore your tripod’s functionality with confidence. Let’s dive into the repair process to keep your equipment reliable and ready for action.

Credit: www.reddit.com
Table of Contents
Assessing The Damage
Identifying the Broken Part: Look at the tripod carefully. Check each leg. Find the part that seems broken. It might be a crack or missing piece. Use a flashlight if needed. Sometimes, the broken part is small. Inspect joints and connections. Make sure you see everything clearly.
Checking for Additional Issues: After finding the broken part, look for other problems. Maybe a joint is loose or a screw missing. Check for wear and tear. Feel the leg for weak spots. Test the tripod’s stability. Make sure nothing else is damaged. Fixing these issues is important too.
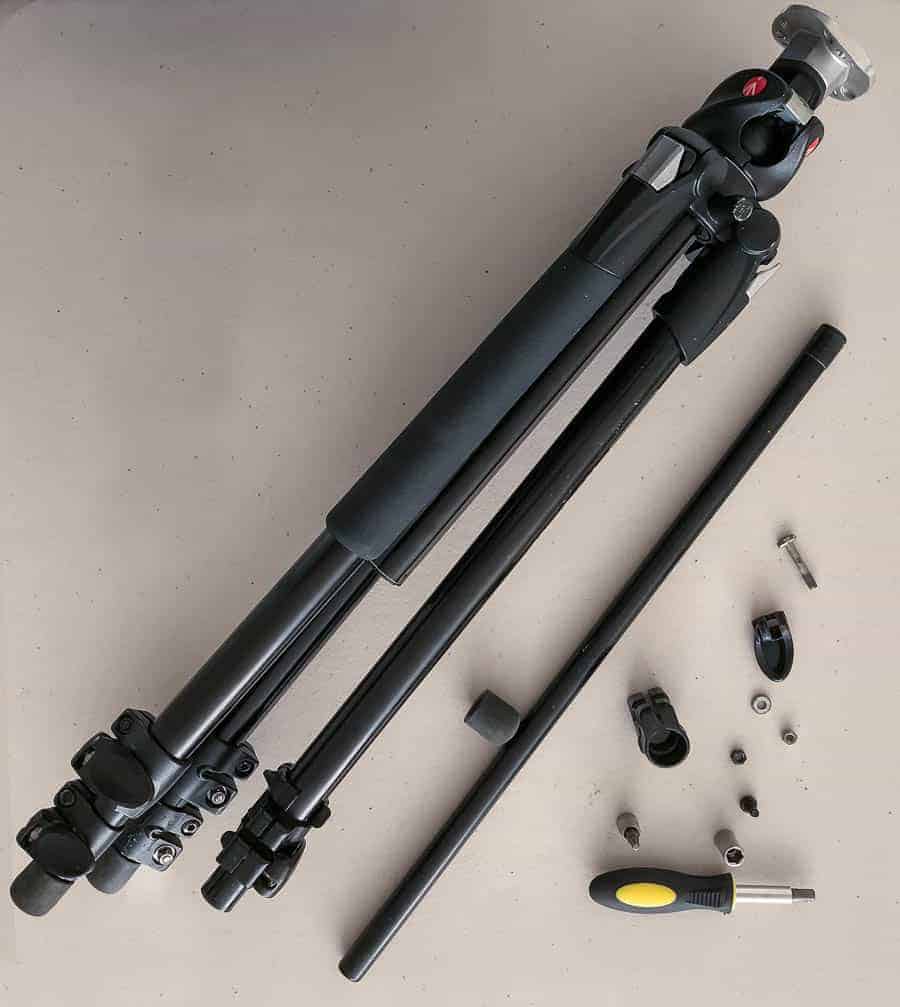
Gathering Necessary Tools
A basic tool kit is very helpful. Keep a screwdriver and pliers ready. A small wrench might be needed. Have glue nearby for quick fixes. Tape can hold things in place. It’s smart to have a cloth for cleaning.
Specialized tools make the job easier. A tripod spanner is handy. It helps tighten loose parts. Replacement parts might be needed. Keep them in a safe place. Lubricant can make parts move smoothly. A magnifying glass helps see small details.
Temporary Fixes
Tape can hold a broken tripod leg. Wrap it tightly around the break. Make sure the tape is strong. Duct tape works best. Zip ties can also help. They are easy to use. Pull them tight around the leg. This gives the leg support. It helps keep the tripod stable. Both tape and zip ties are quick solutions. They are great for a temporary fix. But remember, they might not last long. Check the leg often for safety.
String can tie the leg together. Use thick string if possible. Wrap it many times around the break. Wire is stronger. Twist it tightly around the leg. It holds better than string. Both can keep the tripod steady. These are handy tools. But keep an eye on them. They may loosen over time. Fixes with string or wire are not permanent. Yet, they can save your day. Be careful while using them.
Repairing With Glue
Strong glue is important for fixing a broken tripod leg. Epoxy adhesive works well for metal and plastic. Super glue is good for quick fixes but may not hold heavy weight. Wood glue is best if the tripod is made of wood. Read labels to know what materials the glue works with.
Clean the broken parts before gluing. Make sure there’s no dust or dirt. Apply glue evenly on the surfaces. Press the parts together firmly. Hold them for a few minutes. Let the glue dry completely. Follow drying instructions on the glue bottle. Sometimes, it takes a few hours.
Replacing The Leg Section
Start by checking with the tripod’s manufacturer. They often have spare parts. Visit their website or contact their customer service. Online stores like Amazon or eBay also sell tripod parts. Make sure to know the model of your tripod. This helps in getting the right part. Local camera shops might also have what you need. They can order specific parts for you. Always compare prices before buying.
Once you have the new leg, gather your tools. A screwdriver and a wrench might be needed. Start by removing the broken leg. Be gentle to avoid further damage. Place the new leg in the same spot. Use screws and bolts to secure it. Tighten them well so the leg is stable. Test the tripod after fixing. It should stand firm and strong.

Credit: www.youtube.com
Reinforcing Weak Points
Metal brackets are strong. They help fix broken legs. Use a small bracket. Place it over the weak spot. Screw it tight. This makes the tripod strong. Metal holds well. It is durable. Do not use plastic. It breaks easily. Metal is better. It lasts longer.
Epoxy is sticky. It is like glue. It holds parts together. Mix the epoxy well. Put it on the broken leg. Let it dry. It makes the leg strong. Use epoxy for cracks. It fills them well. Epoxy is waterproof. It keeps the tripod safe. Always wear gloves. Epoxy can be messy.
Testing The Stability
Ensure your tripod can hold the camera weight. Place a small weight on the tripod. Watch if the tripod wobbles or falls. If it does, the leg may need repair. Use a scale to measure the weight. Compare it to the tripod’s weight limit. Never exceed the tripod’s weight capacity. It may break or fall.
Check if the tripod leg moves easily. Slide the leg up and down. Feel for any bumps or stops. If the leg sticks, it might need fixing. Look for any dirt or debris. Clean the leg with a soft cloth. Tighten loose screws to improve smoothness. Test the leg again. Make sure it moves without stopping.
Preventing Future Breakage
Keep your tripod clean and dry. Dust and moisture can harm it. Use a soft cloth to wipe it often. Check for loose screws and nuts. Tighten them if needed. Replace any worn parts immediately. This helps avoid future breaks. Store the tripod in a safe place. A bag or case is best. Avoid places where it might fall. Regular care keeps the tripod strong.
Always hold the tripod by its center column. This gives better balance. Avoid swinging it around. This can damage it. Fold the legs before carrying. This makes it easy to handle. Never force the legs to open or close. Gentle movement is key. Keep away from harsh weather. Rain and wind can be tough. Handle with care, and the tripod will last longer.
Credit: improvephotography.com
Frequently Asked Questions
How To Fix The Leg Of A Tripod?
Tighten the screws on the leg joint using a screwdriver. Replace broken parts with new ones. Check for loose or missing bolts and adjust them. Ensure the leg locks are secure. Test the stability by extending and retracting the leg.
Can A Tripod Be Repaired?
Yes, a tripod can be repaired. Common issues include broken legs, loose screws, or damaged mounts. Repair services are often available through manufacturers or local camera shops. DIY repairs are possible with replacement parts and tools. Regular maintenance can prevent major damage and extend the tripod’s life.
How To Fix A Broken Chair Leg?
First, clean the broken area. Apply wood glue to the broken leg and clamp it tightly. Let it dry. Reinforce with screws if necessary. Sand any rough edges and repaint or varnish for a finished look. Always ensure the repair is stable before use.
How Do You Stabilize Tripod Legs?
Extend the tripod legs fully for stability. Use a weight or sandbag to secure the center column. Adjust leg angles to suit uneven surfaces. Ensure all locks are tightly fastened. Place the tripod on solid ground, avoiding slippery or unstable surfaces.
Conclusion
Fixing a broken tripod leg is easy with the right steps. These tips help you repair it quickly at home. Save money and avoid buying a new tripod. Follow the guide for a sturdy setup. Now your tripod can hold the camera safely.
Repairs make your photography sessions smoother. No need for expert help. Just a few tools and you’re ready. Enjoy stable shots without worrying about the tripod. Capture beautiful moments confidently. Keep your tripod in top shape with simple maintenance. Happy shooting!