Choosing the right tripod height is crucial for photography success. It affects composition and stability.
The right height ensures sharp images and ease of use. Photographers often overlook tripod height. Yet, it plays a vital role in capturing the perfect shot. A tripod too high or too low can lead to poor angles and shaky shots.
The ideal height depends on your shooting needs and style. Whether you’re capturing landscapes or portraits, the tripod height can make or break your image quality. In this guide, learn how to select the perfect tripod height for your photography needs. Discover tips and tricks to optimize your setup. Ensure your tripod supports your creativity without any compromise. Dive in to elevate your photography game with the right tripod height.
Credit: www.better-digital-photo-tips.com
Table of Contents
Tripod Height Basics
Tripods come in different sizes. Most tripods have standard heights. These heights are usually between 50 to 65 inches. This height is good for most people. The average height is easy to use. It lets you see clearly through your camera. Tall people might need a taller tripod. Short people might like a shorter one. Always check the tripod size before buying. This helps you find the right fit.
Many tripods have adjustable legs. You can change their height easily. Adjusting helps you use it on uneven ground. Some tripods have flip locks. Others have twist locks. These locks keep your tripod steady. Adjustable tripods are great for travel. They fit in bags when folded. Always test the locks before buying. Make sure they work well.
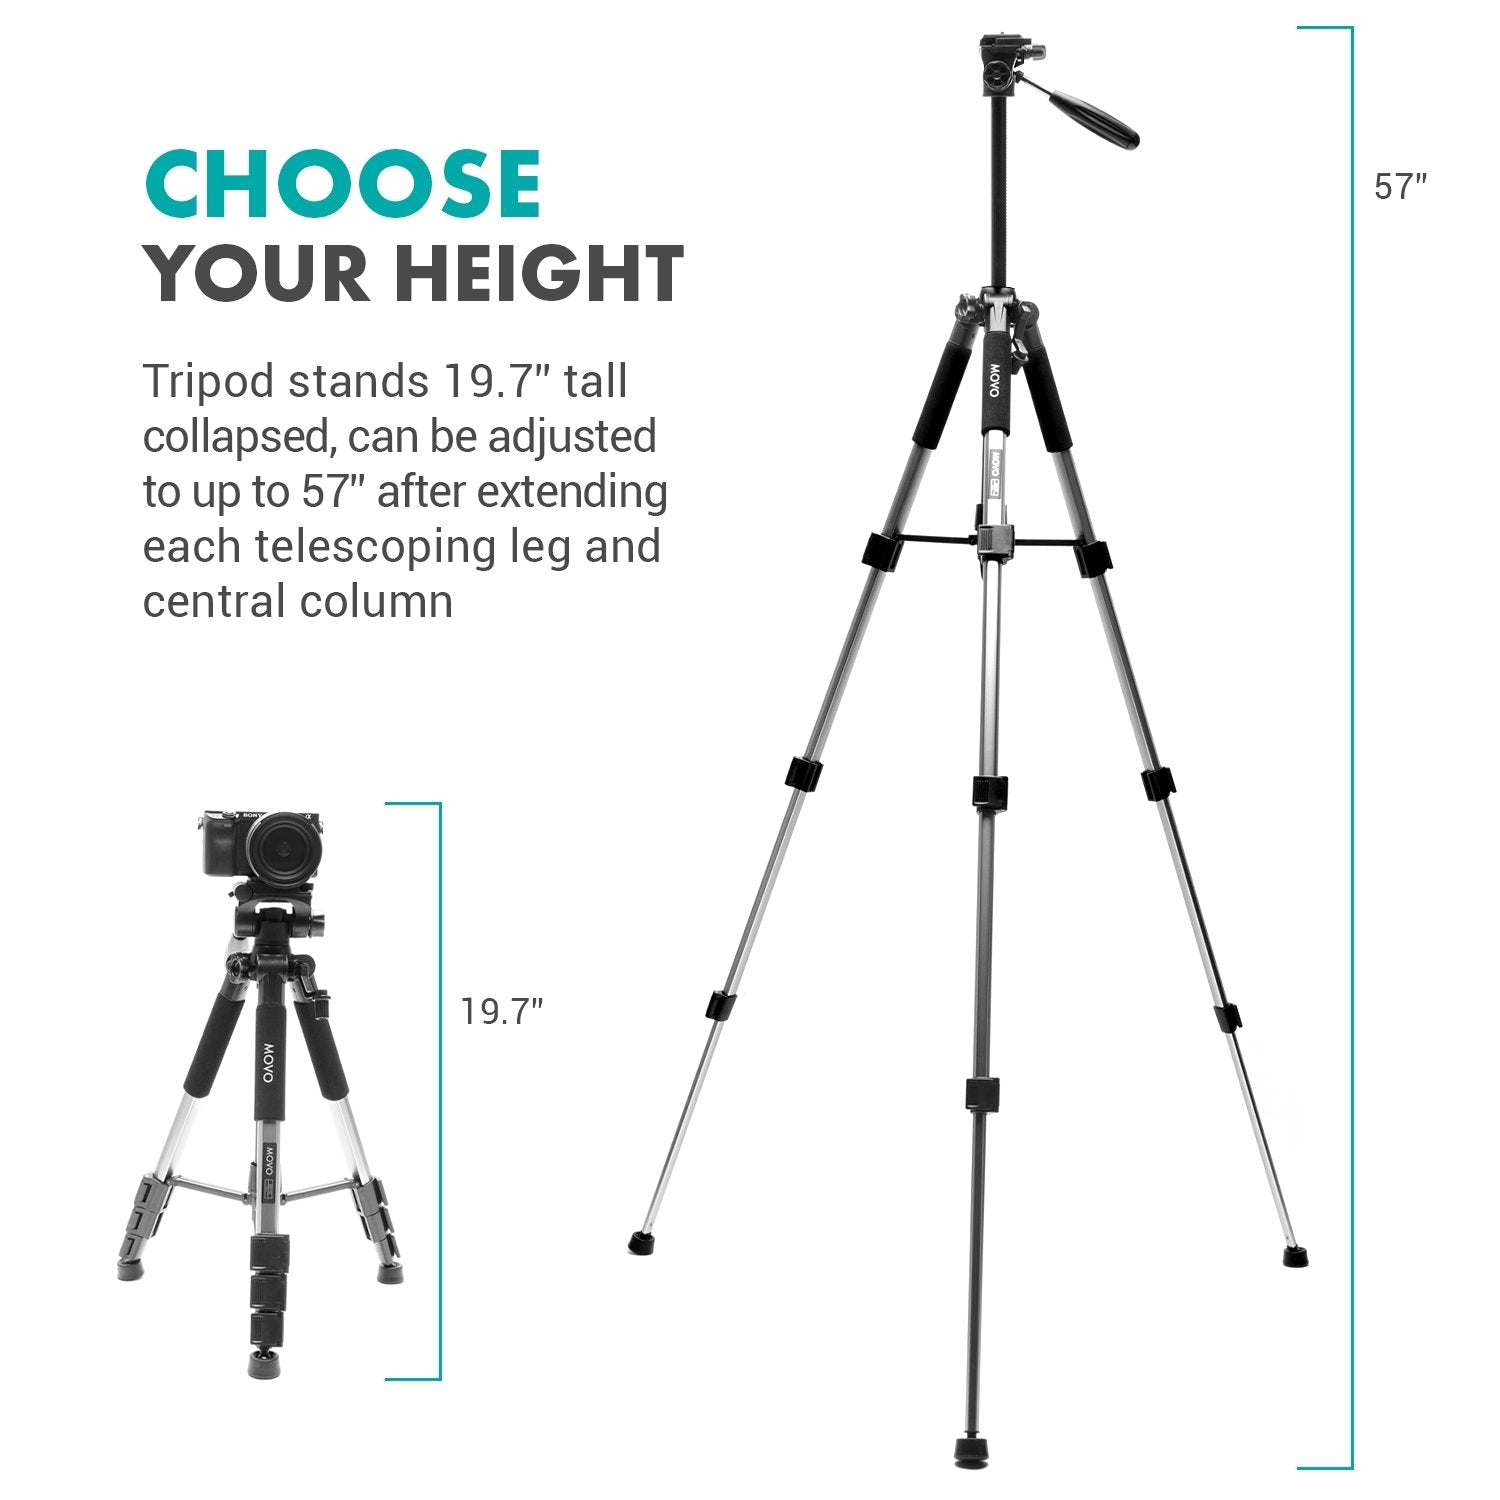
Credit: www.movophoto.com
Importance Of Tripod Height
Tripod height affects stability. Shorter tripods are more stable. They resist wind better. Taller tripods can be less steady. They might wobble. Stability is crucial for clear photos. A stable tripod helps the camera stay still. This avoids blurry images. Consider the tripod legs. Wider leg spread increases stability. Heavy tripods are also steadier. Choose wisely for stable shots.
Tripod height impacts composition. It changes the view. Low height captures ground details. High height shows wide scenes. Adjust height for different angles. Different heights offer creative options. They help show unique perspectives. Composition can tell a story. Tripod height plays a big role in this. Choose the right height for your vision.
Assessing Shooting Needs
Choosing the right tripod height is important for your photography. Indoor and outdoor settings need different heights. Indoors often need shorter tripods. They help capture family photos or pets. Outdoors might need taller tripods. They help shoot landscapes and tall buildings.
Landscape vs Portrait mode affects tripod height too. Landscape shots might need a taller tripod. It helps capture wide views. Portrait shots need different heights. It helps focus on people or objects. Adjust the tripod height for each mode. It will make your photos better.
User Comfort Considerations
Comfort matters a lot. Tripod height affects your posture. A tall tripod can cause neck strain. Short tripods might hurt your back. Adjust the height for comfort. Your eyes should meet the camera lens. This keeps your posture healthy.
Long shoots need good comfort. Proper height reduces body pain. Choose a height that feels natural. You can stand or sit with ease. This helps during long hours. Good posture avoids tiredness. Enjoy shooting without discomfort.
Choosing Based On Equipment
Camera Type affects the tripod height you need. Smaller cameras might need shorter tripods. Bigger cameras often require taller tripods. Check your camera’s size and weight. This helps in picking the right tripod.
Lens Compatibility matters too. Longer lenses can make the camera heavy. A stable tripod is important here. Ensure the tripod can hold the lens safely. Match the tripod height with the lens length. This keeps your camera steady.
Adjustability Features
Tripods come with different height mechanisms. Some have a simple lever to adjust height. Others use a gear system. This can be more precise. Choose a tripod with a mechanism you find easy. It should not be hard to adjust. Quick adjustments can save time. You will find some tripods that have extension columns. These help increase the height. But be careful. They may shake in windy conditions. A stable tripod is best for clear photos.
Locking systems keep your tripod steady. They are important for stability. Look for tripods with good locks. Twist locks are common. They are easy to use. Some tripods have clip locks. These are quick to adjust. Both locks have their pros and cons. Make sure the locks are secure. Loose locks can cause problems. Your camera might fall. Always check the locks before using. Safe locks mean safe equipment.
Expert Tips For Precision
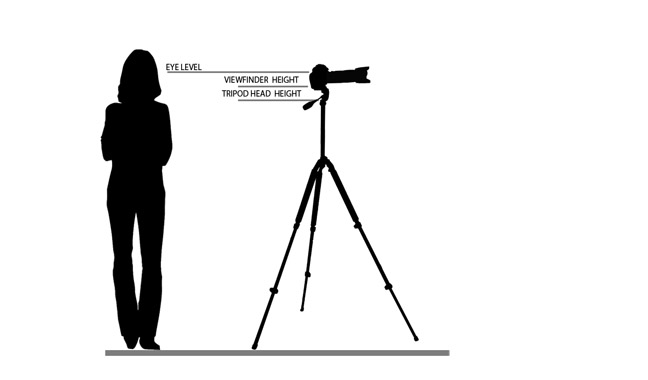
Choosing the right tripod height is important. A tripod that’s too tall or too short can cause problems. Camera stability depends on this choice. Measure from your eye level to the ground. This helps find the best height. Adjustable tripods are handy for different situations. They offer more flexibility. A tripod should match your needs. Think about your usual shooting style. For landscape photos, a tall tripod might be better. For macro photography, a shorter one might be best.
Fine-tuning is key for precision. Always adjust the tripod legs equally. This keeps the camera stable. Use the bubble level on your tripod. It helps keep things straight. Check the tripod’s weight capacity. It should support your camera and lens. A stable tripod makes photography easier. Happy clicking!

Credit: outdoorsmans.com
Practical Testing Methods
Testing a tripod in the field helps find the best height. Use your camera and tripod outside. Adjust the tripod to different heights. See what feels comfortable. Check if the camera view is clear. Make sure it is stable. A stable tripod keeps your camera safe. Try different angles and positions too. You will see how it affects the view. Testing in real settings gives the best results. This helps you choose the right tripod height.
Comparing different tripods helps you find the right one. Look at the features of each tripod. Some are tall, others are short. Check the weight each tripod can hold. This is important for heavy cameras. Think about how high each tripod goes. A taller tripod can give you better views. Write down what you like about each. This helps you decide which tripod fits your needs best.
Frequently Asked Questions
What Height Should My Tripod Be?
Choose a tripod height matching your eye level or the subject’s height for optimal photography. Consider adjustable tripods for flexibility. Ensure stability and convenience for your shooting needs. Always prioritize comfort while maintaining proper posture during use.
What Is The Formula For Tripod Height?
The tripod height formula is: Height = Leg Length * √(1 – (Base Width/Leg Length)²). Adjust for stability.
How To Measure Tripod Height?
Measure tripod height by extending all legs fully. Measure from the ground to the mounting plate. Ensure legs are locked for accuracy. Use a tape measure for precision. Consider measuring with and without the center column extended for different heights.
Adjust for uneven terrain if necessary.
What Is The Correct Way To Set Up A Tripod?
Extend tripod legs and lock them securely. Adjust the height using center column. Ensure the tripod is stable on the ground. Attach camera to the mounting plate and tighten screws. Check balance and make final adjustments for optimal positioning.
Conclusion
Choosing the right tripod height is crucial for great photos. Consider your shooting style. Think about comfort and stability. Measure your eye level for better shots. Taller tripods suit outdoor photography well. Smaller tripods are ideal for travel. Adjustable tripods offer flexibility in various conditions.
Test different heights before purchasing. Find the perfect balance between portability and support. Your photography deserves the right equipment. The correct tripod height enhances your experience. Make an informed decision for stunning images. Enjoy capturing moments with ease and precision.