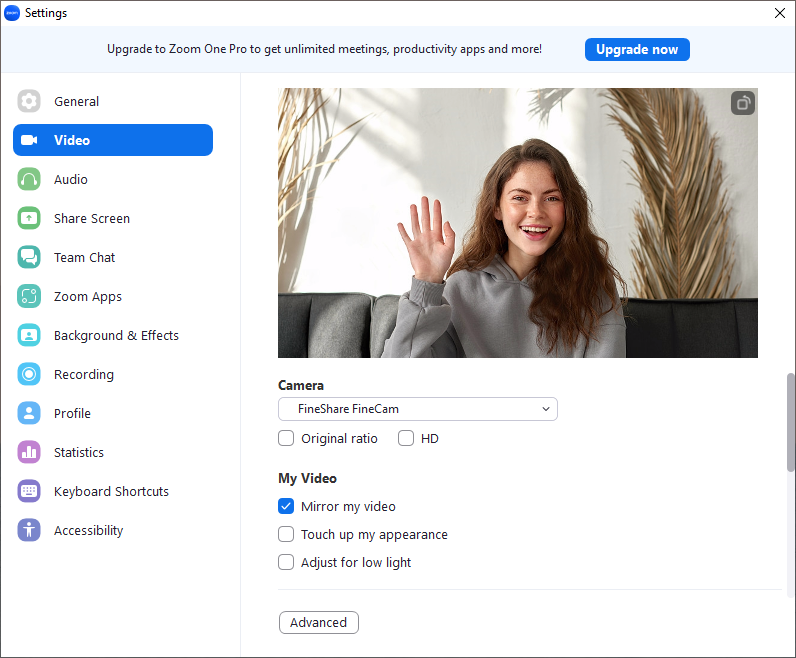
Testing your camera on Zoom is simple. Open Zoom, go to settings, and select the video tab.
You will see your camera feed. Testing ensures your camera works well during meetings. It helps you fix issues before important calls. With the rise of remote work and virtual meetings, using Zoom has become a daily routine for many.
A clear video feed is crucial for making a good impression. Whether for a job interview or a family call, you want to look your best. Testing your camera before a Zoom meeting can prevent unexpected problems. It’s a quick step, but it can save you from awkward moments. This guide will walk you through testing your camera on Zoom. You’ll gain confidence for your next meeting.

Credit: tactiq.io
Table of Contents
Setting Up Your Camera
Good hardware makes a big difference in video quality. Webcams are easy to use. Built-in cameras work fine for basic needs. External webcams offer better clarity and control. They connect through USB ports. Check compatibility with your computer before buying.
Camera placement affects how you look. Eye-level positioning is ideal. Avoid looking up or down at the camera. Front lighting helps your face appear clear. Natural light is best. Avoid bright lights behind you. Test different angles to find the best view.
Credit: www.fineshare.com
Pre-meeting Checks
Ensure your camera works properly. Open the Zoom app. Find the settings icon. Click on it. Look for the video tab. Click on the video tab. Your camera should turn on. Check if you see yourself. Adjust the camera angle if needed. Make sure your face is clear.
Check the lighting in your room. Make sure it is bright enough. Avoid sitting in front of a window. The light should be in front of you. Avoid sitting in a dark room. Use a lamp if needed. Ensure your face is well-lit. This helps others see you clearly.
Zoom Video Settings
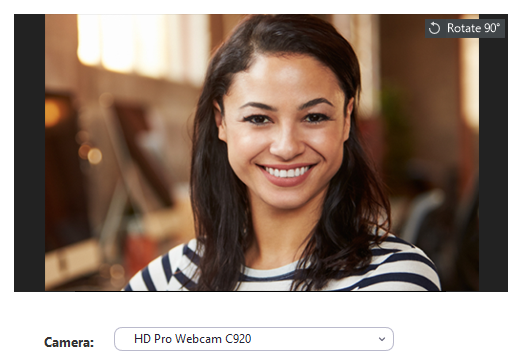
Zoom has many video options to explore. Find them in settings. Look for the video tab. Click on it. Adjust your camera view. Select your camera from the list. Choose the best angle. Try different settings. See what works best. You can test the camera here. Ensure good lighting. Make sure you are centered. Avoid clutter in the background. Keep it simple. Bright and clear is best.
Quality settings are important. They help improve video clarity. Find them under the video tab. Adjust the resolution. Higher means clearer video. Lower saves bandwidth. Choose the right balance. You can also use HD if available. Test each setting. See the difference it makes. Check the internet speed. Faster connection means better video. Slow connection can cause lag. Make sure everything is smooth. This enhances the Zoom experience.
Ensuring Privacy
Managing backgrounds is important for privacy. Choose a clean and simple space. Avoid showing personal items. Keep sensitive information hidden from view. Use a plain wall if possible. This helps others focus on you. Virtual backgrounds can also be used to cover your real space.
Utilizing virtual filters adds another layer of privacy. Filters can blur your background. This prevents others from seeing details. Some filters add fun effects. Choose ones that suit your needs. It’s important to test filters before a meeting. Make sure they work properly. Adjust settings for the best look. Protect your privacy with these simple tools.
Troubleshooting Common Issues
Testing your camera on Zoom involves accessing settings and selecting video options. Ensure your camera is connected properly. Preview the video to confirm it’s working. Adjust lighting for clearer visibility.
Addressing Connectivity Problems
Camera issues on Zoom can be frustrating. Check your internet connection first. A weak connection causes problems. Ensure Wi-Fi is strong. Use a wired connection for better results. Restart your router if needed. Also, update your Zoom app regularly. Outdated versions might cause trouble. Make sure your camera is connected properly. Check cables and ports. Test your camera with another app. Verify permissions for Zoom to access your camera. Sometimes, other apps use the camera. Close unnecessary apps to free the camera.
Resolving Video Lag
Video lag can disrupt meetings. Check your computer’s performance. Close unused programs to free up resources. Ensure your device meets Zoom’s requirements. Adjust video settings for better performance. Lower resolution might help reduce lag. Keep your system updated for best results. Enable hardware acceleration in Zoom settings. It boosts video quality. Make sure your camera drivers are up to date. Outdated drivers can cause lag. If lag persists, consider contacting Zoom support.
Advanced Camera Techniques
Testing your camera on Zoom involves checking video quality and adjusting settings for clarity. Open Zoom and navigate to settings, then click on “Video” to preview your camera feed. Ensure proper lighting and angle, and make necessary adjustments to optimize the visual experience for virtual meetings.
Using Multiple Cameras
Zoom allows the use of more than one camera. Connect extra cameras to your computer. Open Zoom and go to settings. Find the video section. Choose the camera you want to use. Switch between cameras during a call. Each camera offers different angles. This can make your call interesting. Make sure each camera works well. Test them before your meeting. This helps avoid problems later.
Incorporating External Software
External software can enhance your camera. Use programs like OBS or ManyCam. They add features to your Zoom call. You can add effects or change backgrounds. Install the software on your computer first. Open Zoom and go to settings. Choose the external software as your video source. This can make your call fun and creative. Ensure the software is compatible with Zoom. Test it before joining a call. This ensures everything runs smoothly.
Testing Audio With Video
Start by checking if the audio and video are in sync. Use a simple clap test. Clap your hands while recording. Watch the playback. Do your hands and the sound match? If yes, the sync is good. If not, adjustments are needed. Zoom settings can help fix this. Make sure to update your app. Updates often fix sync issues.
Headphones are important. They help you hear better. Use them during calls. Microphones capture your voice clearly. Built-in mics are okay. External mics are better. Test your mic before the meeting. Speak into it. Make sure your voice is clear. Adjust the mic if needed. A good setup makes a big difference.
Credit: support.zoom.com
Final Preparations
Testing your camera on Zoom is important. Practice in a quiet room. Open Zoom and start a new meeting. Check your camera settings. Ensure the video is clear and bright. Make sure your face is in the center. Adjust your lighting if needed. Try speaking to test the audio. Check for any background noise. Make sure your internet connection is strong. End the meeting and review your video. Fix any issues you find.
Ask a friend to join your Zoom call. Tell them to watch and listen. Request feedback on video and sound. Note any suggestions they give. Make changes based on their advice. Check if your face is clear. Ensure your voice is loud enough. Practice again if needed. Feedback helps you improve. It makes your Zoom calls better.
Frequently Asked Questions
How Do I Test My Zoom By Myself?
Open Zoom and click “Settings. ” Select “Video” or “Audio” to test your camera and microphone. You can also use the “Test Speaker and Microphone” option in the meeting preview screen for real-time testing. Ensure your devices are connected properly for optimal results.
How Do I Test My Webcam Before A Meeting?
Test your webcam by opening the camera app on your device. Ensure it’s functioning correctly. For online platforms, use their built-in test feature. Adjust lighting and angle for clarity. Check microphone settings too. Visit a webcam test website for a comprehensive check before your meeting.
How Can I Get My Camera To Work On Zoom?
Ensure your camera is connected and enabled. Open Zoom, go to Settings, select Video, and choose your camera. Restart Zoom if necessary.
How Do I See Myself On A Zoom Camera?
Open Zoom and join or start a meeting. Click “Start Video” to activate your camera. You’ll see yourself at the bottom right or top right corner of the screen. Adjust your video settings in the Zoom toolbar if needed.
Conclusion
Testing your camera on Zoom is simple and essential. It ensures smooth video calls. Start by accessing Zoom’s settings. Select “Video” and check your camera feed. Adjust lighting and angle. Make sure your device drivers are updated. Practicing these steps boosts confidence and improves communication.
You’ll avoid technical hiccups during important meetings. A quick test can make a big difference. Stay prepared and maintain a professional image. Keep these tips in mind for your next Zoom call. Happy video chatting!